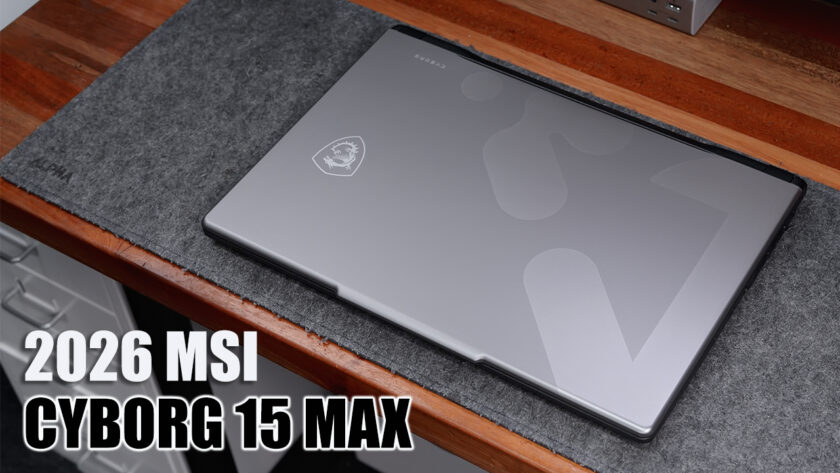
Today, after weeks of testing and figuring out what’s the best configuration for my workflow, I’m finally giving you guys my full review of the Ultimate Hacking Keyboard, and let’s just say that it is good enough to stay on my desk until something more interesting comes in. Wanna know why? Let’s get into it.

MY EARLY BREAKDOWN
Pros: Great build quality, Flexible ergonomic options, Tons of unique features, Highly customizable software
Cons: Old miniUSB interface, ABS keycaps, Expensive
WHAT’S IN THE PACKAGE
FULL REVIEW
External Modules
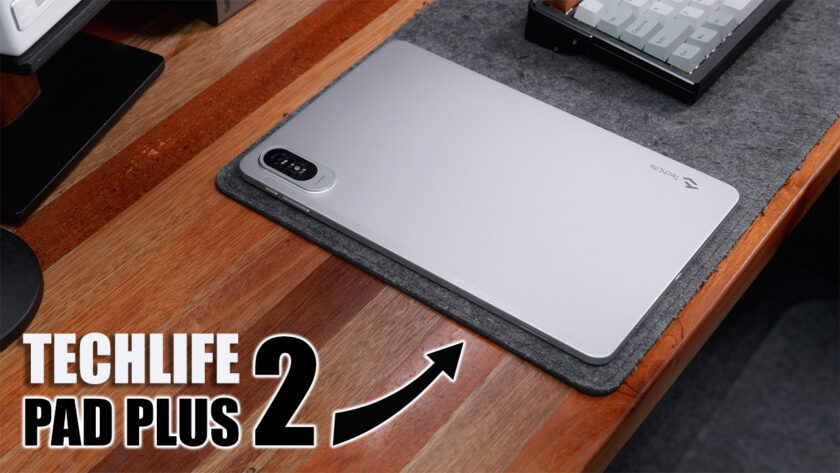
Before we take a deep dive at the Ultimate Hacking Keyboard itself, let’s discuss first the external modules that will be available for this keyboard as well.
These are currently under development and I’m actually pretty excited to get a hold of one. So we have the key cluster module, the trackball module, a trackpoint module which reminds me of those old school ThinkPad laptops, and lastly we have the touchpad module which I am personally looking forward to. These modules, in theory, should help make productivity much easier without having to remove both of your hands from the keyboard itself.
Design, Construction and Parts Overview
Now, let’s discuss about everything you need to know about the ultimate hacking keyboard.
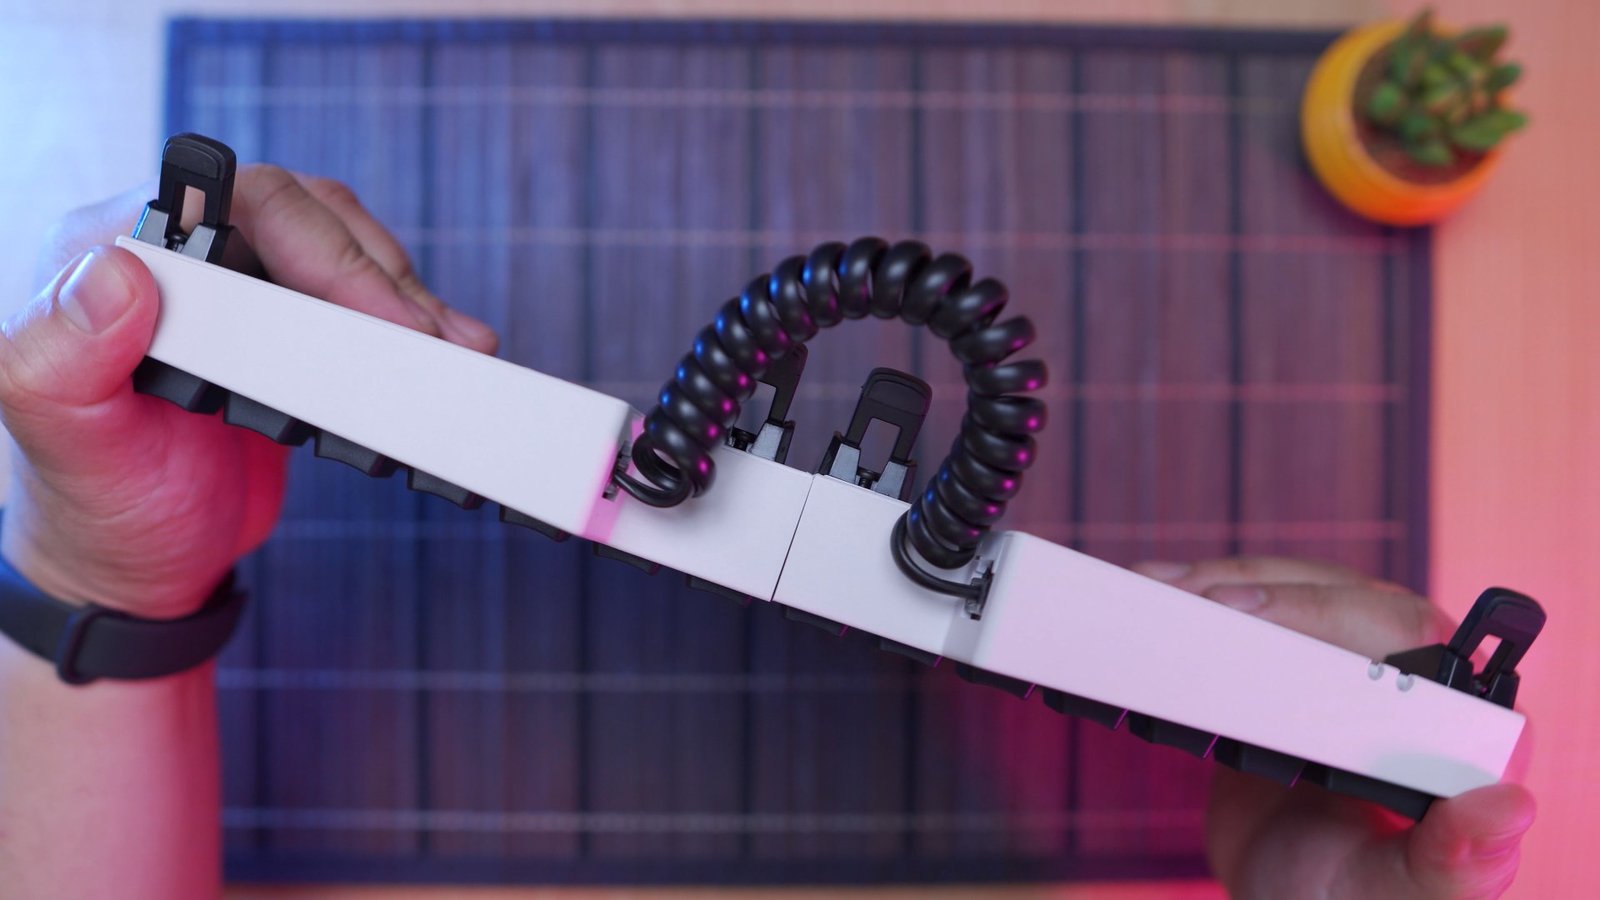
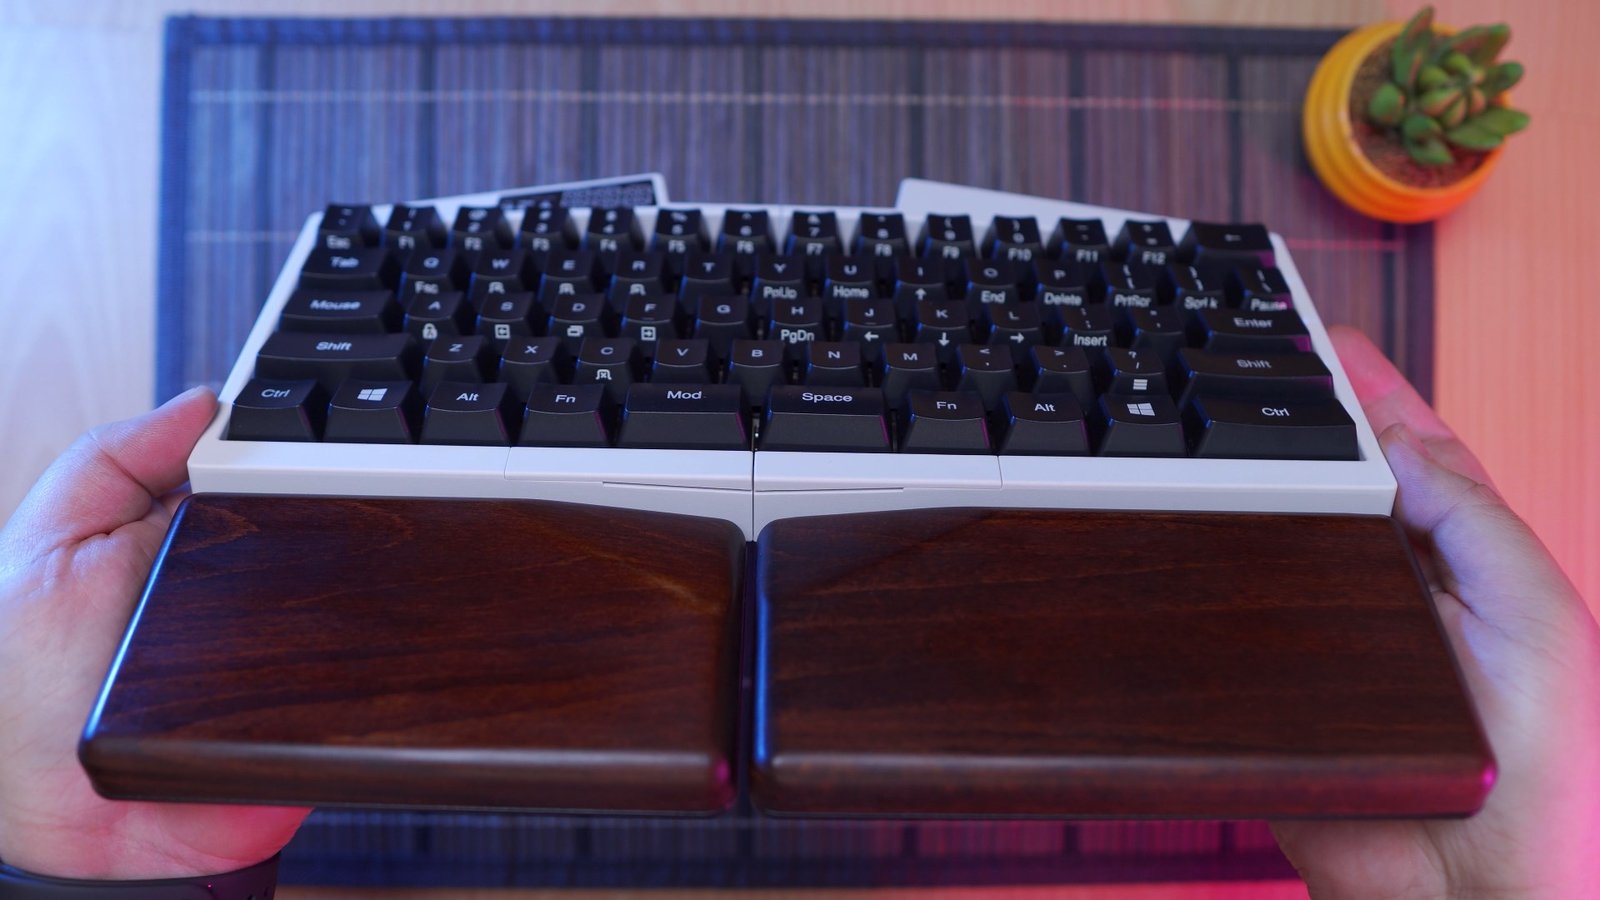
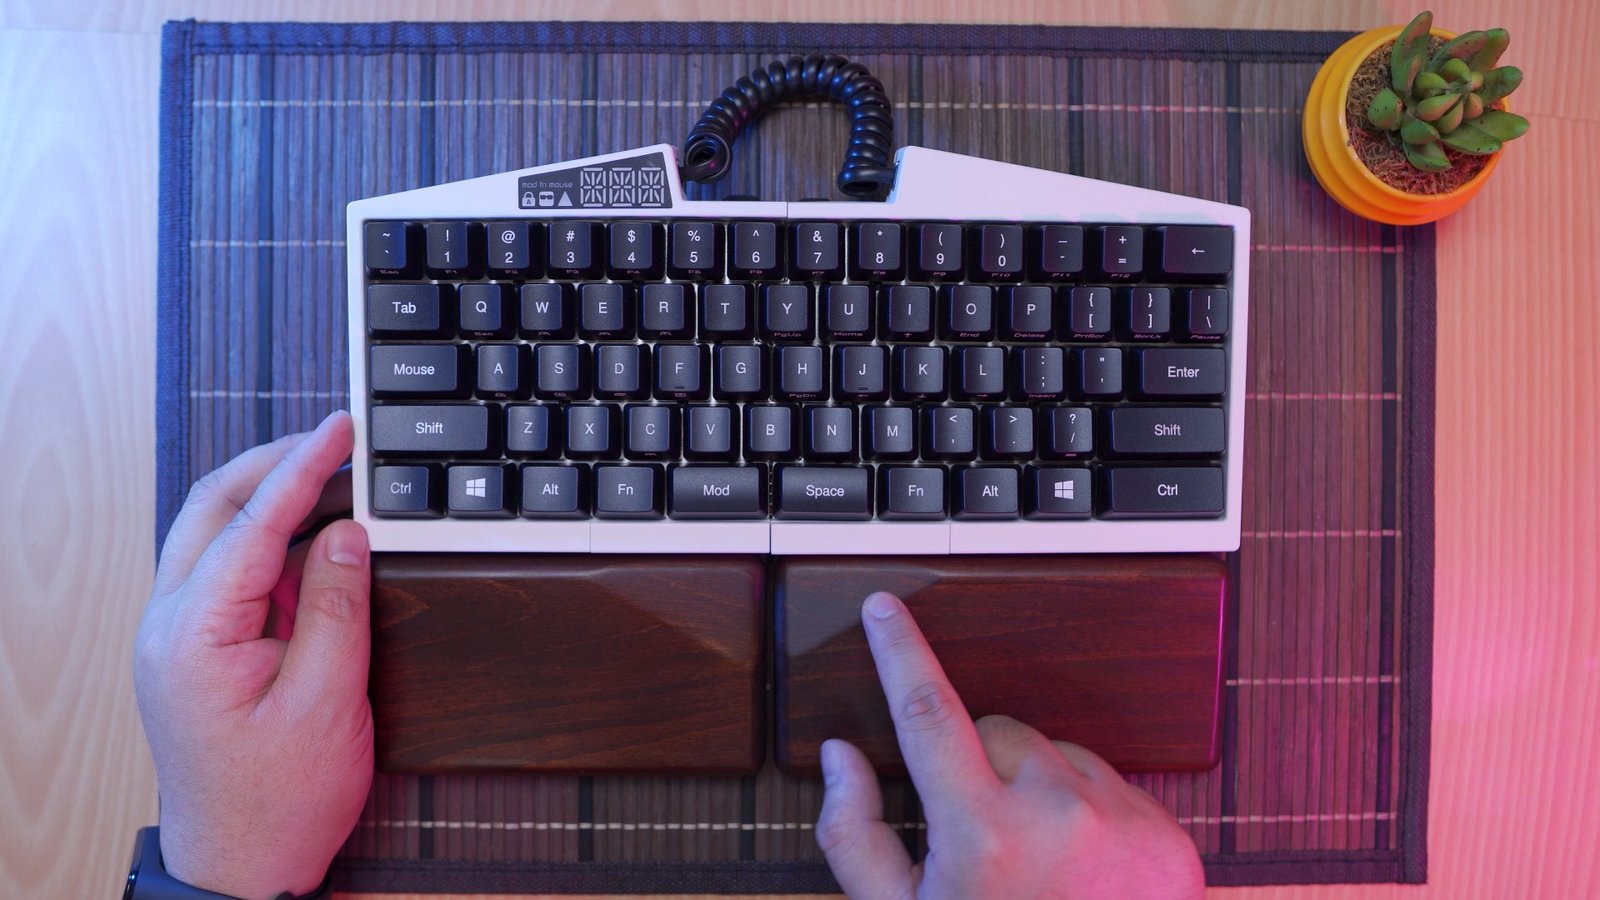
Right here we have the ultimate hacking keyboard already built as you can see here, we have the two palm rests on both sides and the coiled cable connecting both parts.

In terms of the build quality, it is super solid and it doesn’t flex at all even if this keyboard can split into two. It has a weight of around 1163g with the palm rests attached to it.
Tilting it a bit in front we can see the sub legends on some keys for their secondary functions,
And flipping it on its side, we can see that the housing has this high profile design hiding the switches and that it is flat in shape compared to other keyboards that are slanted. The keycaps profile is standard OEM.
We can also see here the flip-out stand which you can always change the location depending on your preferred tilting angle.

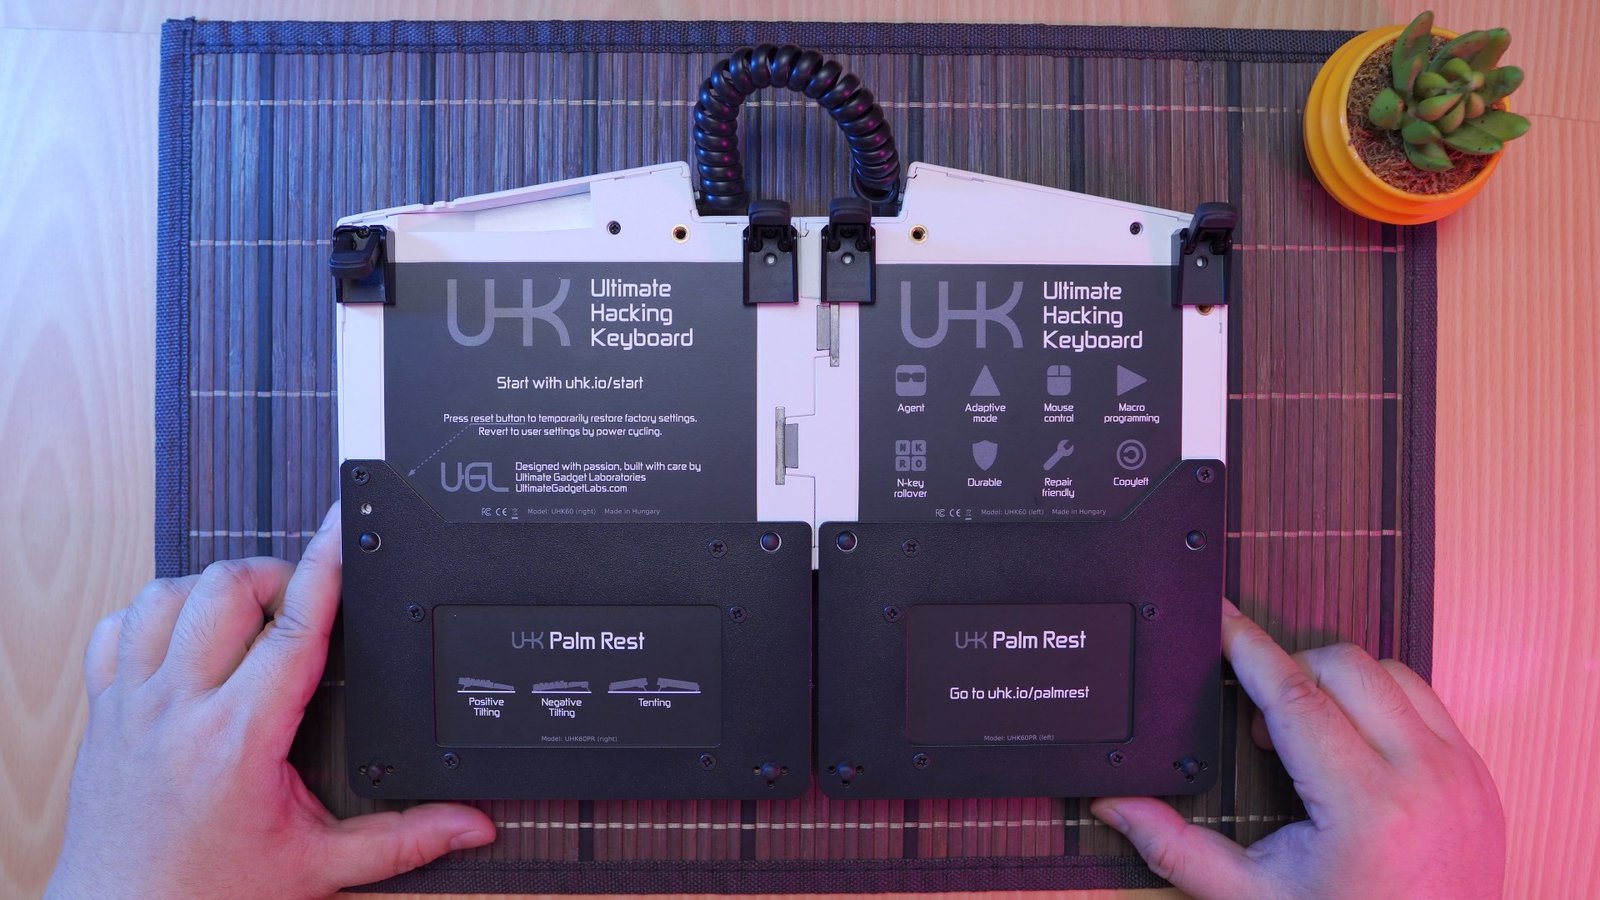
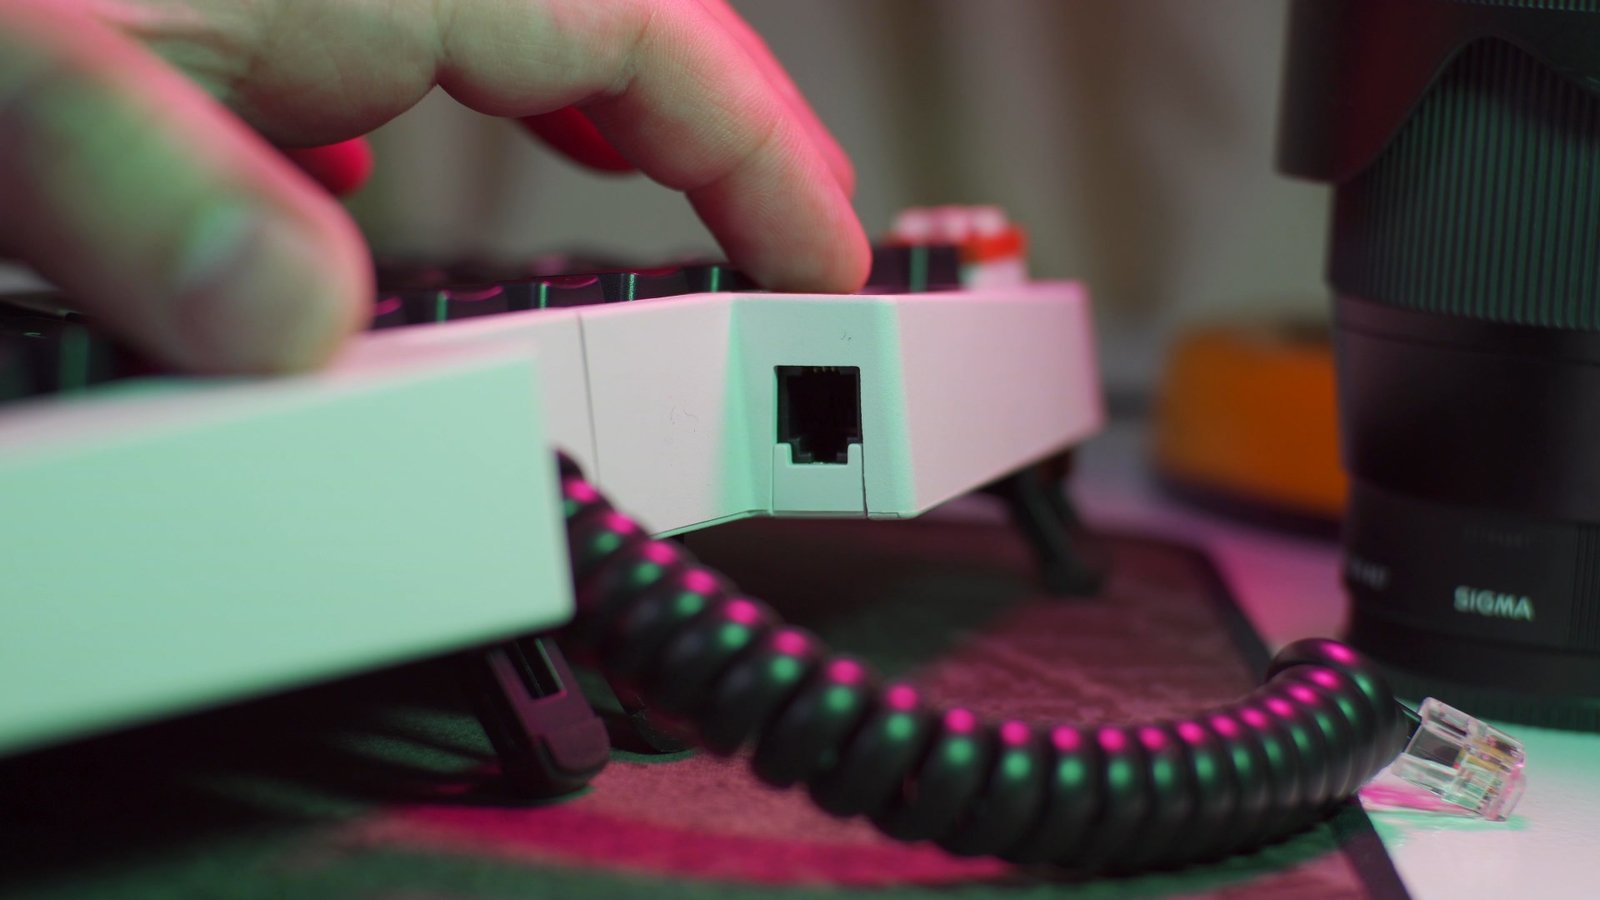
Now, looking at the backside, we can clearly see here how the coiled cable is attached to the keyboard, as well as 2 cable routing channels for the power and data cable. This is a wired-only keyboard by the way, at least for this first version that we have right here.

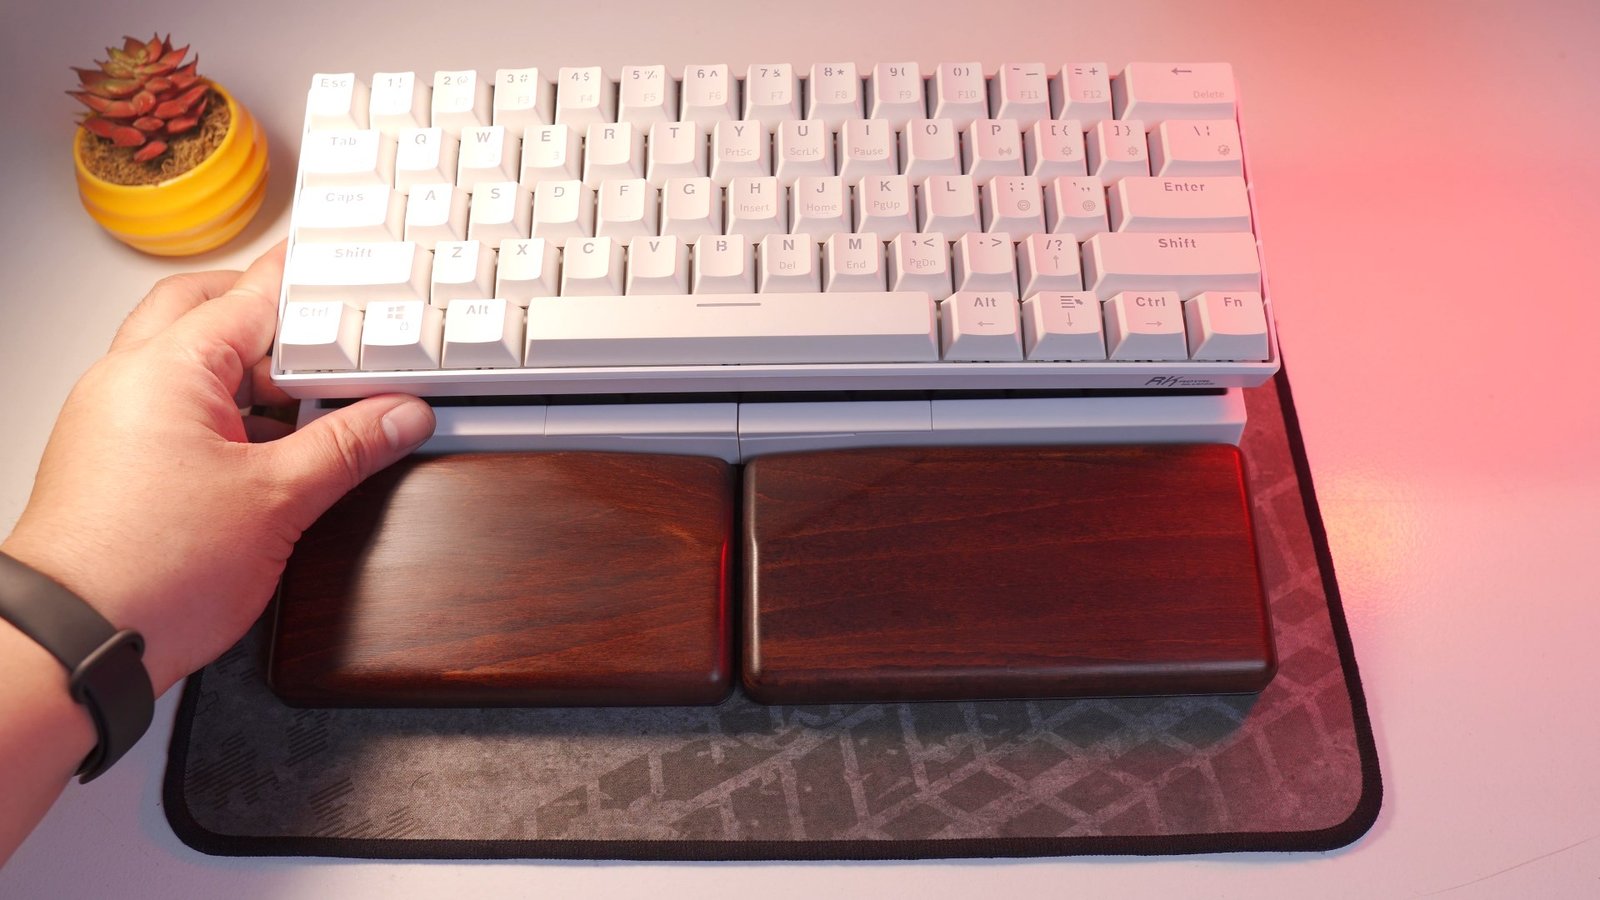
Flipping it all over at the front side, we can see the profile and thickness of the palm rests.

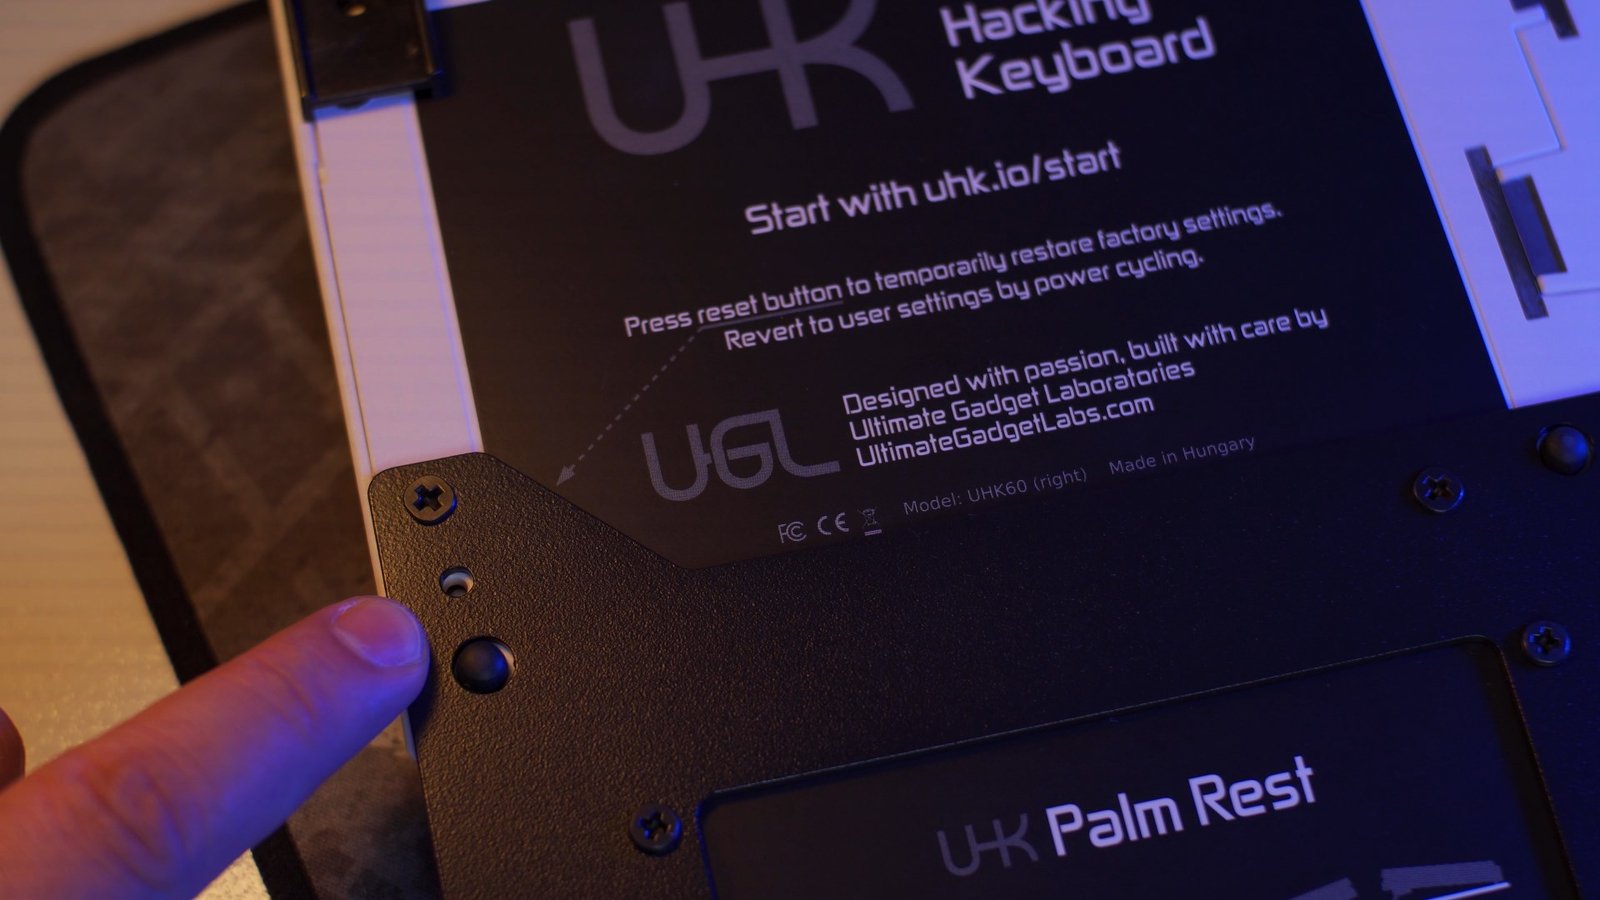
Turning it at the back, we have a lot more details here, so depending on your preferred configuration, you can set up the flip-out stand on the other mounting points of the keyboard, you can set it up for positive tilting like what I did here, negative tilting and tenting if you’re up for that.
As you can see, the amount of customization for this keyboard just for the ergonomics alone is very extensive.

We also have here some of the key features of this keyboard.

And we also have here a small pin-hole reset button to reset the keyboard to factory settings if necessary.
Layout
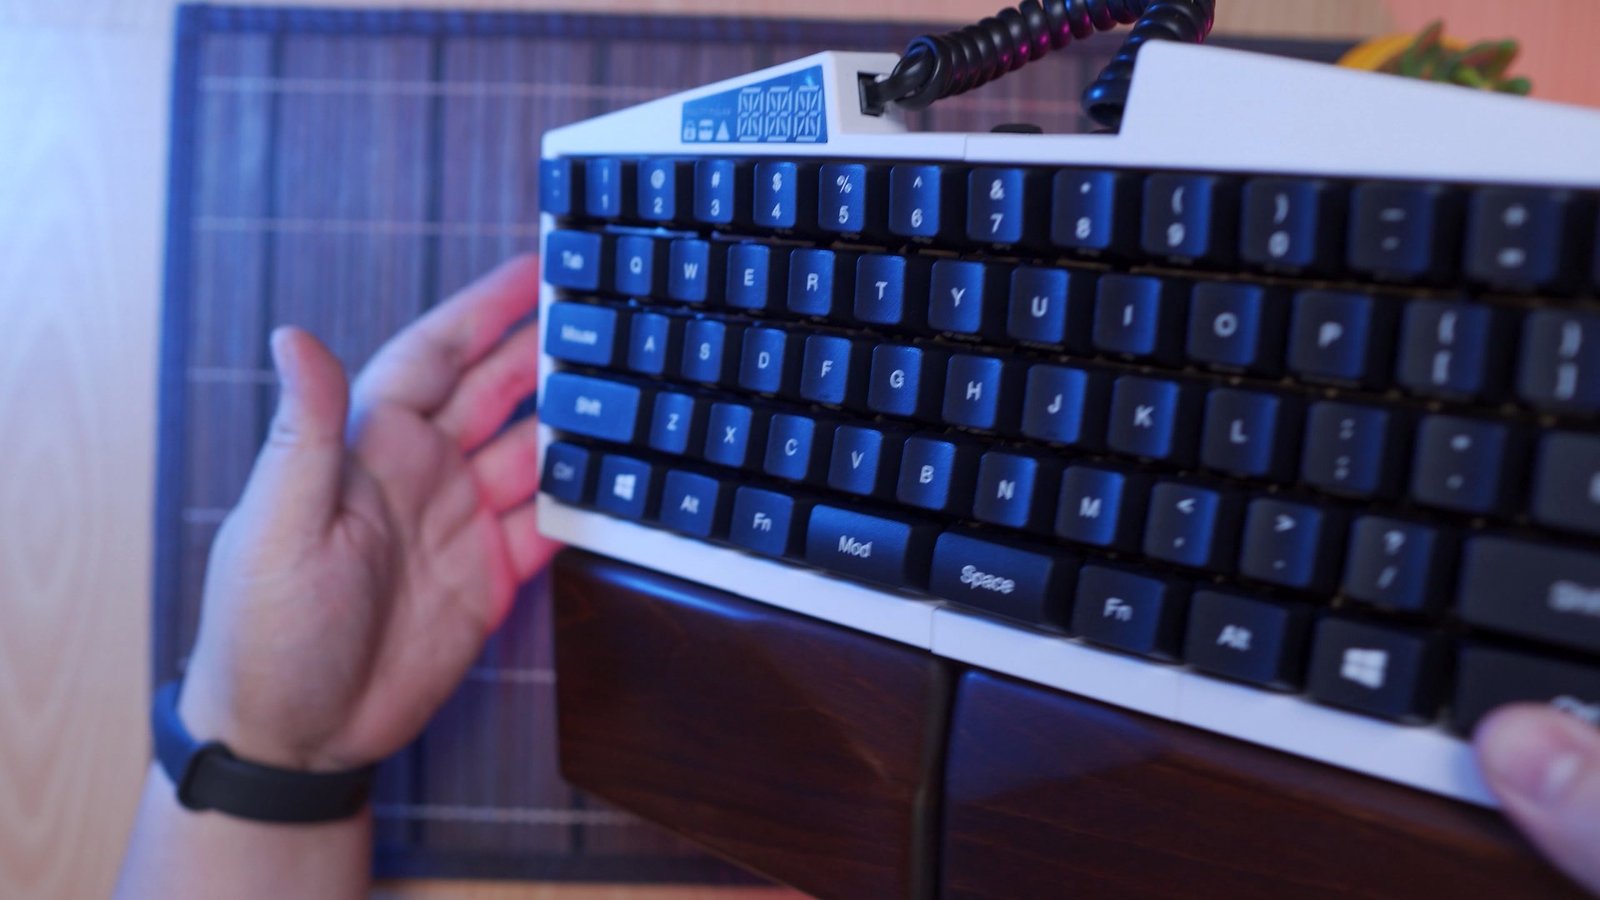
Now, going back in front, The form factor is 60% as you can see here with a total of 63 keys. However, the layout is non-standard with shortened keys on the rightmost keys to make it as compact as possible and also to maintain symmetry for the keyboard halves.

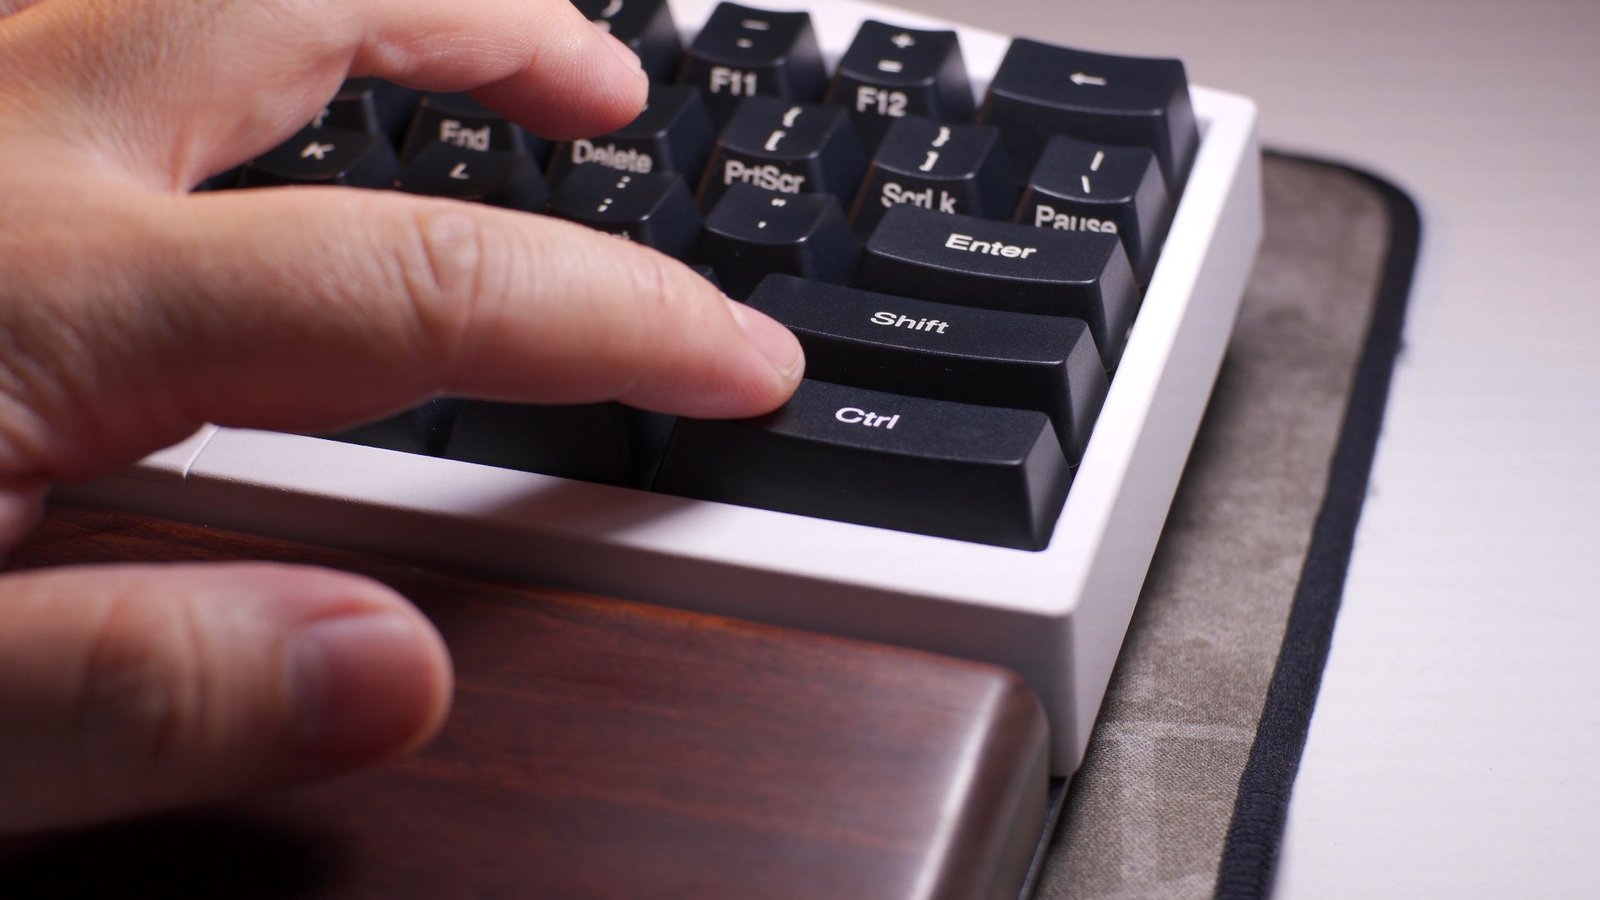
Except for the right control key which became longer, the right shift, enter and the backspace key was shortened to accommodate this compact form factor.
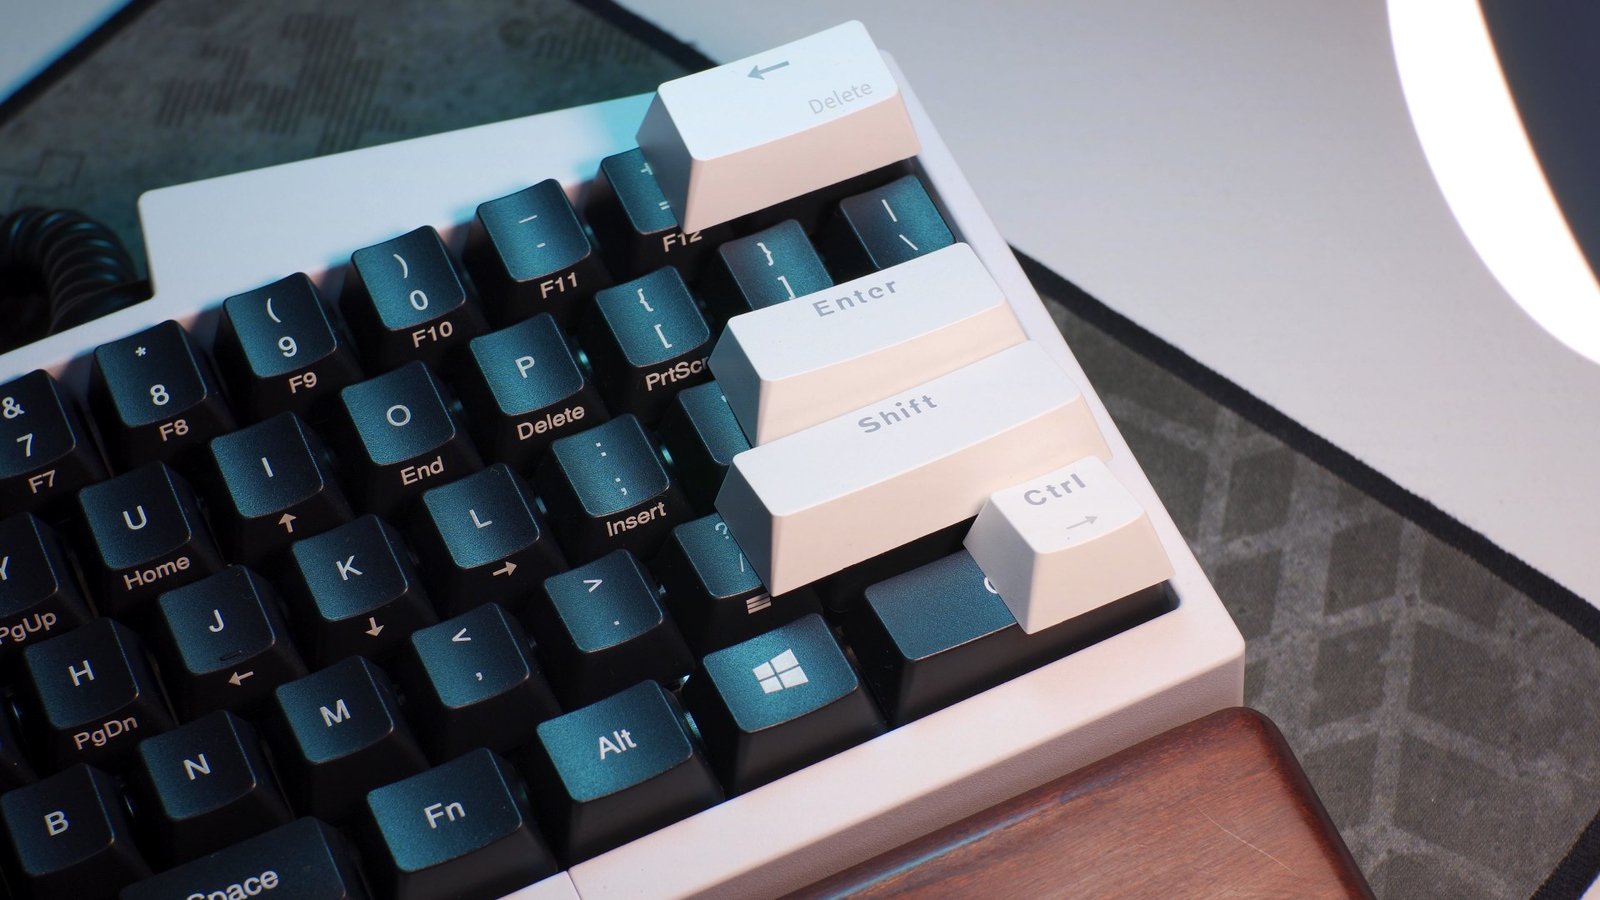
The left side, on the other hand, is pretty standard in size.
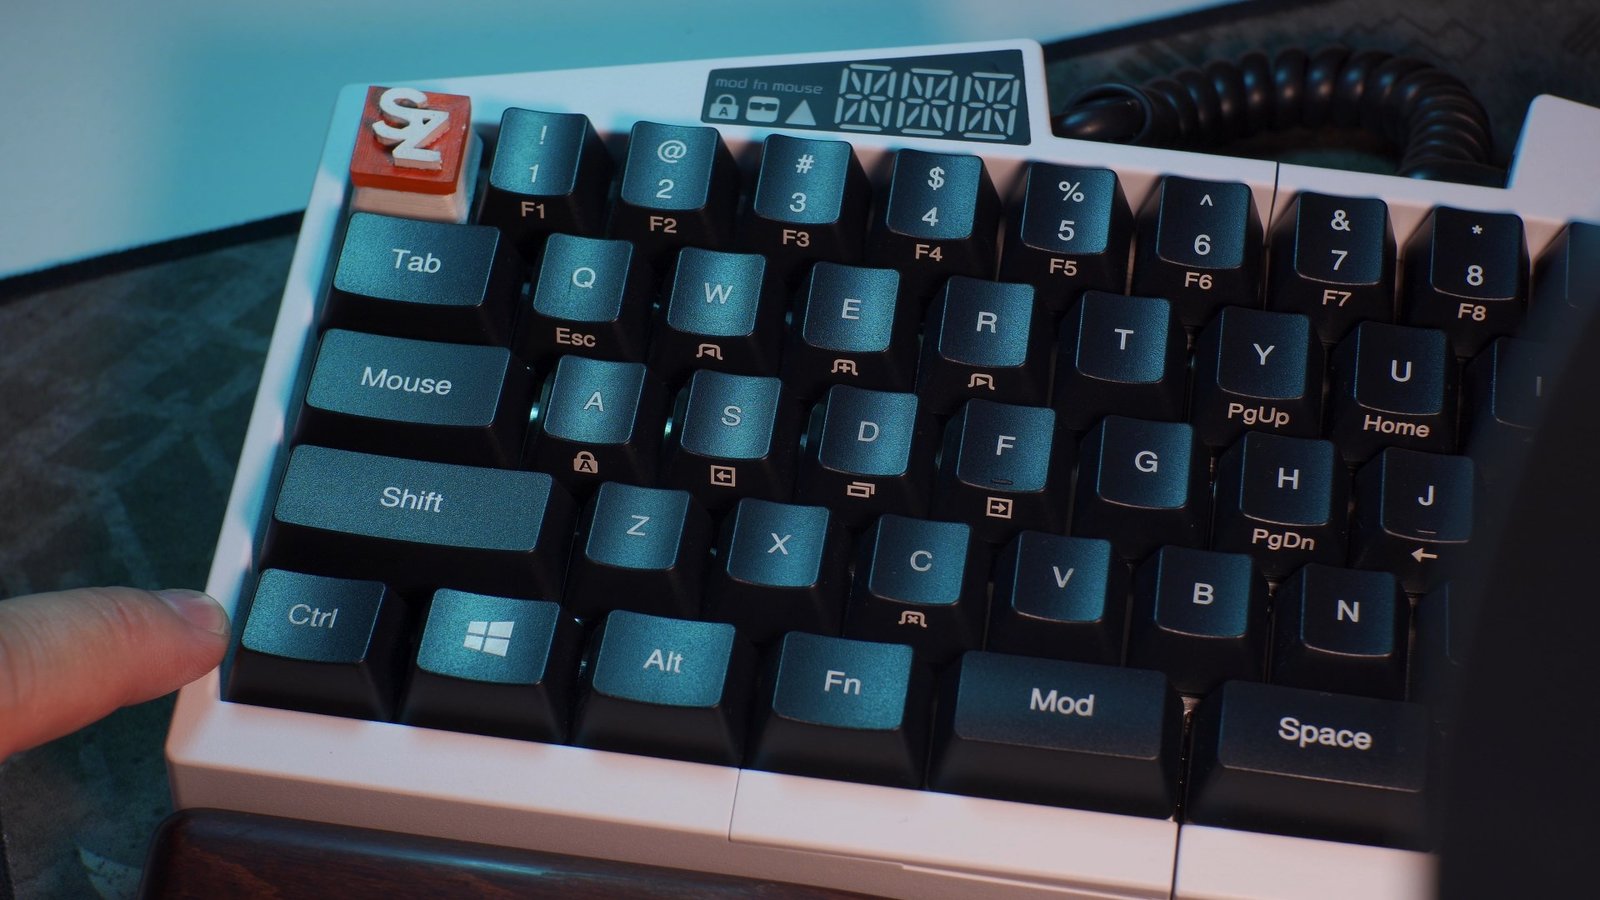
Aside from the non-standard keys on the rightmost part of the keyboard, we also have some non-standard keys here on the bottom row. So we have 2 windows key, 2 function keys and a split spacebar one for each of the keyboard halves. These are highly customizable on the UHK agent which I will show to you later.
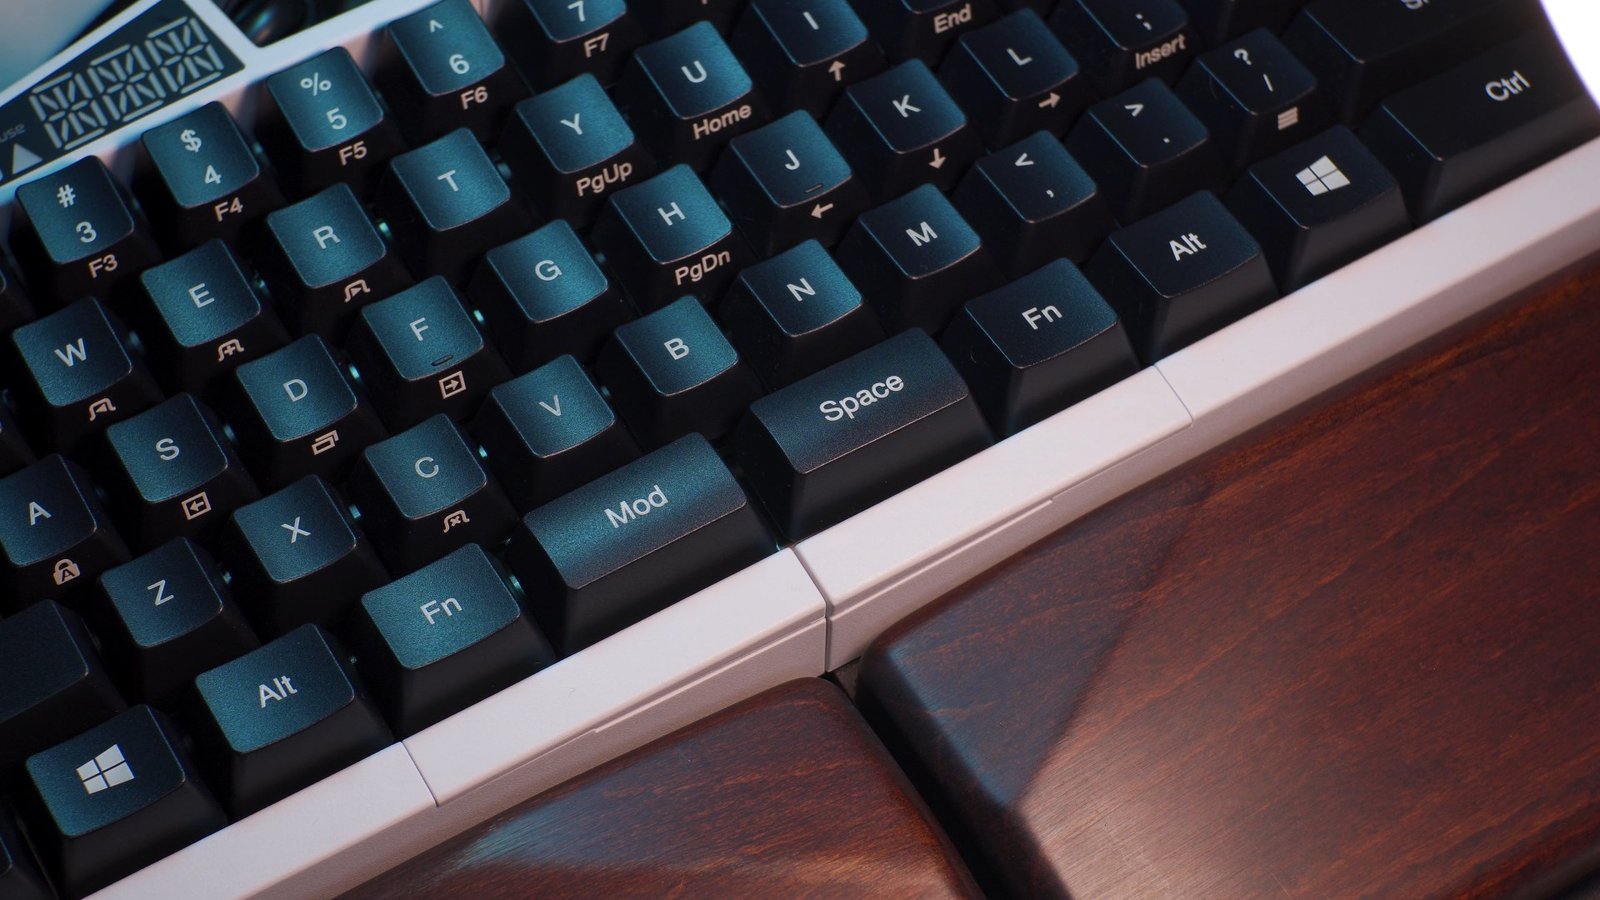
The options and features don’t stop there guys, we actually have 2 additional buttons here built directly on the housing of the keyboard which I think is pretty cool. These two clicky buttons are also highly customizable depending on your preference. You can use it as a spacebar or any other function that you want especially for toggling different layers which this keyboard actually has four, four layers guys, think about that, for a 60% keyboard to have four customizable layers is just plain insane.

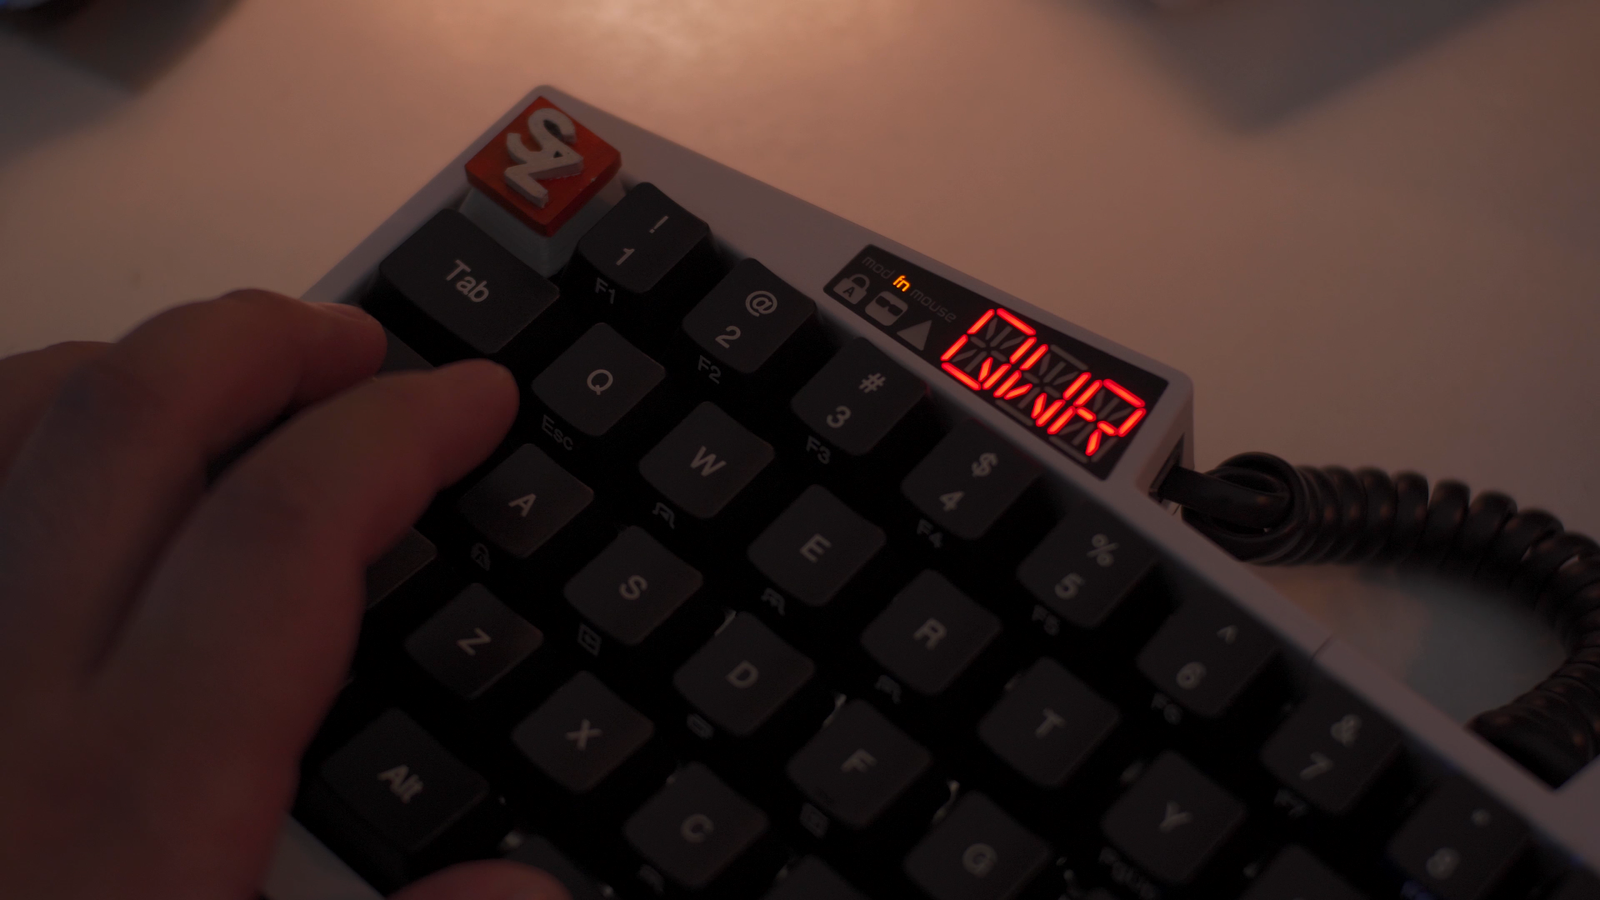
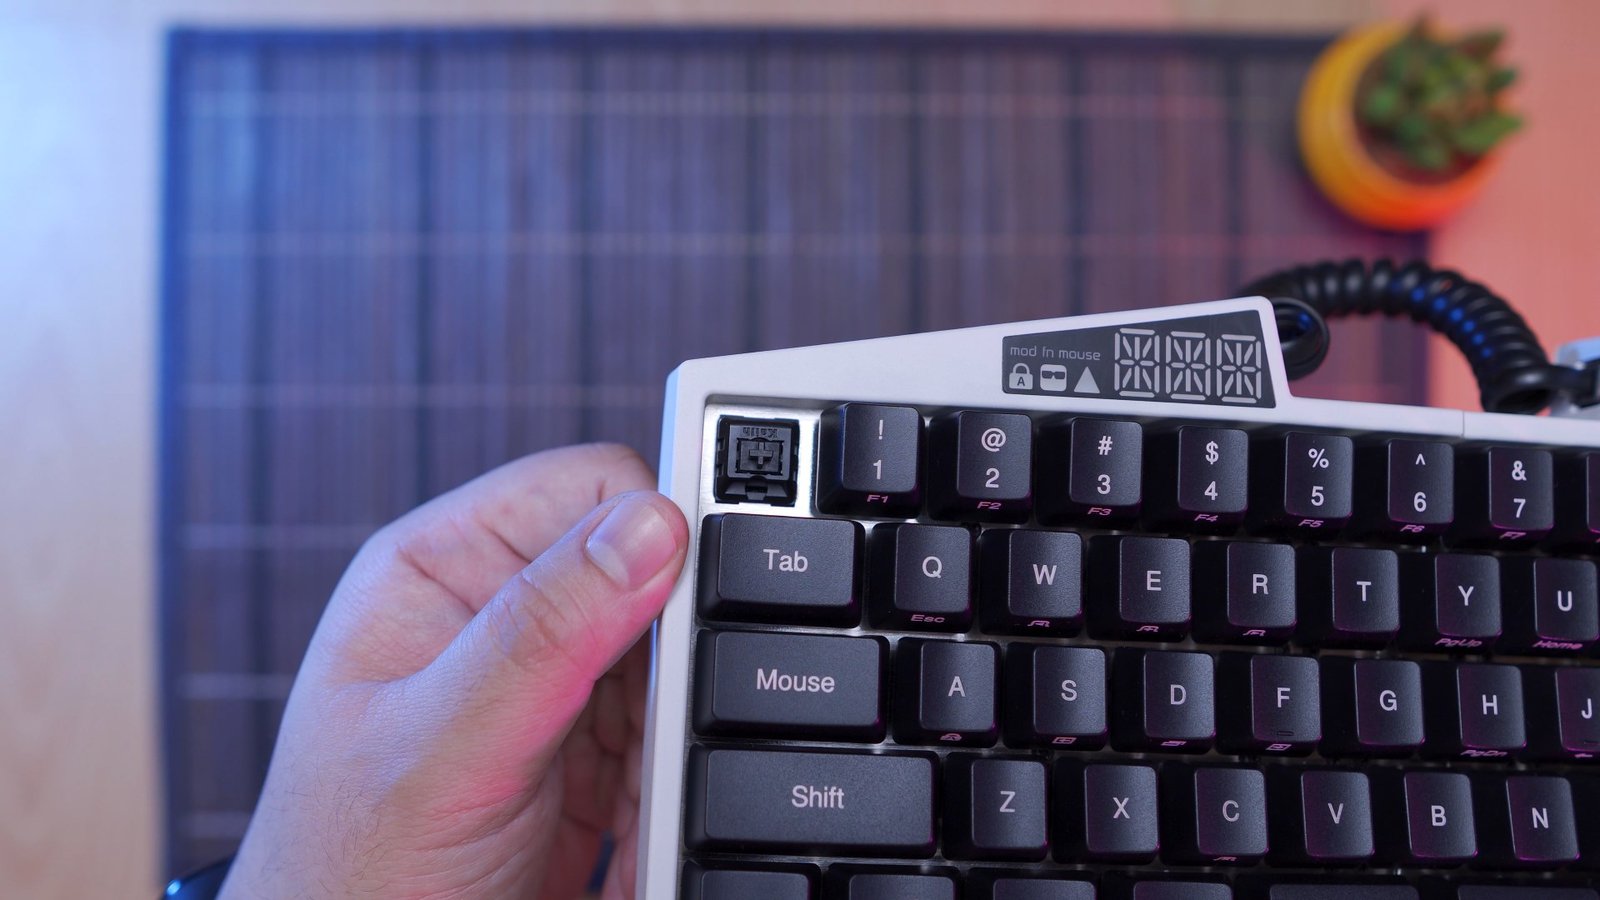
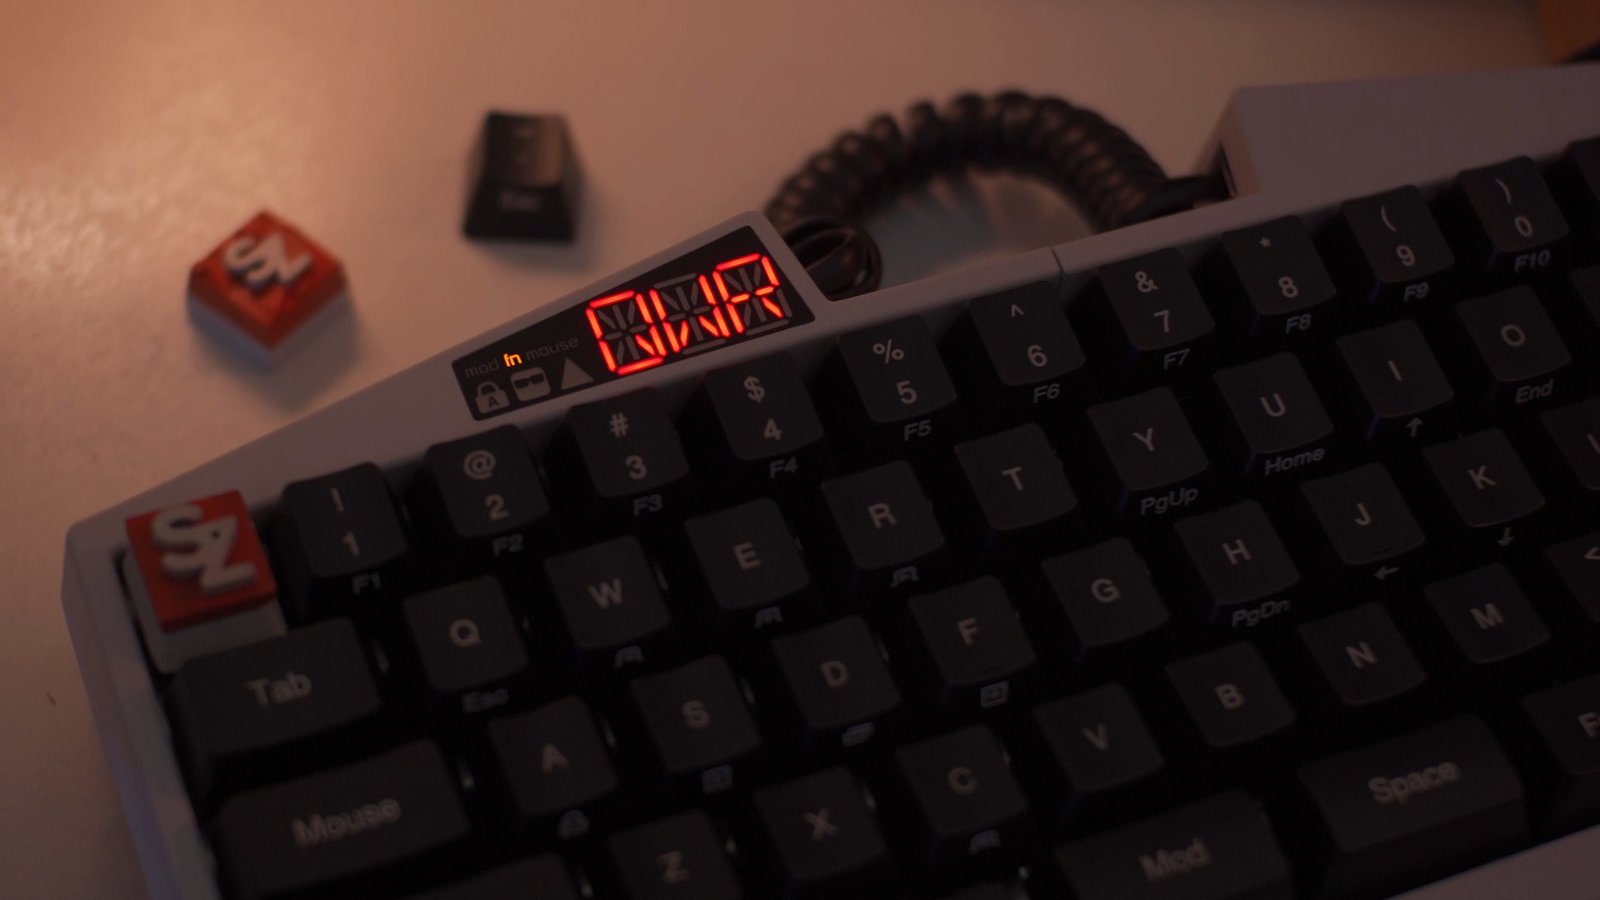
Analog Display
And to make things easier, we also have an analog display screen here which we’ll tackle in-depth in a minute, but basically, this will be your indicator of which layout you’re currently working at as well as the status of the modifiers.

Palm Rests
Another thing that I like with this keyboard design-wise, is that we have this angled design on the palm rest that ideally should provide better access to the two clicky buttons on the housing.
Not to mention that the palm rests themselves are also made from high-quality materials. This little design detail is really what I appreciate with the craftsmanship of this keyboard.

More Features
Speaking of design details, this keyboard features a thick metal backplate with a brushed finish that adds up to its overall premium look.
It also features a replaceable bridge connector that also adds to the overall aesthetics of this keyboard.
Aside from that, as I said earlier, we have a bunch of flip-out stands that you can use for ergonomics which this keyboard is made specifically for that purpose.

The only thing that I don’t like about this keyboard feature-wise is the rather Jurassic mini USB port right here, I’m not sure what’s the reason for that but it’s 2019 and I rather prefer USB type C.


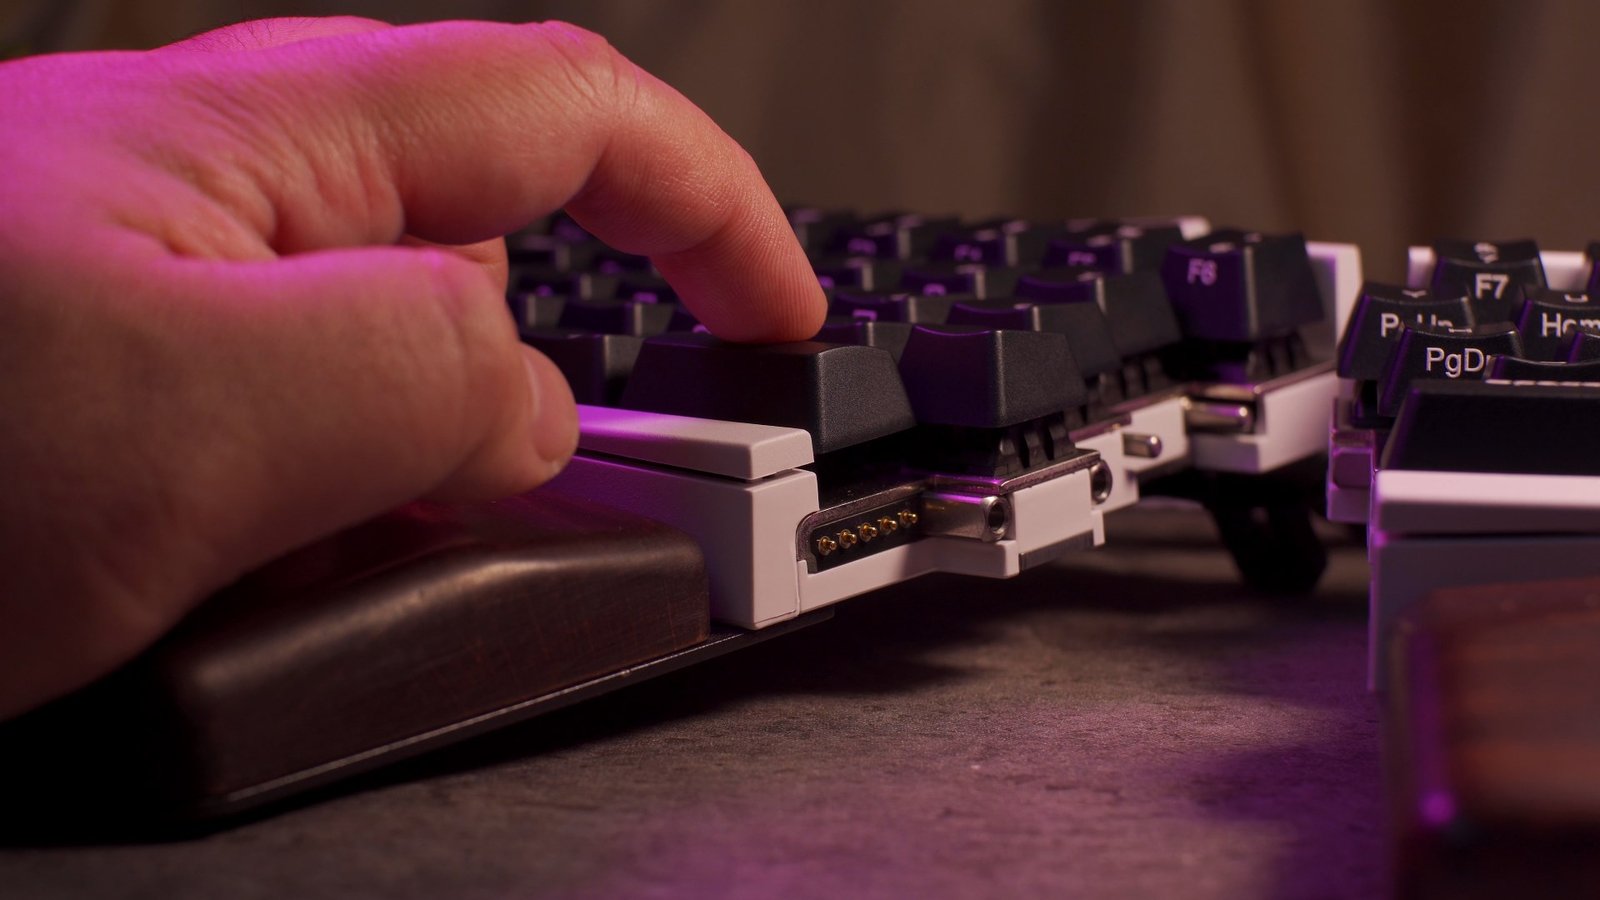
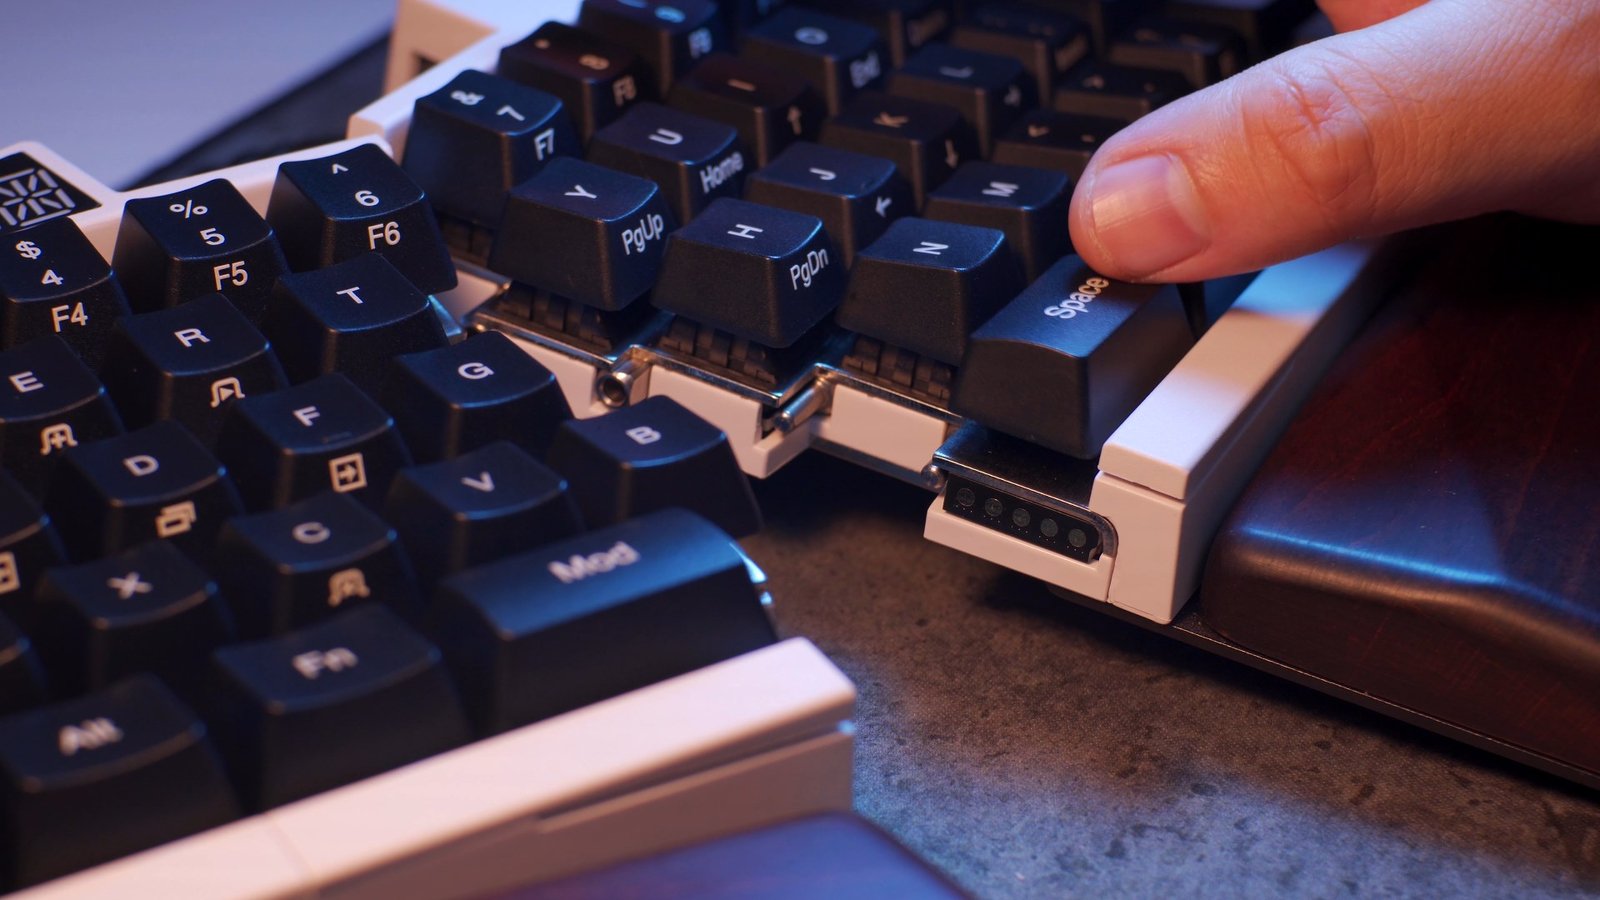
Moving on let’s check out the implementation of the split feature of this keyboard.
Split Keyboard Feature
On the left side, we have a couple of male plugs and a couple of female slots here as well as the male 5-pin connector.

And then on the other side, of course, we have the opposite of that with a 5-pin flat connector.
The left side is where the key cluster module attaches, while the right side is for the Trackball, TrackPoint and Touchpad modules.

Now, I can’t find any details about it but I feel like the split mechanism of this keyboard features magnets so that they snap in together quite easily but stays in place pretty good.
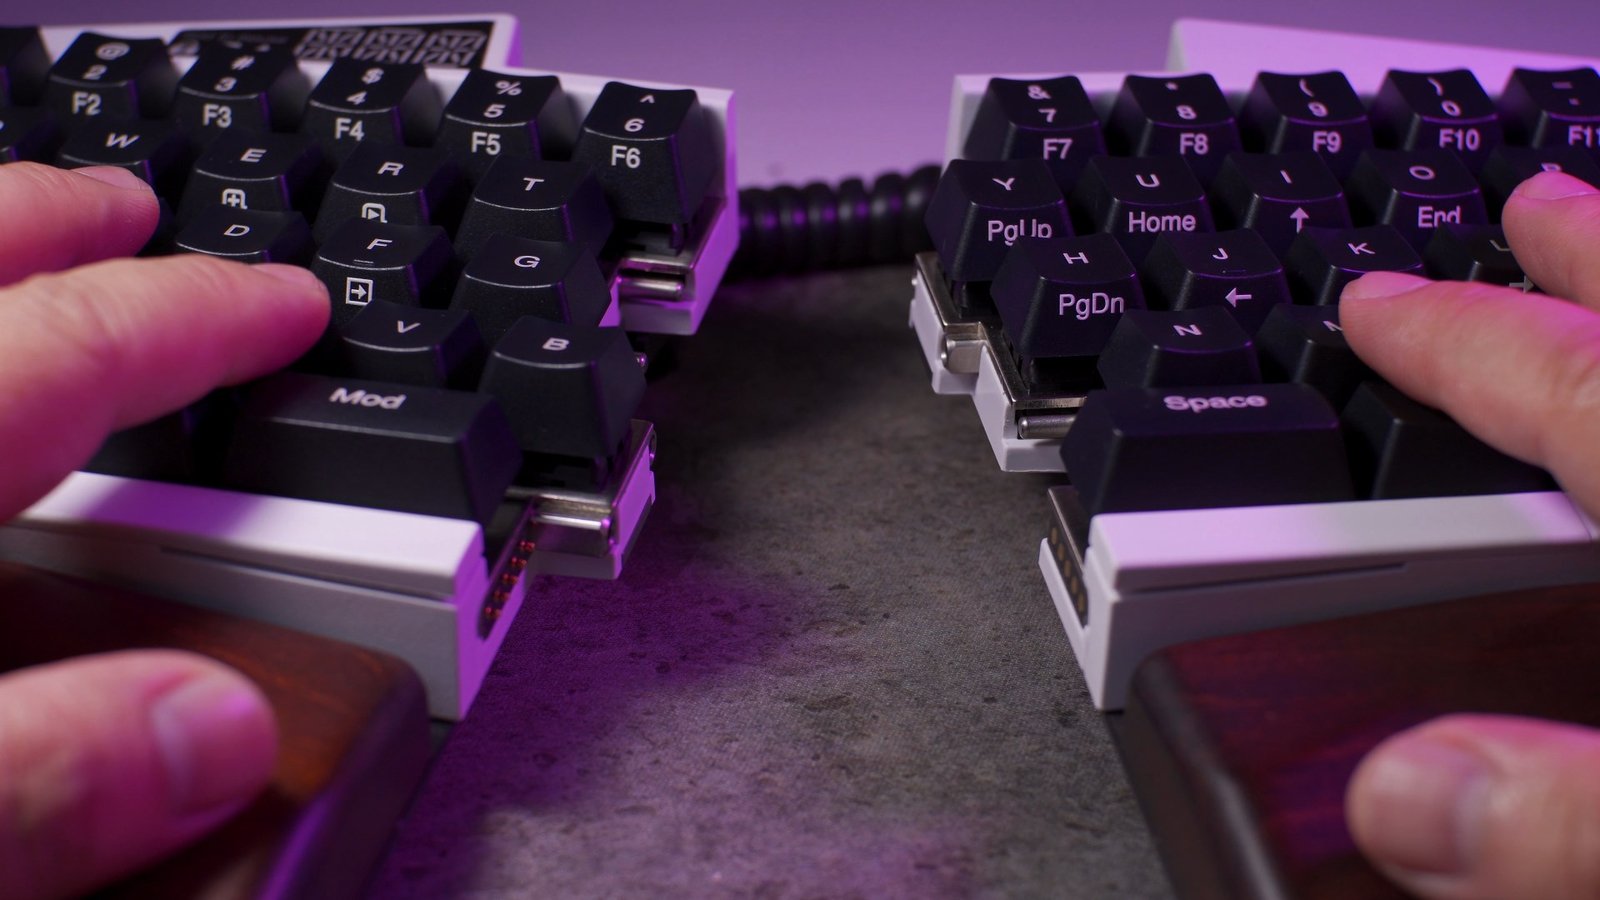
The resistance is enough to make the two halves connected to each other without splitting on its own, but it is also not that difficult for them to be separate from each other. I think they did a good job balancing between connecting both of them together easily as well as splitting them for that ergonomic form factor.
Moving on let’s check out the keycaps and switches of this keyboard.
Keycaps
In terms of the keycaps, this keyboard uses keycaps made of ABS plastic with laser printed legends.
And although its thickness is only around 0.9mm I’d say it is quite hard than I thought it would be.

However, I am not a fan of this type of printing as you’ll definitely feel the texture of the fonts on top of the keycap and it will probably fade away and get shiny at some point, I would prefer since this keyboard comes in a premium price tag to get this with PBT keycaps out of the box and probably with dye sublimated characters. However, I figured that it will also add up to the overall cost.
Both sides of the keyboard have sub legends for the secondary layers to make your transition easier using the function, mod and mouse layers.

Switches
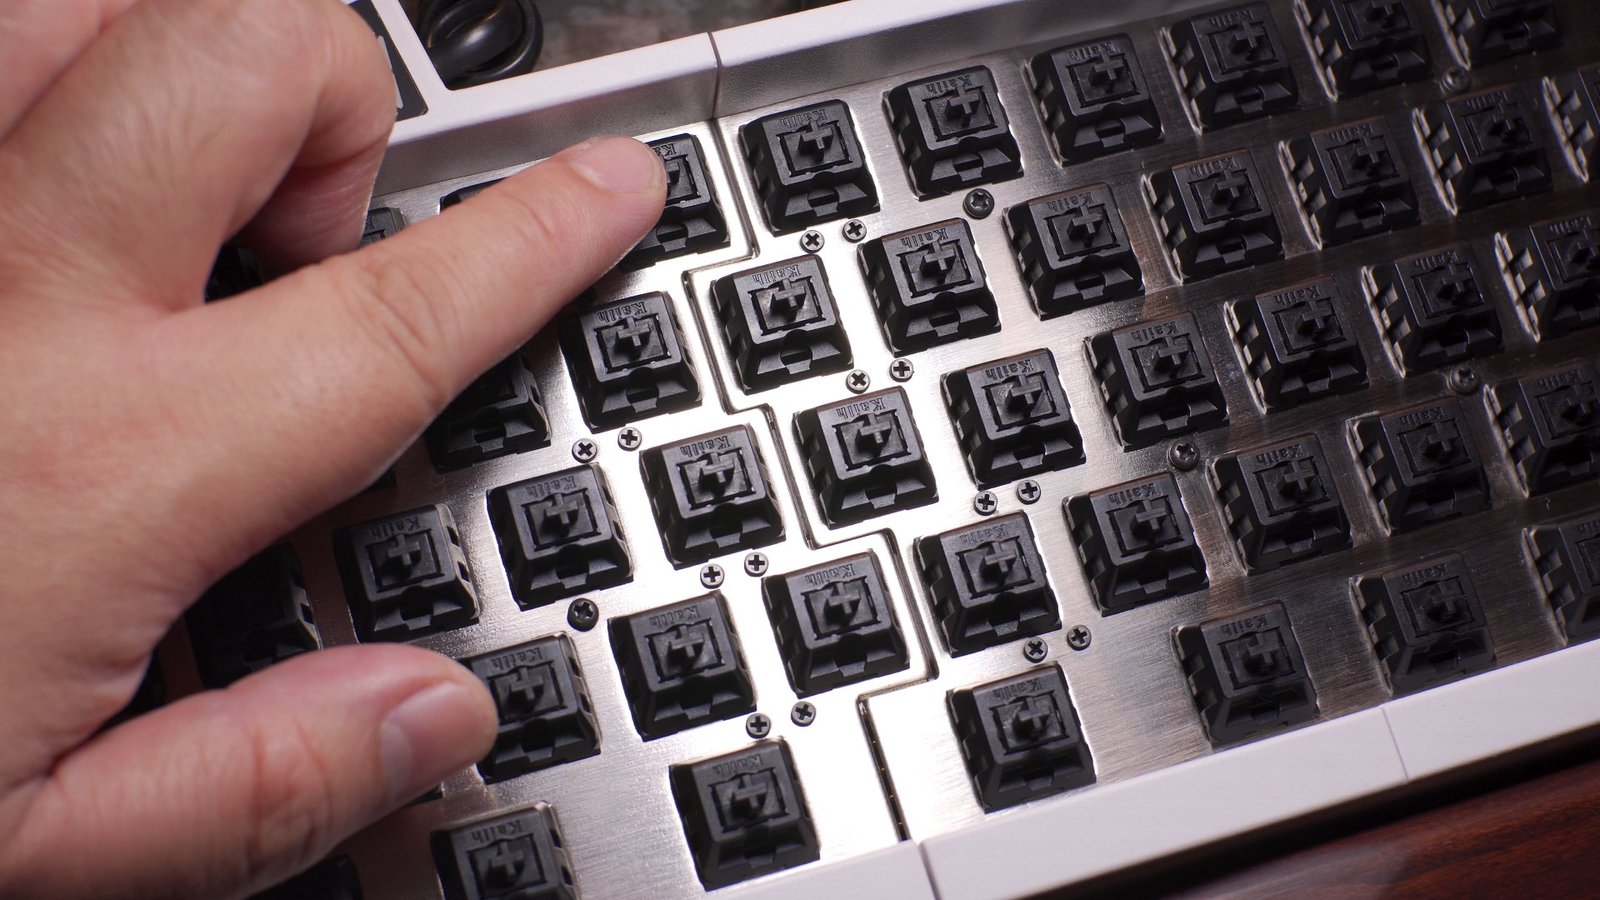
Now, in terms of the switches, this keyboard is available in a variety of Cherry MX and Kailh switches and what I have here is the Kailh Black variant.
I chose Kailh Black because I was interested in how they feel compared to Cherry MX, and as per comparison, in my opinion, the Kailh black switch is a little bit smoother than the Cherry MX black but I can still definitely feel some scratchiness on this switch compared to Gateron.
Black switch has an actuation force of 60g which is quite heavy for most users like myself, but is definitely good for accuracy as it is less prone to accidental key presses unlike with my experience with any 45g red switch. As long as your fingers have the endurance to type heavily for a prolonged period of time, black switch is a good option for a relatively quiet switch.

Stabilizers
As for the stabilizers, since this keyboard features a split spacebar, both the left and right spacebars are very stable as well as all the other modifiers like the ctrl, shift, enter and backspace.

Size Comparison to a standard 60% keyboard
Now, here’s a quick size comparison so that you can have an idea of how it differs from a standard 60% keyboard. At first, I wasn’t really convinced with the idea of shortening the right modifiers but then I realized that even with the shortened keys, the right side is already bigger than the left side, so I can only imagine how unsymmetrical they will be with the standard size.
Alright guys, before I share with you my overall experience with this keyboard, let us talk about the UHK Agent software first because it plays a huge role when it comes to actually using this keyboard on a daily basis.
UHK Agent Software
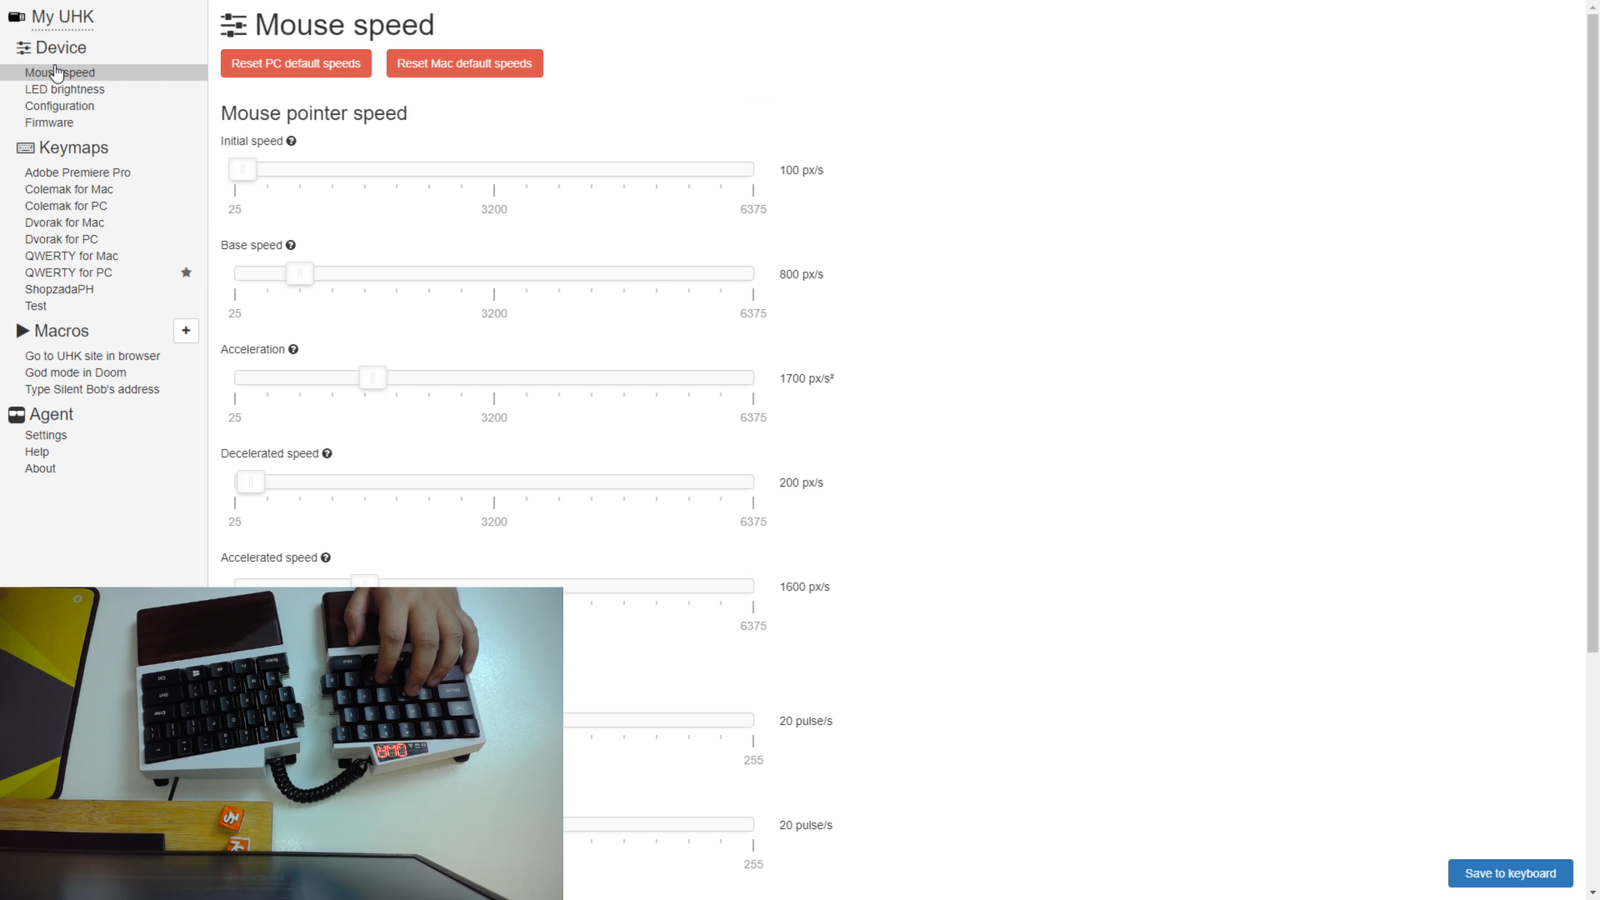
The UHK Agent is the most extensive software that I’ve ever experience for a keyboard so far and I’ll show you why here.
Right here we have the device settings, first, we have the mouse speed configuration wherein you can set up the mouse functionality of the mouse layer, you can essentially change speed, acceleration, and other details.
Next, we have the LED brightness configuration, right now, they still don’t have a backlit version of this keyboard but this is a good sign that they will offer one soon.

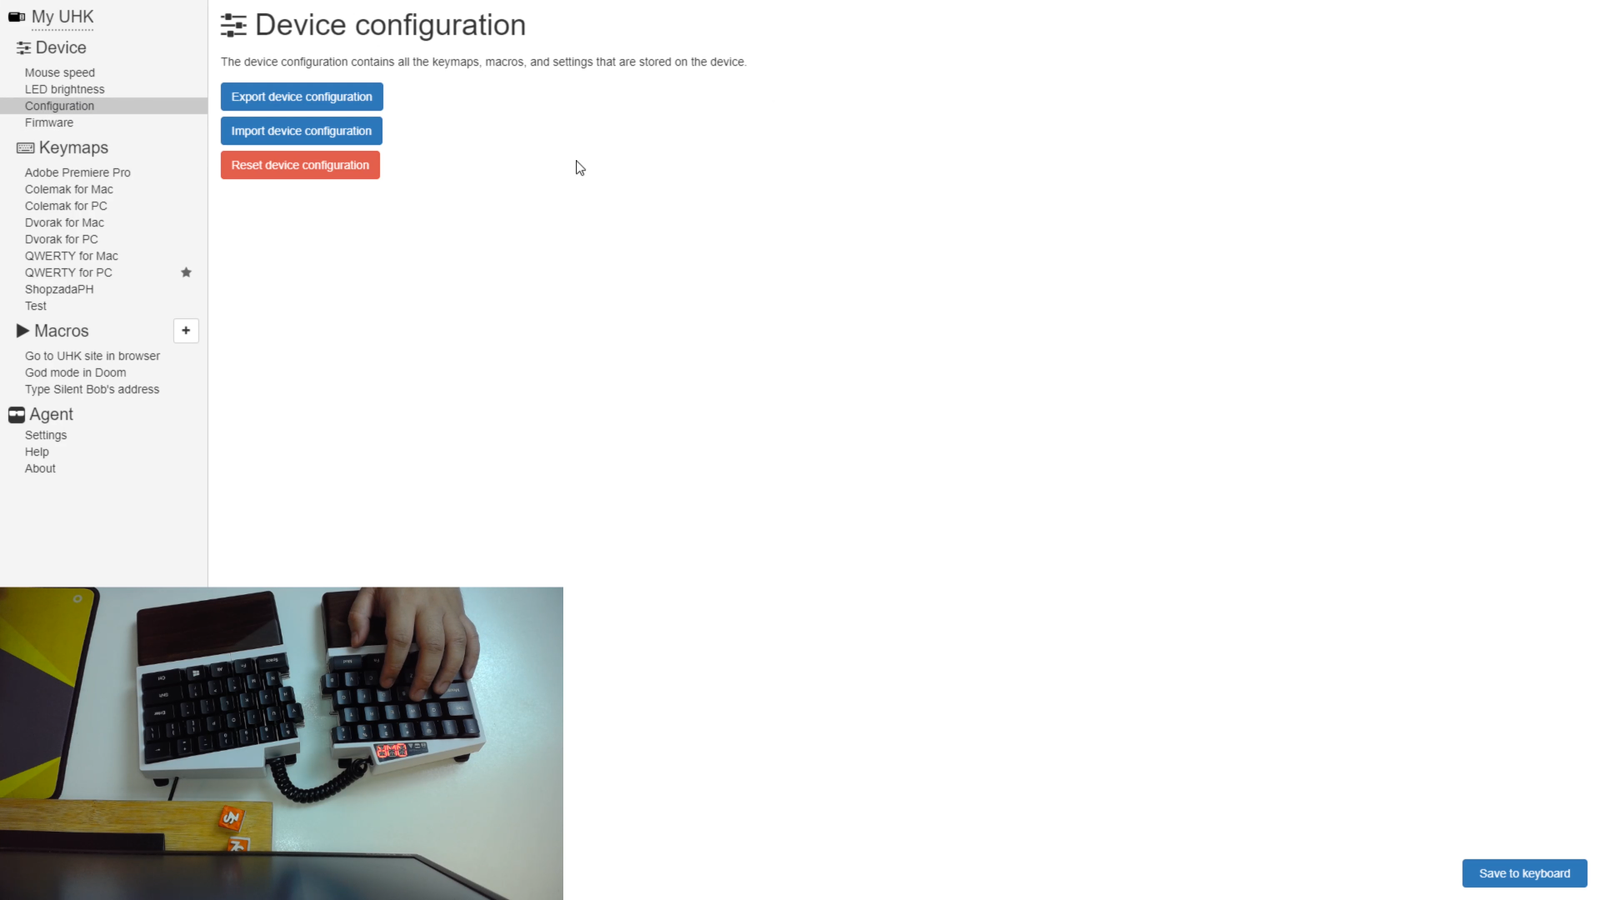
Next, we have the device configuration settings wherein you can import, export and reset your configurations.
And we also have here the option to update your keyboards firmware. I advise you to follow their blog as they usually post updates there when it comes to firmware and module updates.

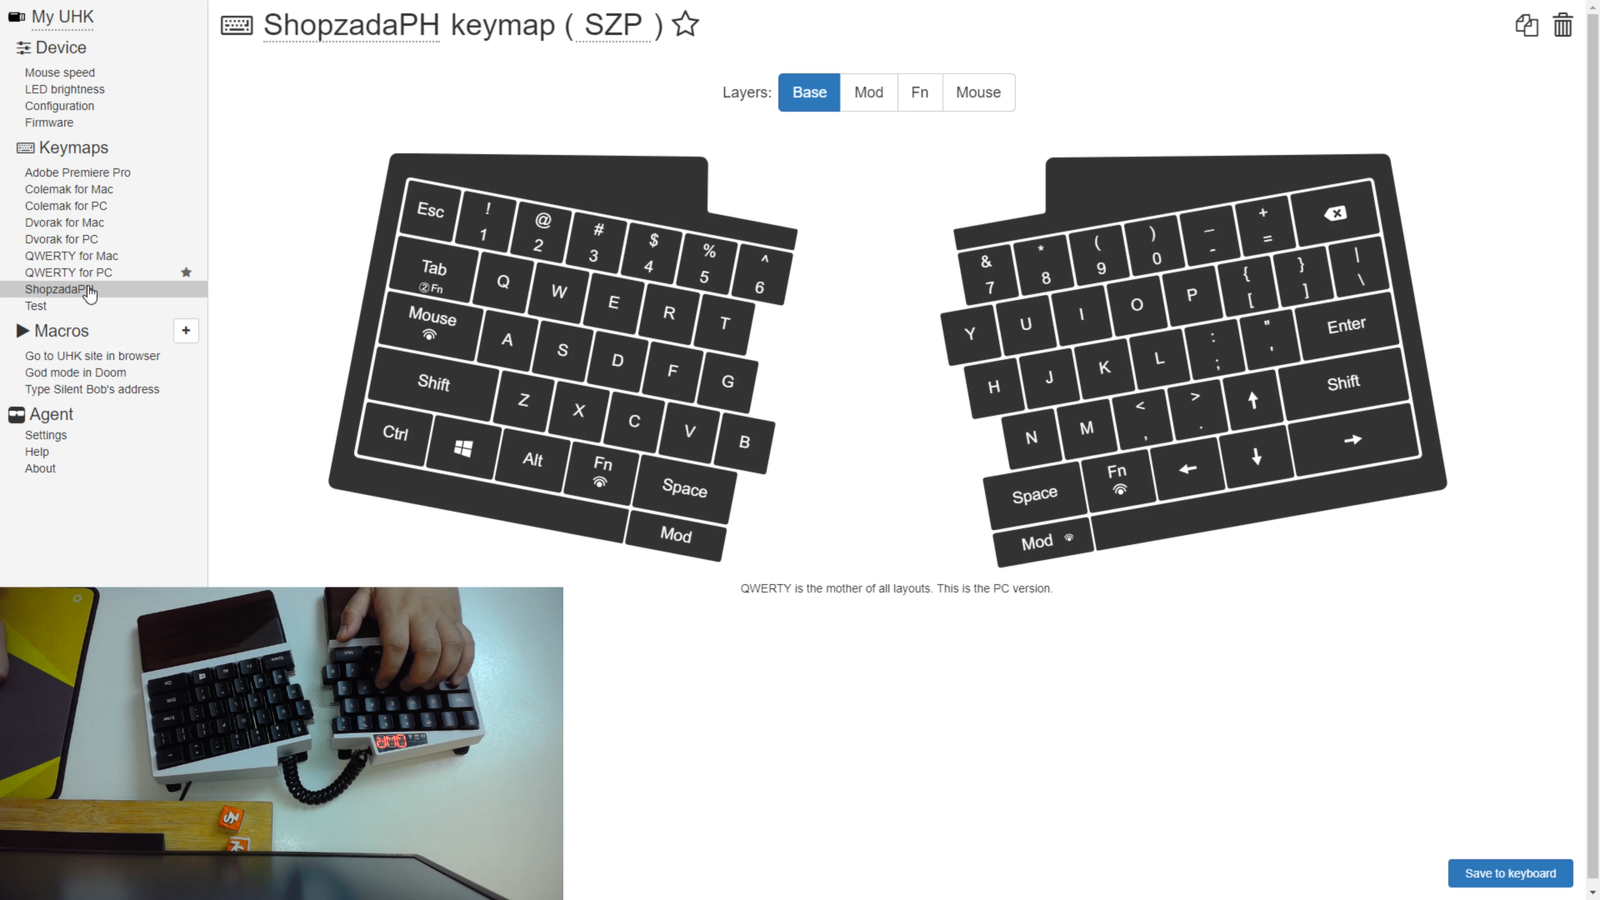
Now, this keyboard is available with Colemak, Dvorak and QWERTY layout for both Mac and Windows OS out of the box, but as you can see, I’ve already configured my own layouts with my standard layout (ShopzadaPH) and for video editing with Adobe Premiere Pro.

First, let’s take a look at the standard QWERTY layout because this is what you’re getting out of the box.
And here’s why this software is very powerful, on a single key, you can pretty much change it to virtually anything that you want like letters, numbers, punctuation, functions, etc.

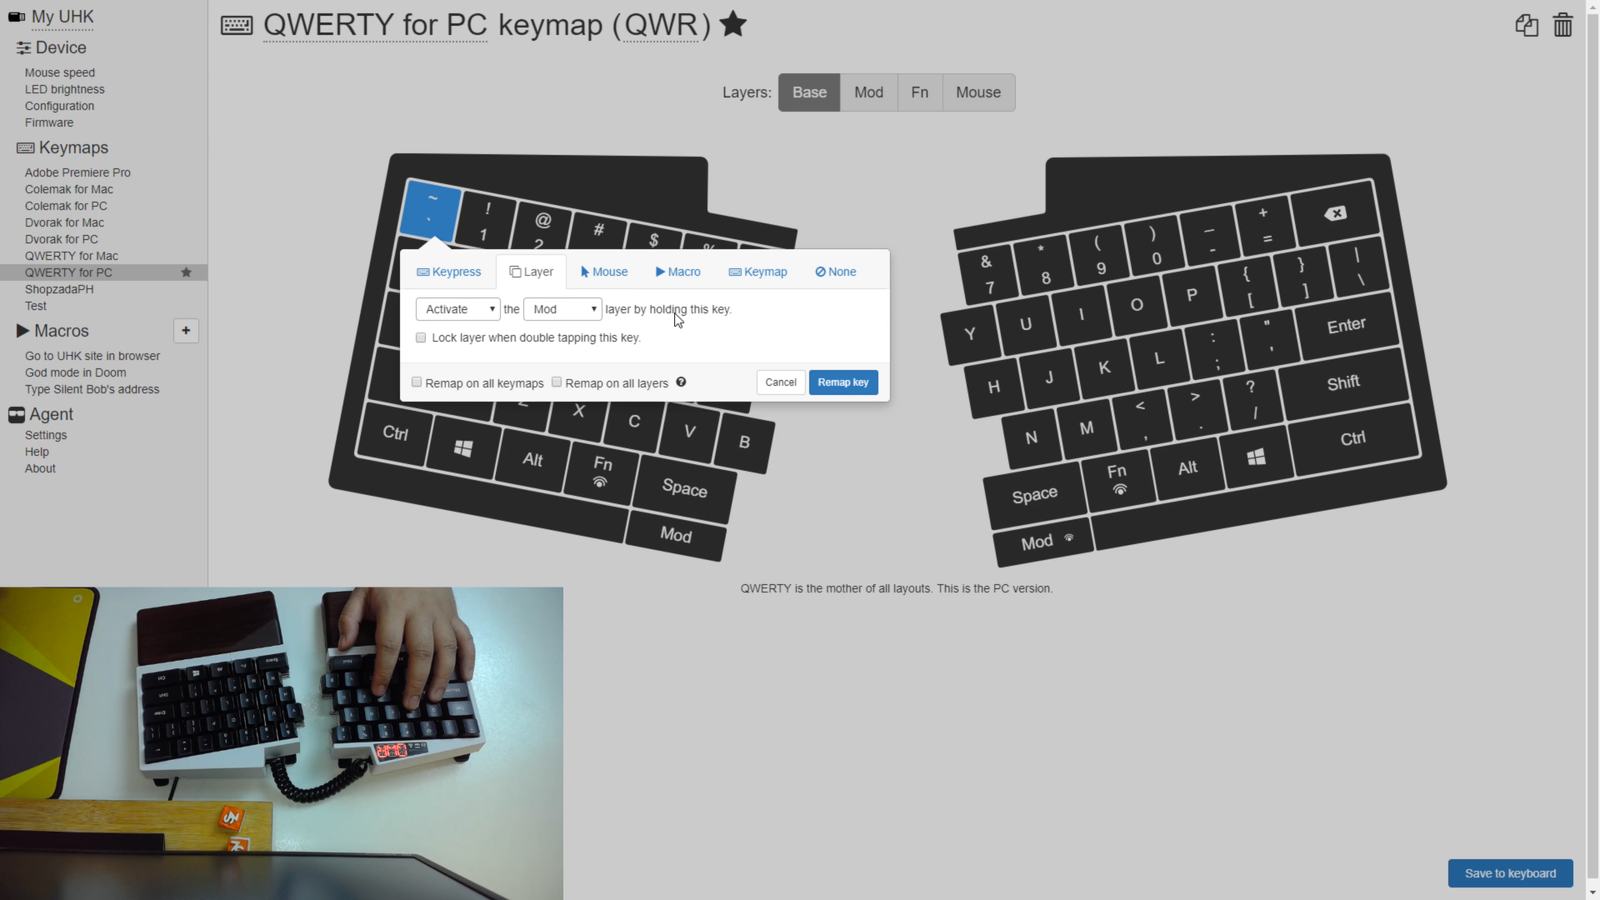
You can also use the capture keystroke to change the functionality of the key and you can also add modifiers along with that. Aside from that you can also configure its secondary function for when you press and hold it acting as either a layer switcher or a modifier.

Next, we have the layer tab wherein you can remap a key’s function to use as a layer switcher either by holding or tapping the key.
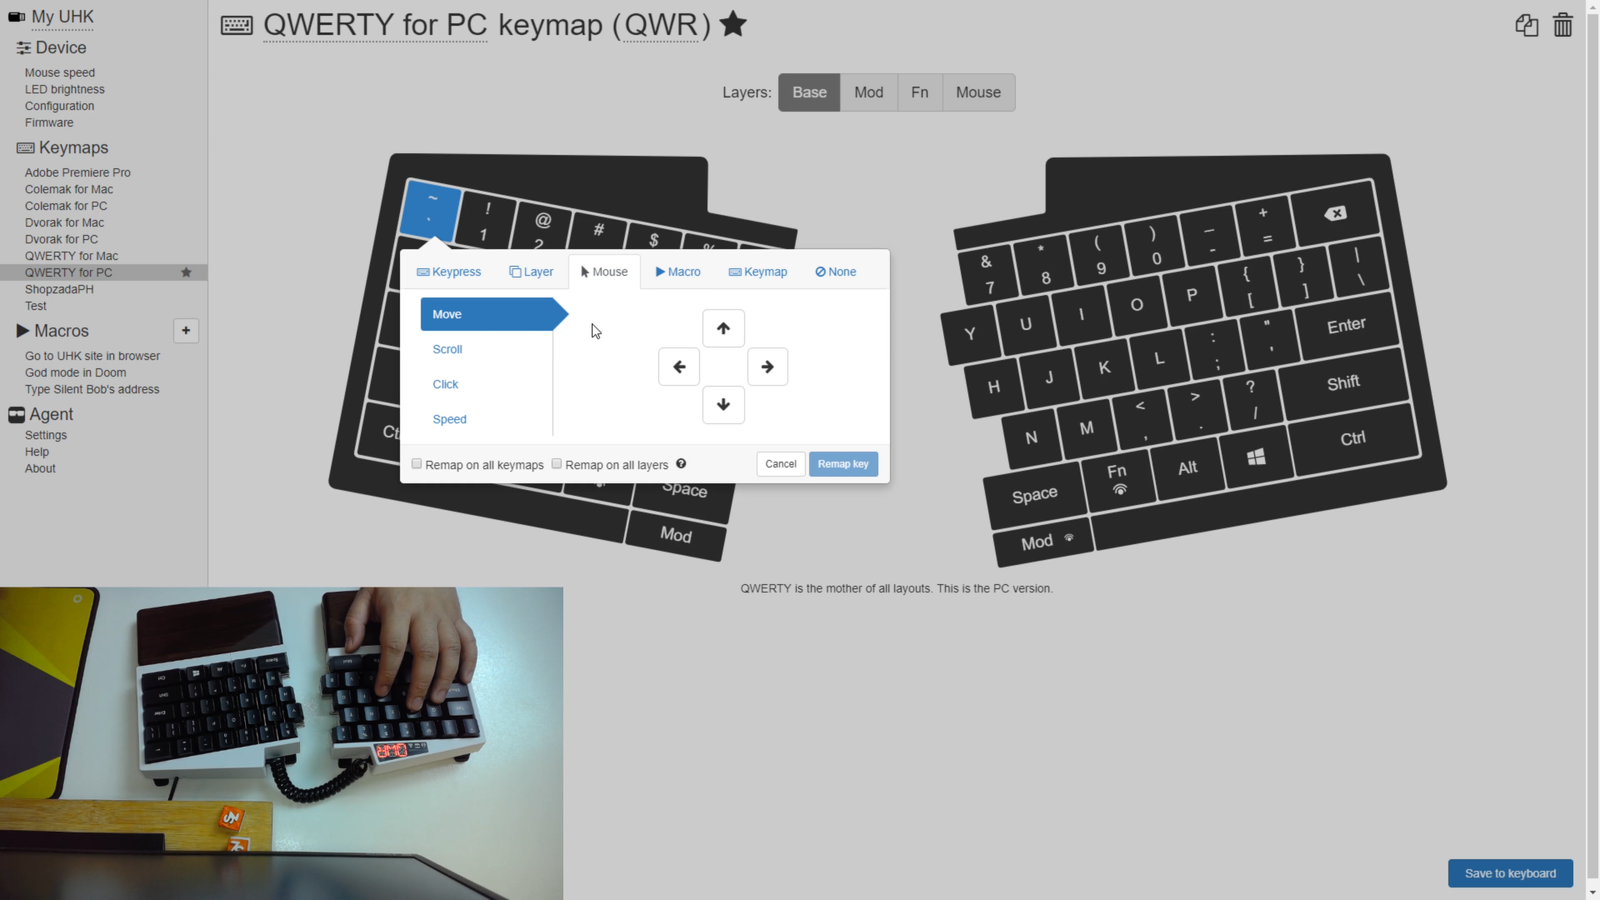
Next, we have the mouse layer, which is one of the most interesting features of this keyboard. Basically, you can use this keyboard as a mouse, more on that later.
Then we have the macro tab wherein you can configure your own macros.

Then we have the keymap tab wherein you can set the key to be used to change in between different layouts.

And lastly, of course, you can disable the key entirely. As you can tell, the amount of customization you have with this keyboard using this software is the sky’s the limit and it’s quite intuitive as well, and so far I didn’t encounter any bugs yet which is nice.

Did I tell you we have 3 more layers other than the base layer? well, we also have the mod layer wherein you can use the layers indicated on the side of the keycaps on both sides of the keyboard.

Next, we also have the FN layer, which is another customizable layer and by default, it has the multimedia keys and the keys to change between other layouts that I setup.

And the last layer is the mouse layer wherein you can customize your own settings when it comes to using this keyboard as a mouse using the mouse modifier. You can use your pinky finger to hold the mouse modifier and then you can move the mouse around using the corresponding keys, then you can use the keys on the right side of the keyboard for the left click, middle click, right-click and even change the speed of the mouse itself. With this, you can pretty much do simple tasks that require mouse actions so that you won’t have to lift off both of your hands from the keyboard.
Like I said, this keyboard with this UHK Agent software is highly customizable and one of the best that I’ve tried so far.

Alright, so let’s talk about my overall experience with this keyboard.
Personal Experience with the Ultimate Hacking Keyboard
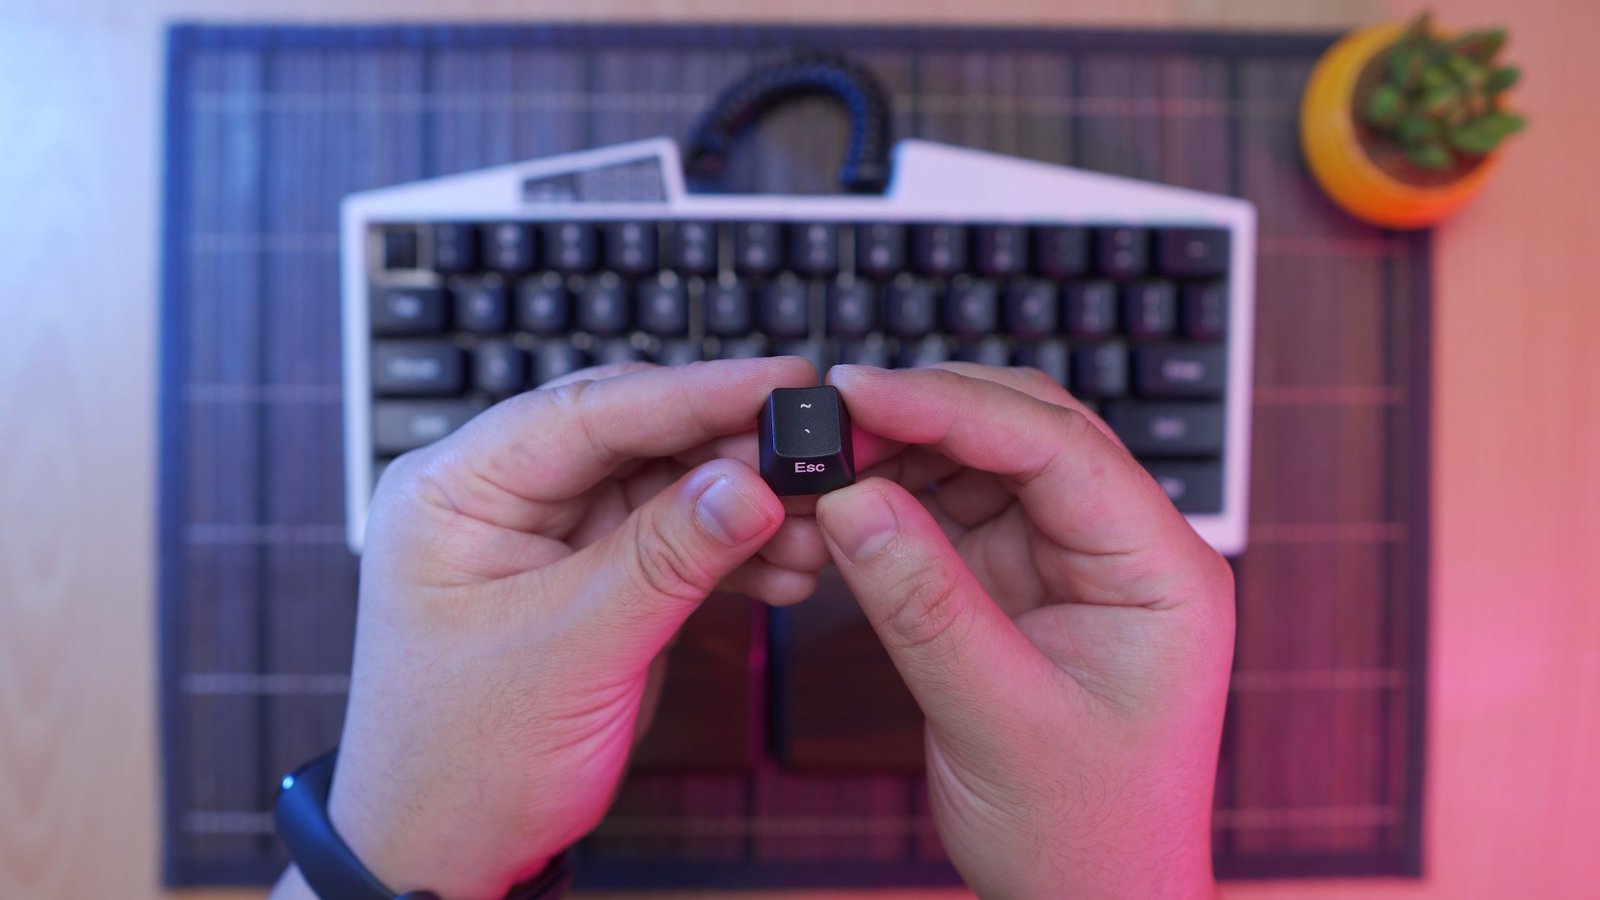
For starters, I configured my own layout so that I can use this keyboard much like how I used the Anne Pro 2 60% keyboard before. I set up the right alt, windows key, right ctrl and the question mark to function as the arrow keys by default and the tilde key as escape as default as well,
But I can also toggle them easily using the function layer as you can see here, I also interchanged the mod and fn layer so that I can use the secondary layers on the keycaps alongside the fn key.

And I use the mod layer as my multimedia shortcuts layer. Aside from that I also set the tab to function as fn key so that I can easily toggle between numbers and the function rows up top using only my left hand.

I can also easily toggle between my configured layouts and the analog display helps with identifying what layout I am currently working at, not to mention that it also adds up to the overall cool aesthetics of this keyboard.
There is still a lot more potential for me to configure this further for better efficiency but for now, this configuration is doing wonders for my everyday workflow. Lastly, you can save your configuration to the keyboard and they will function even without the software which is pretty awesome.
Performance
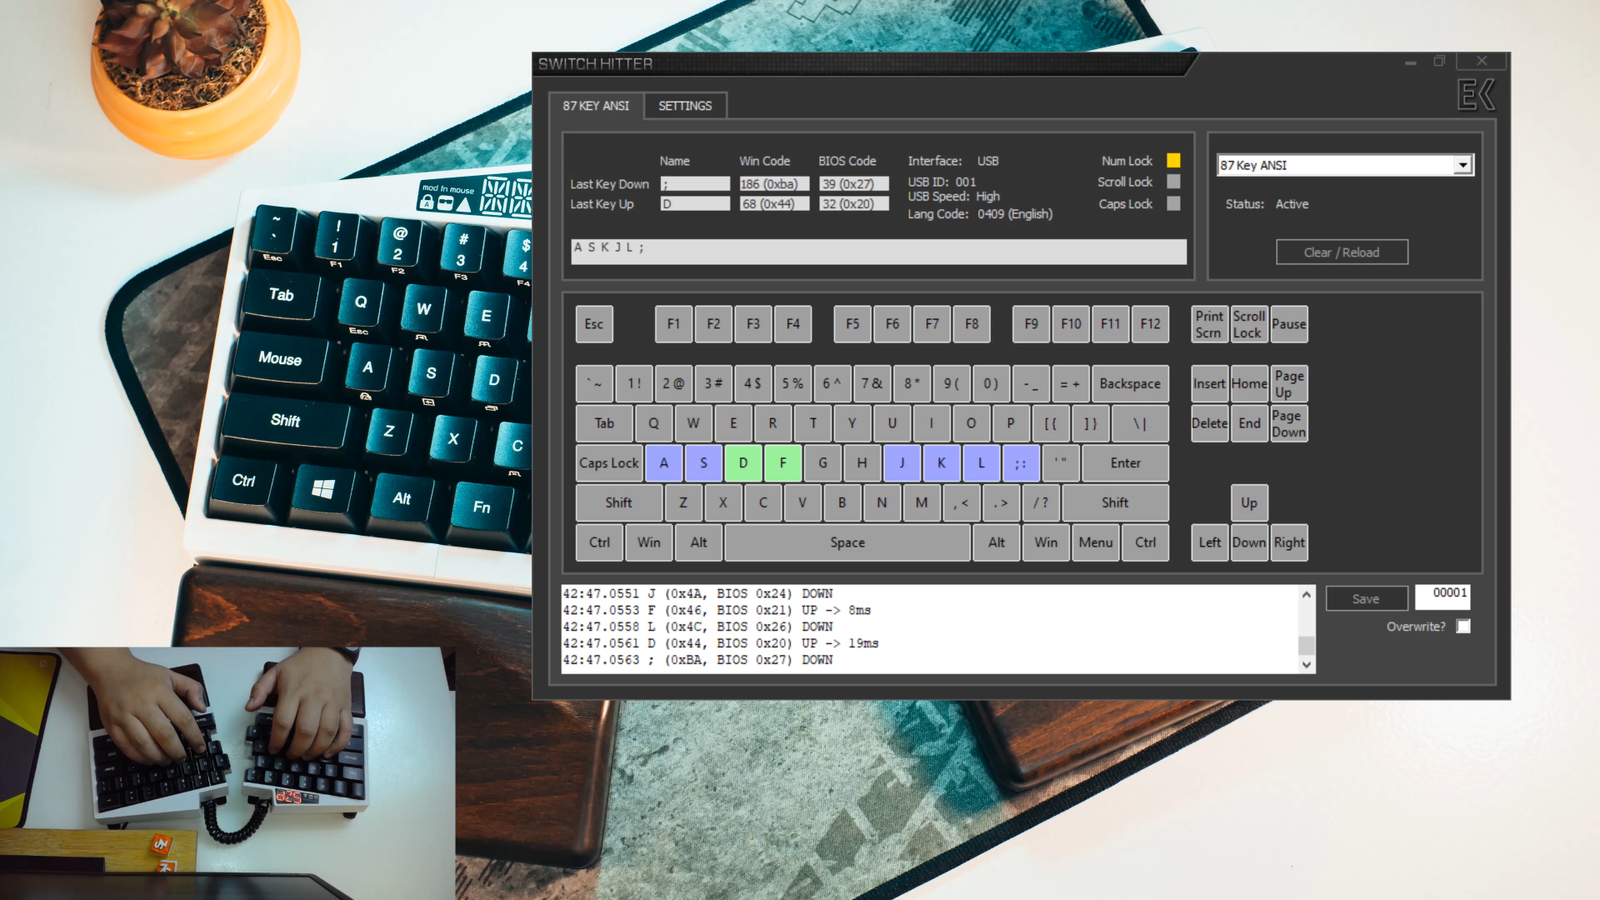
NKRO Feature
As for the performance of this keyboard, for NKRO or N-Key Rollover feature, which allows you to press multiple keys at the same time without conflicts, unfortunately, this keyboard only has 6-key rollover as you can see here, I can press only up to 6 keys at the same time.
Typing Experience
Now, when it comes to typing experience, In my opinion, this is where this keyboard shines the most as it is very comfortable to type with.

The good thing about this is since it is a split type keyboard, you can pretty much use this in a standard 60% layout if you’re not used to touch typing, but if you are, you will definitely reap the benefits of having a split keyboard like this because you can tilt it and match the natural alignment of your wrist. Thankfully since my review of the X-Bows ergonomic keyboard, I was able to learn how to type properly using touch typing with all my 10 fingers, so I didn’t have any issues with being able to type with a split layout like this because my fingers are used to typing with their own designated keys.

Now, when it comes to the typing experience with the Kailh black, as expected it is kinda tiring on my fingers but I think I am getting used to it as time goes by. Though I feel like it somehow defeats the purpose of being able to type comfortably with this layout since the keys are quite heavy. I’ll probably have the switches swapped out into something lighter like yellow or brown in the future.
Gaming Experience
And lastly, when it comes to gaming, I really love this keyboard because you can easily move it around, tilt it in any angle that you want and you can even move out the right side so that you can place your mouse closer if you’re into that.

As for the Kailh black for gaming, I didn’t have much problem with it because you’ll always going to bottom out the keys anyways and I don’t actually pay attention to the heavy actuation while gaming because quite honestly, I press the keys really hard during intense gaming.

Though I still would prefer a lighter switch anytime it is available.

VERDICT
To conclude, there’s really not much to complain about this keyboard other than the rather old miniUSB interface and the ABS keycaps. All I have here are mostly praises because it is really a good quality keyboard with feature sets that are unheard of. The build quality is very solid and the layout is very well thought of including the amount of customization you have when it comes to ergonomics, not only with the split type design but also with the adjustable stands that you can use for different angles. The analog display is also a nice touch making it a lot more easier to know what layer you are currently working at without any guessing. The implementation of the split design is also good with magnets holding both sides together quite sturdy. The addition of two clicky buttons built-in on the housing is something I wasn’t really expecting for any keyboard at all which I think makes this keyboard even more special. And when they finally ship out the external modules I think that will push the customization of this keyboard into an entirely new level. However, as expected with a keyboard with this many features and build quality, it comes with a quite hefty price tag of around 275 USD, but I personally think that it is totally worth it especially if you can maximize the potential of this keyboard with your own set of configurations.

NEW 35 Grams Kailh Box Red Switch Review – Extremely Lightweight!
AKKO DragonBall Z Keyboard and Mouse – AKKO RG325 Review
i-Rocks K65M Mechanical Keyboard Review – Cherry MX Brown Switch!
Ultimate Hacking Keyboard Review – Best Split Mechanical Keyboard!
Royal Kludge RK61 60% Mechanical Keyboard Review – Best Budget 60% Keyboard!
Tecware Phantom Elite 87 Keys Review – Hotswappable Keyboard!
Tecware Phantom Elite 87 Keys Unboxing and Overview
Kailh Switches Review and Teardown – Kailh Switch Tester!
Best 60% Mechanical Keyboard Under $80
Cooler Master CK350 Mechanical Keyboard Review
Akko 3108 Tokyo World Tour Review – Five-Side Dye Sub!
Akko 3108 Dragonball Z Goku Review – Five-Side Dye Sub Spacebar
Rakk Lam-Ang Pro Mechanical Keyboard Review – Universal Socket Keyboard!
Ultimate Hacking Keyboard Review – Best Split Mechanical Keyboard!

WHERE TO BUY:
UHK:
- Price may vary depending on existing promos
- The views and opinions on this review are solely based on my own personal experience, your results may vary

The Broll who always got your back online!