Today, I’ll share with you the easiest way to build your own custom mechanical keyboard tailored to your personal preference. This is good for both beginners and enthusiasts as it is super easy to achieve while having a ton of flexibility when it comes to further customization and improvements down the line. I’ll make it as simple as possible for beginners while providing enough details for our fellow enthusiasts out there.
Before we dive into it though, let’s take a minute and discuss why you would want to build your own custom keyboard in the first place since it is easier to grab a prebuilt one off the shelves. Well, the thing is, we all have different preferences when it comes to mechanical keyboards, and there’s a ton of things to consider when buying one, like the design, the construction, switch choices, keycaps and a lot more. And more often than not, we can not simply find one that fits all our needs in just one prebuilt keyboard so we tend to buy, try and resell and buy again just to find the right one for us which is not very cost-effective right? So building your own could be more expensive at first, but trust me when I say that it is way satisfying and since you built it yourself, there’s a chance that it will stay on your desk for a while. Unless, you get hooked and you start building custom keyboards left and right, which is what usually the case with enthusiasts getting hooked down the rabbit hole. but that’s a story for another day.
So yeah, building your own custom keyboard allows you to choose all the different components based on your personal preference.
And now, I’m going to teach you how to build one. And it’s actually quite simple, all you need to do is get a barebones keyboard, which means it is basically an already built keyboard but doesn’t have switches and keycaps. In our case, I chose the Geek GK61 with a hot-swappable board, and this is the easiest way to do it because you don’t need to solder the switches and it is super easy to replace them once your preference changes over time, which it will at some point, so this is very cost-effective.

And then I have here a set of keycaps, and a set of Gateron Yellow switches.

And that’s about it, you only need 3 different components to start building your own custom keyboard.
WHAT’S IN THE PACKAGE
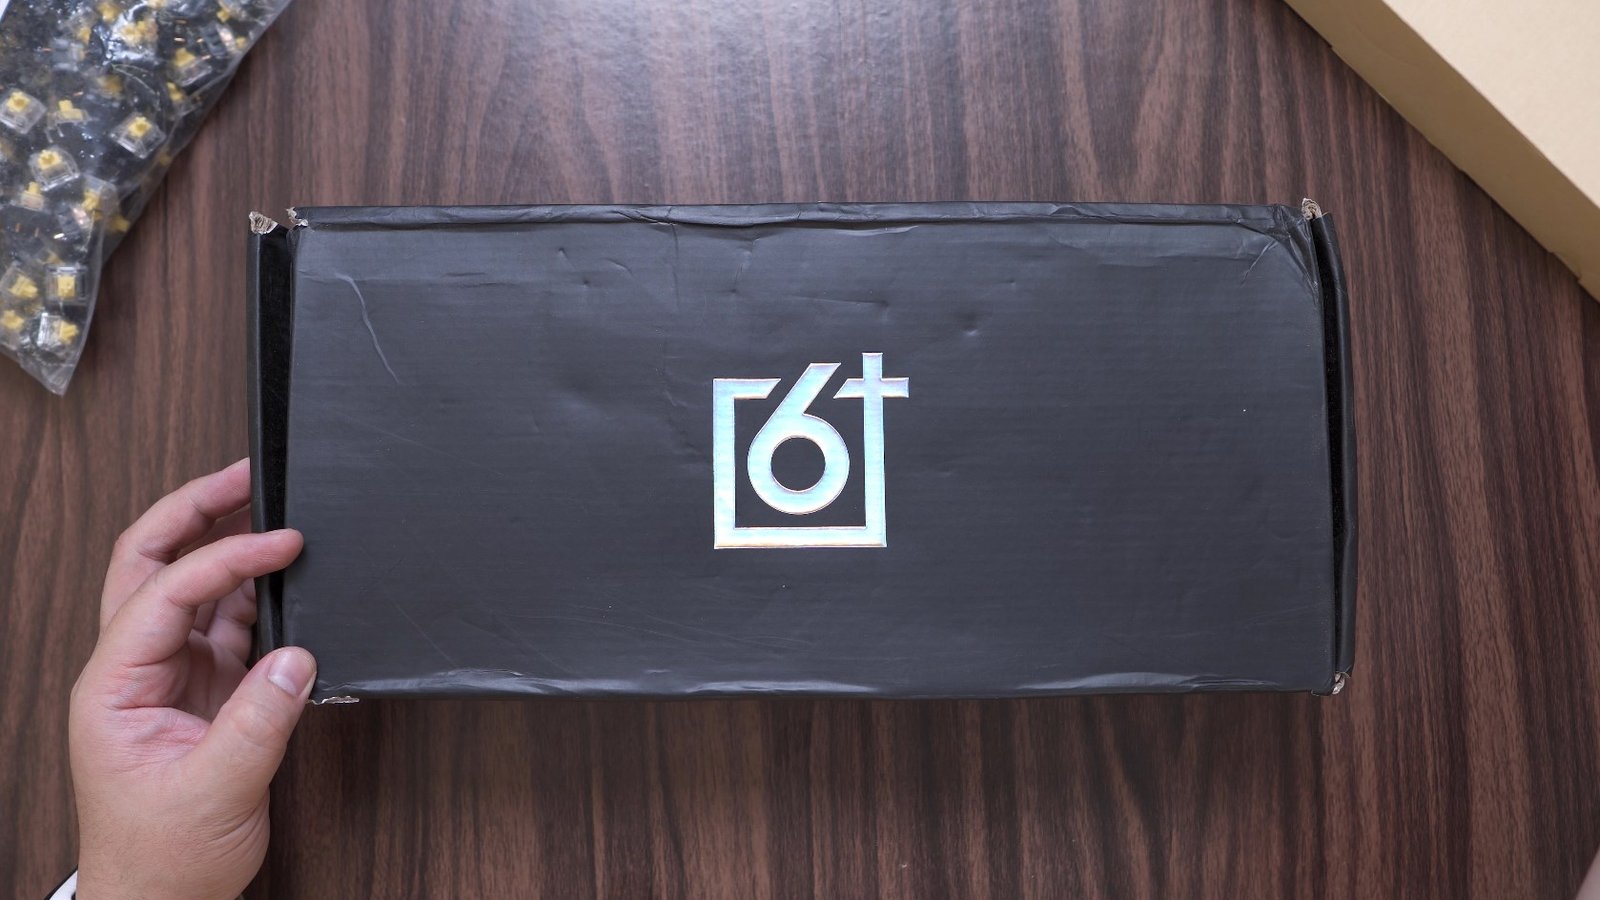
Alright, so let’s unbox all of these first, let’s start off with the Geek GK61. The packaging is pretty straightforward, just a black box with the Geek logo at the center.
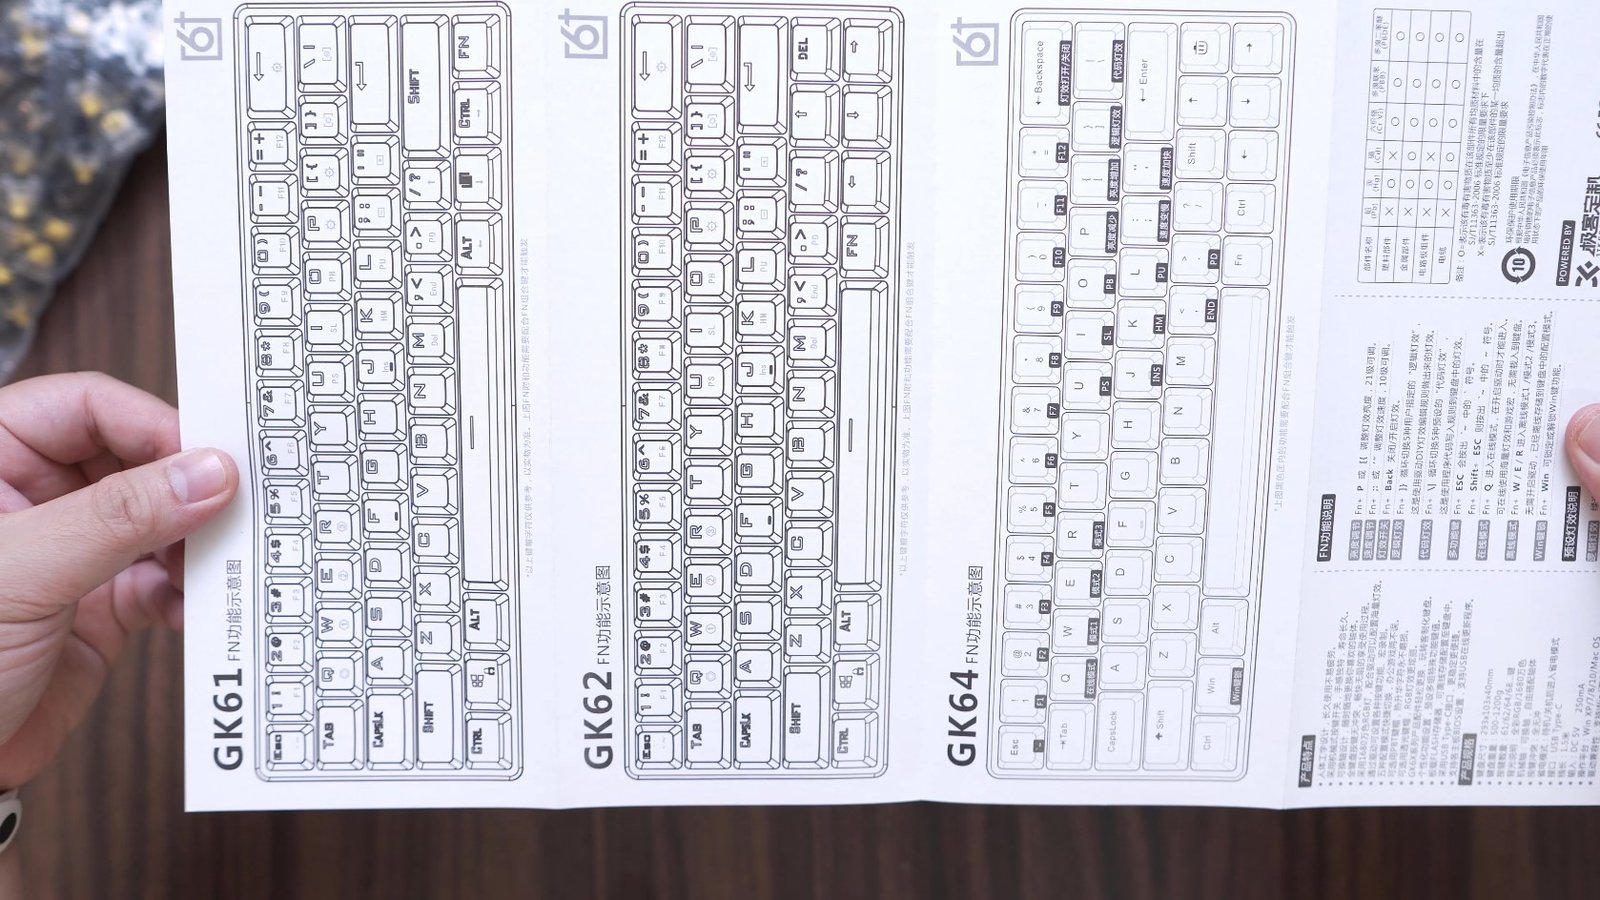
Inside the box, the first thing you’ll notice is the universal manual, so this is also applicable to other models like the GK62 and GK64. It is written in both English and Chinese.
Aside from that, we also have a nice braided and gold plated USB Type C cable right here with a Velcro strap.

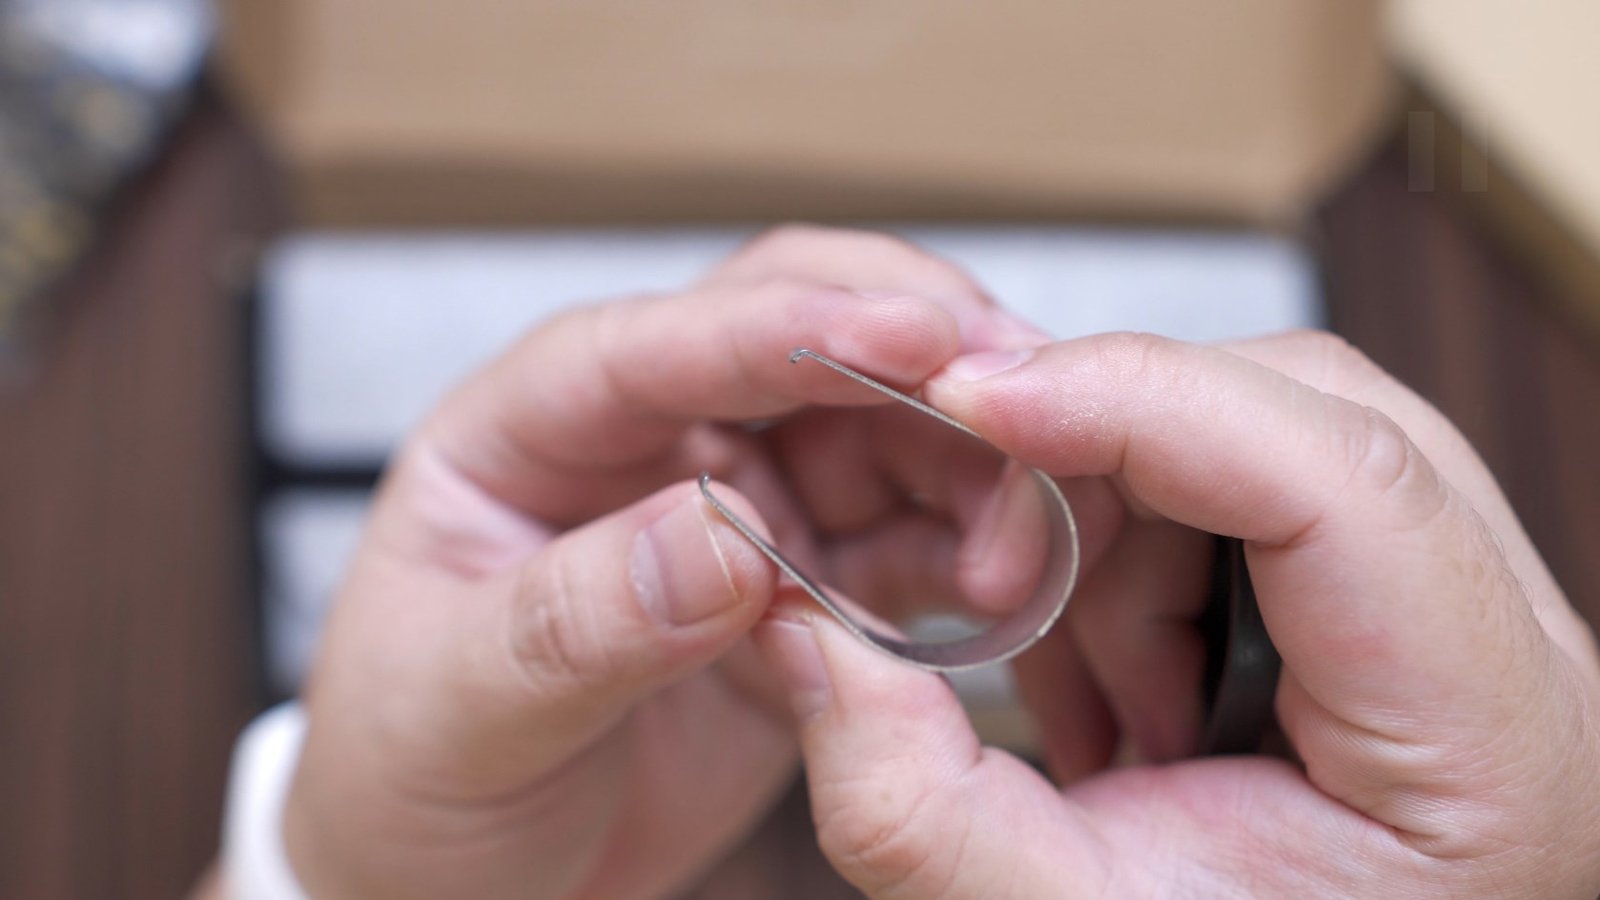
And then we have a generic switch puller and a plastic keycap puller right here.

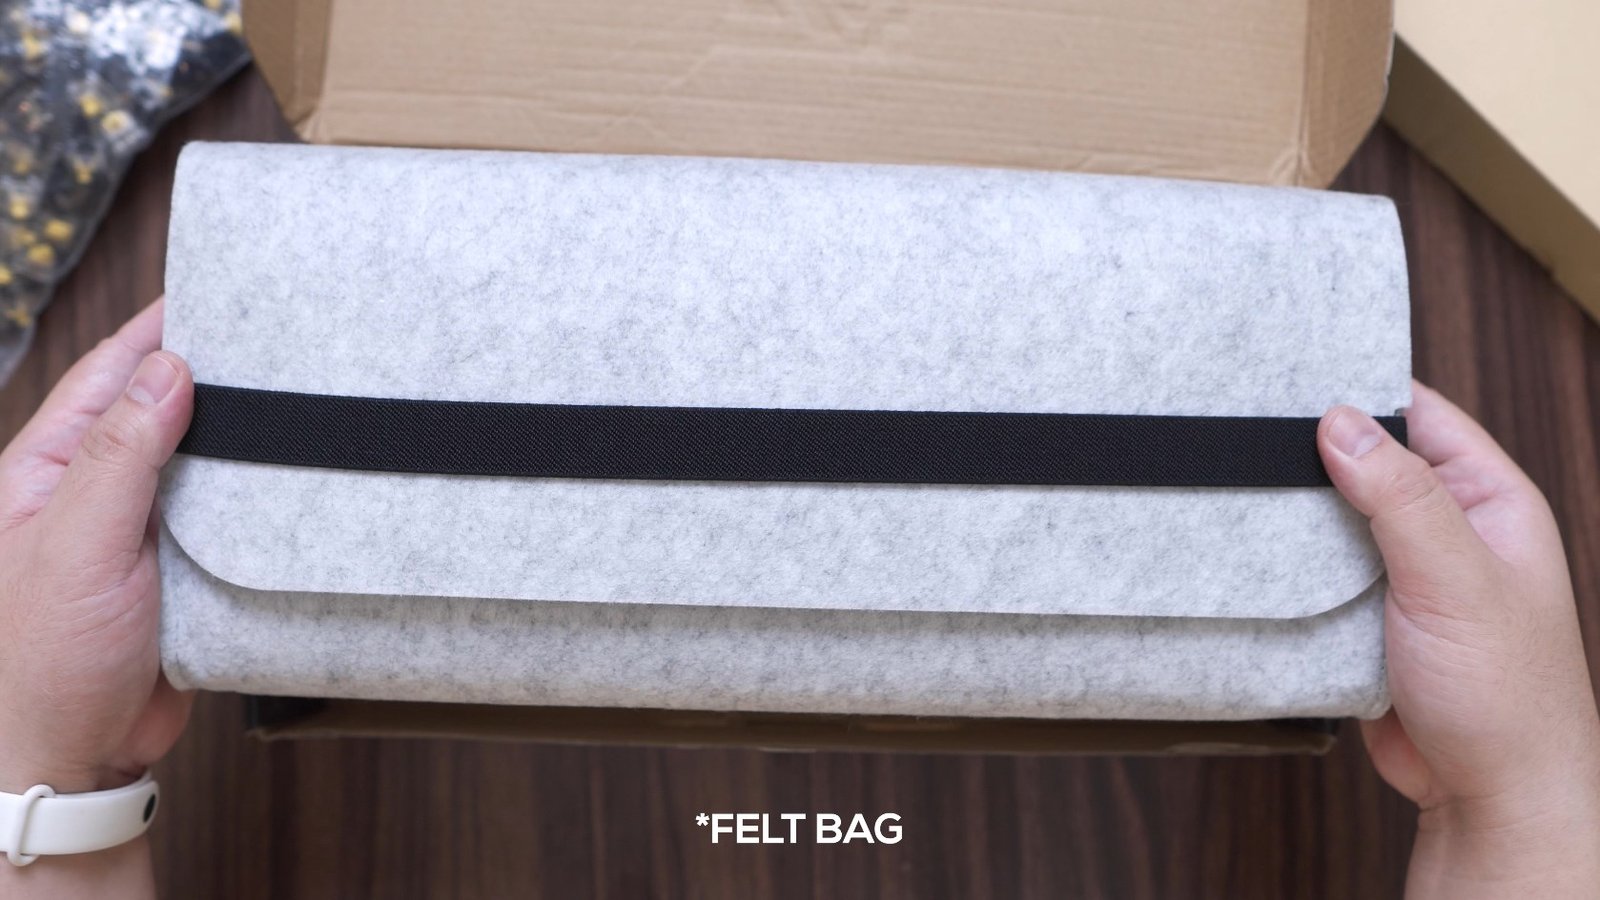
The good thing about this is that the keyboard comes inside a nice felt bag so it is well protected and since this is relatively small, you can easily bring this anywhere with you as your personal custom keyboard.
And not only that, it is also protected with a plastic cover.

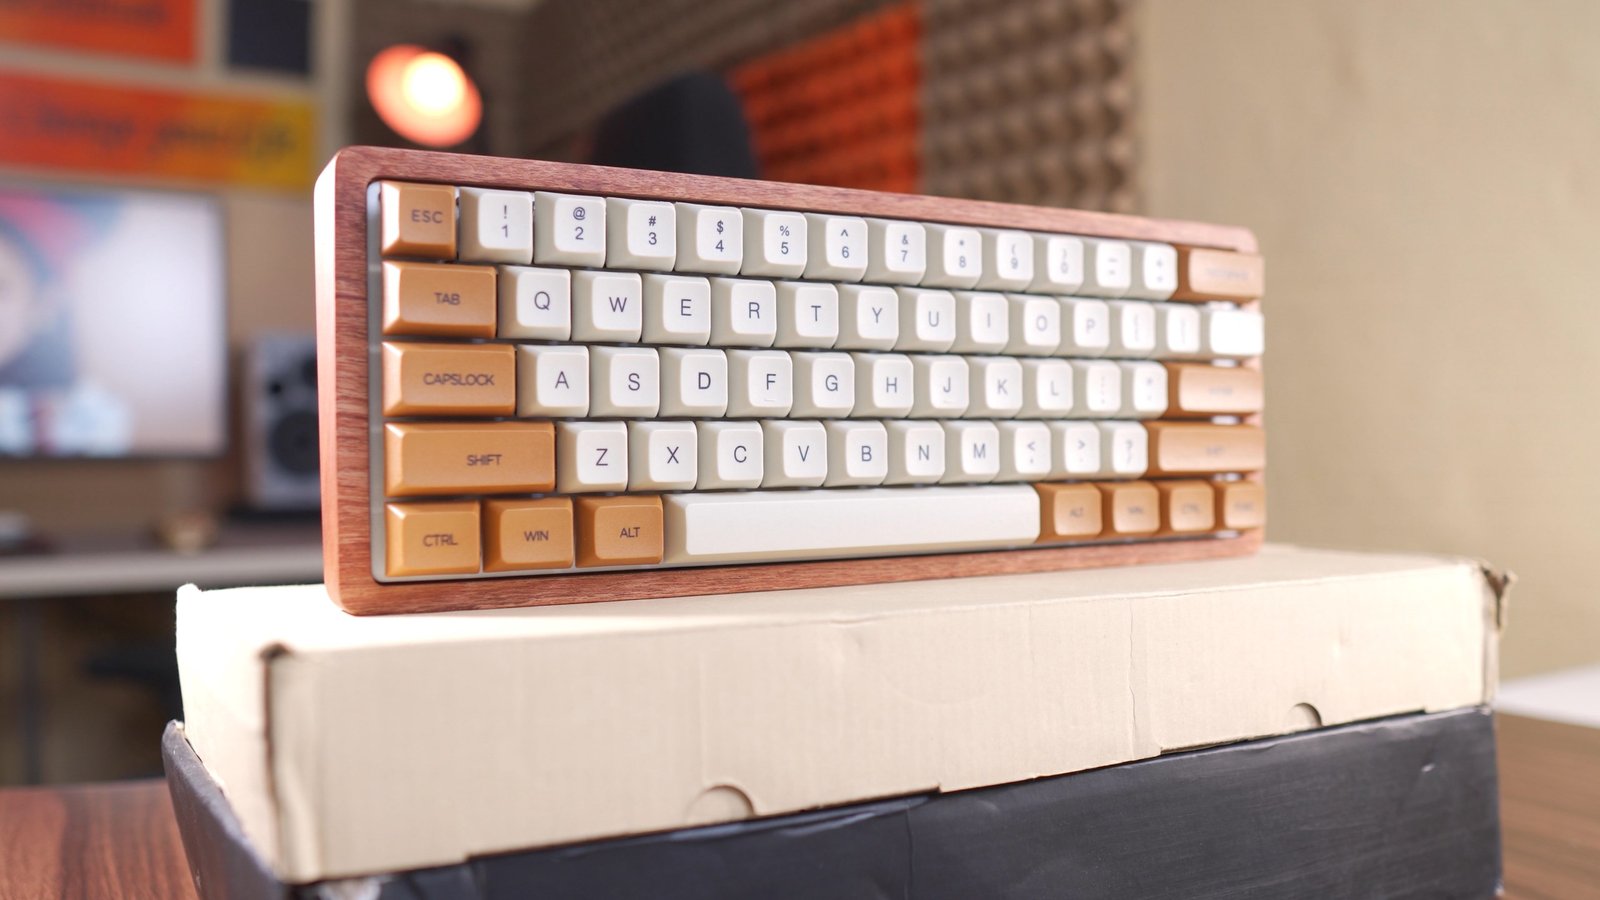
OK, so the reason why I picked this particular barebones GK61 is like I said, personal preference. I like things made from wood and this fits right in, so yeah, like I said, with a custom keyboard, you can pick a particular component that fits perfectly with your personal preference.
Design, Construction, and Parts Overview
At first look and touch, it looks really good with a decent amount of weight to it, and of course, with wooden construction, it is super solid without any flex on the body.
And as you can see here, it has a nice white backplate that looks really good with the wooden material.

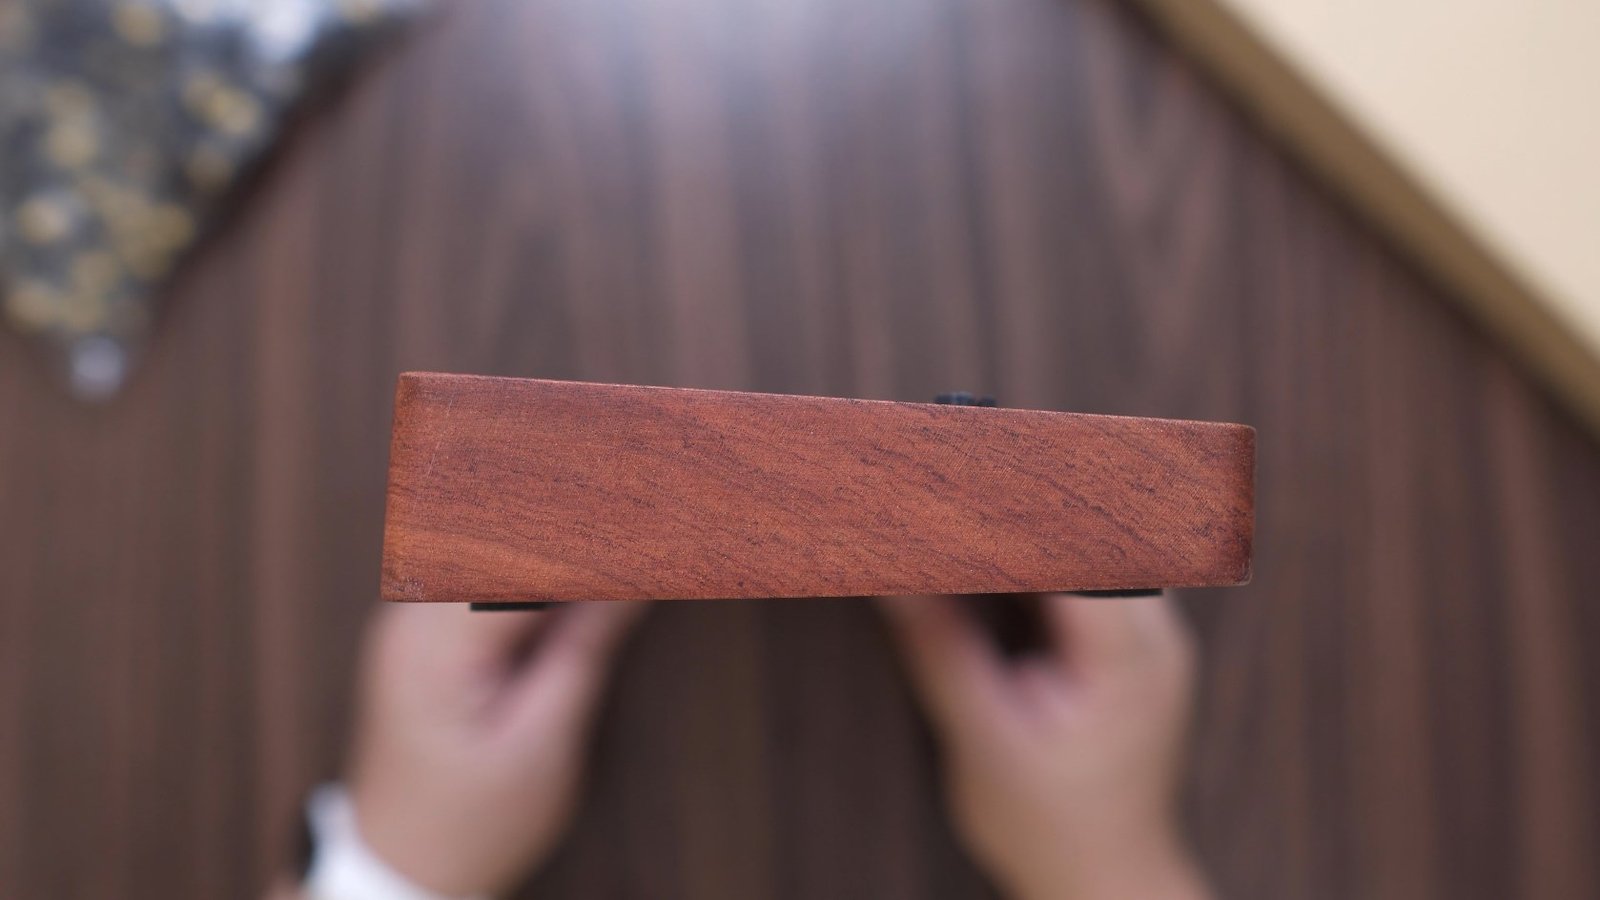
Flipping it on the front side, we have a better view of the wood patterns and the thickness of the bottom housing.

Flipping it on its side, we can see that the bottom housing is a little bit angled
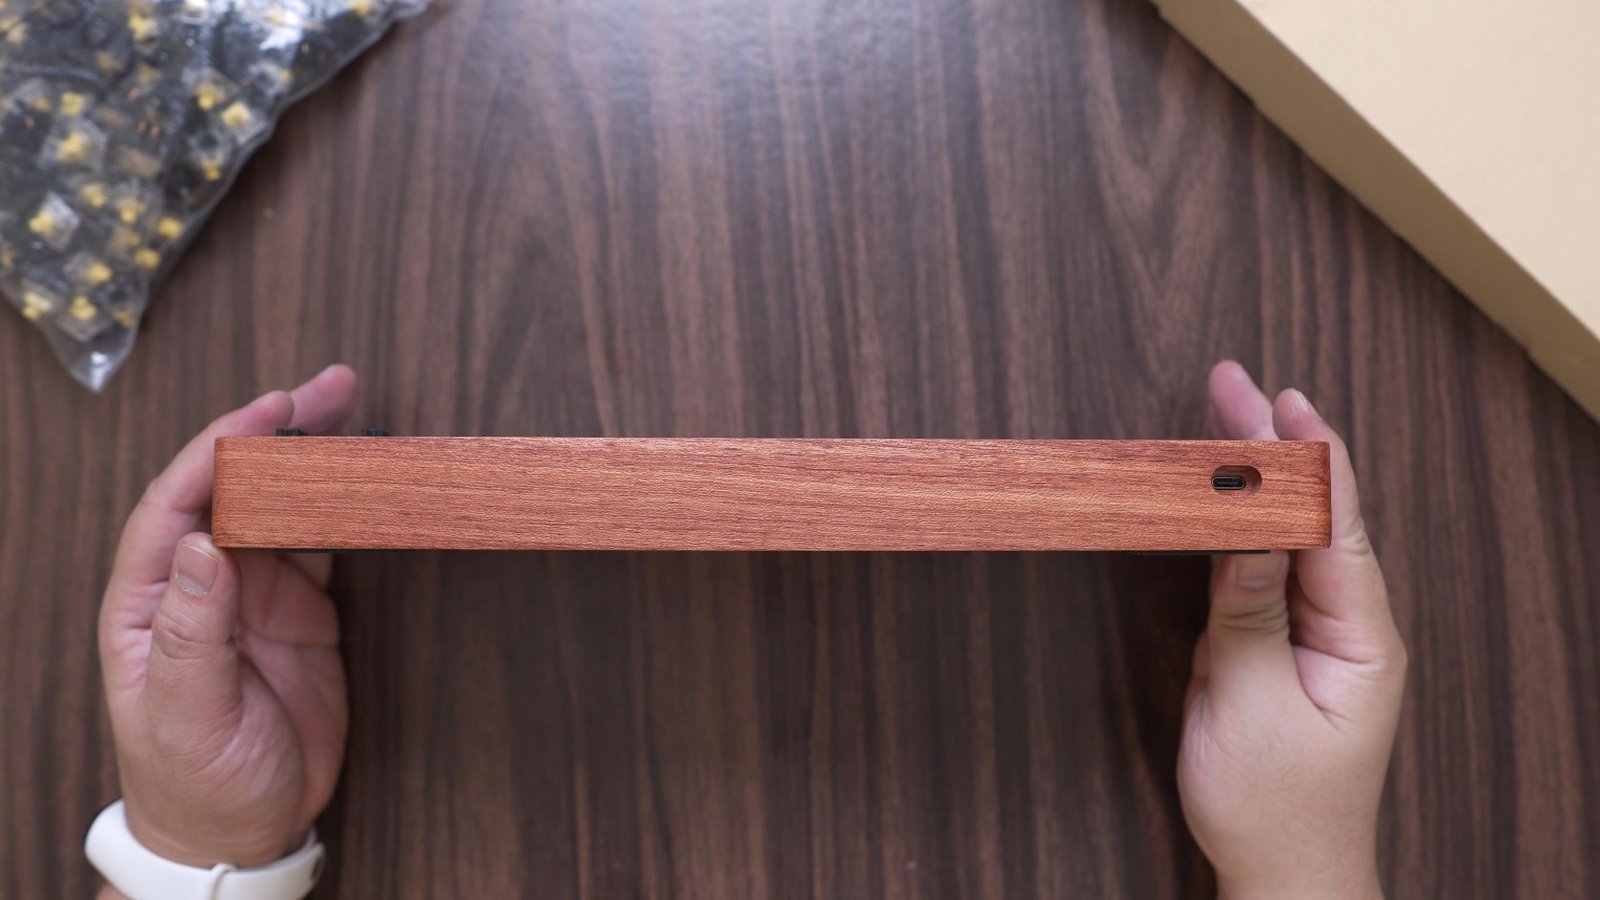
And turning it on the backside we have the recessed USB Type C port on the left side and as per my testing, it fits a wide variety of USB Type C plug.
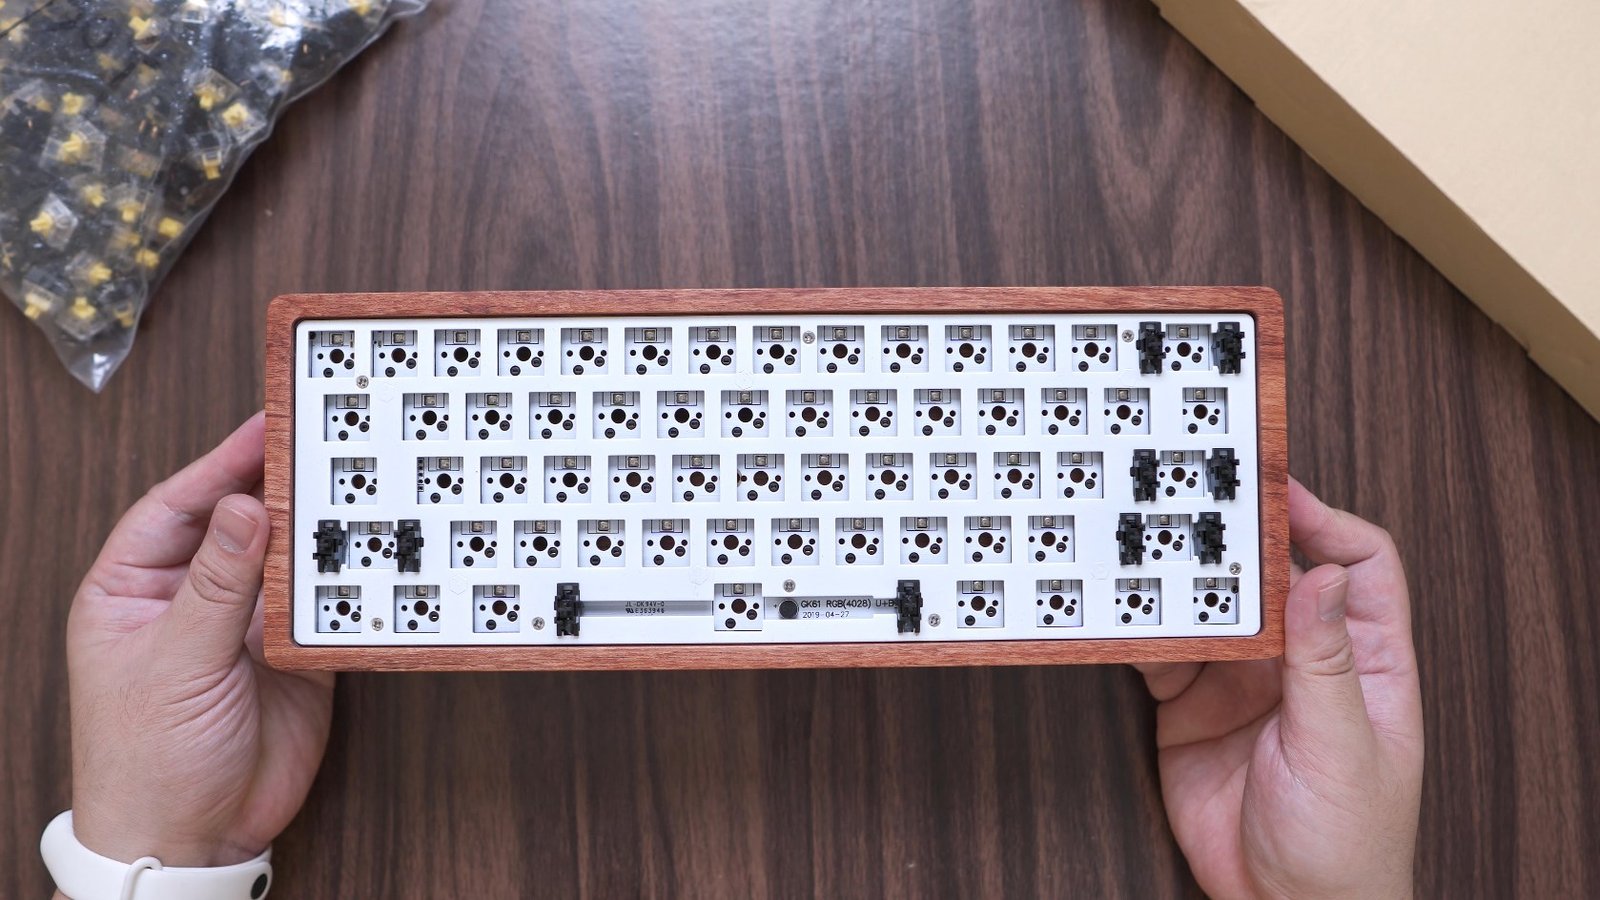
Turning it all over at the bottom, we have 4 rubber feet and as expected with wooden housing and a 60% form factor, we don’t have an adjustable stand. This is usually the case for 60% keyboards so this is no surprise. So we have all the things we need here, we have the backplate, the PCB, the housing and the stabilizers.

Hot-swappable Boards
So again this is the Geek GK61 hot-swappable board version, and before we move on, let me share with you some of the most common budget hot-swappable boards that you can get out in the market right now, just to help you find one.
Aside from the Geek GK61, we also have the GK64 and GK66 for a 60% form factor.
And then we have the Rakk Lam-Ang Pro,

And the Tecware Phantom Elite for Ten Key Less form factor.
As for full size, you can check out the Tecware Phantom Elite Full-size version.

These are all using universal socket which means you can pretty much use any Cherry MX style switches.
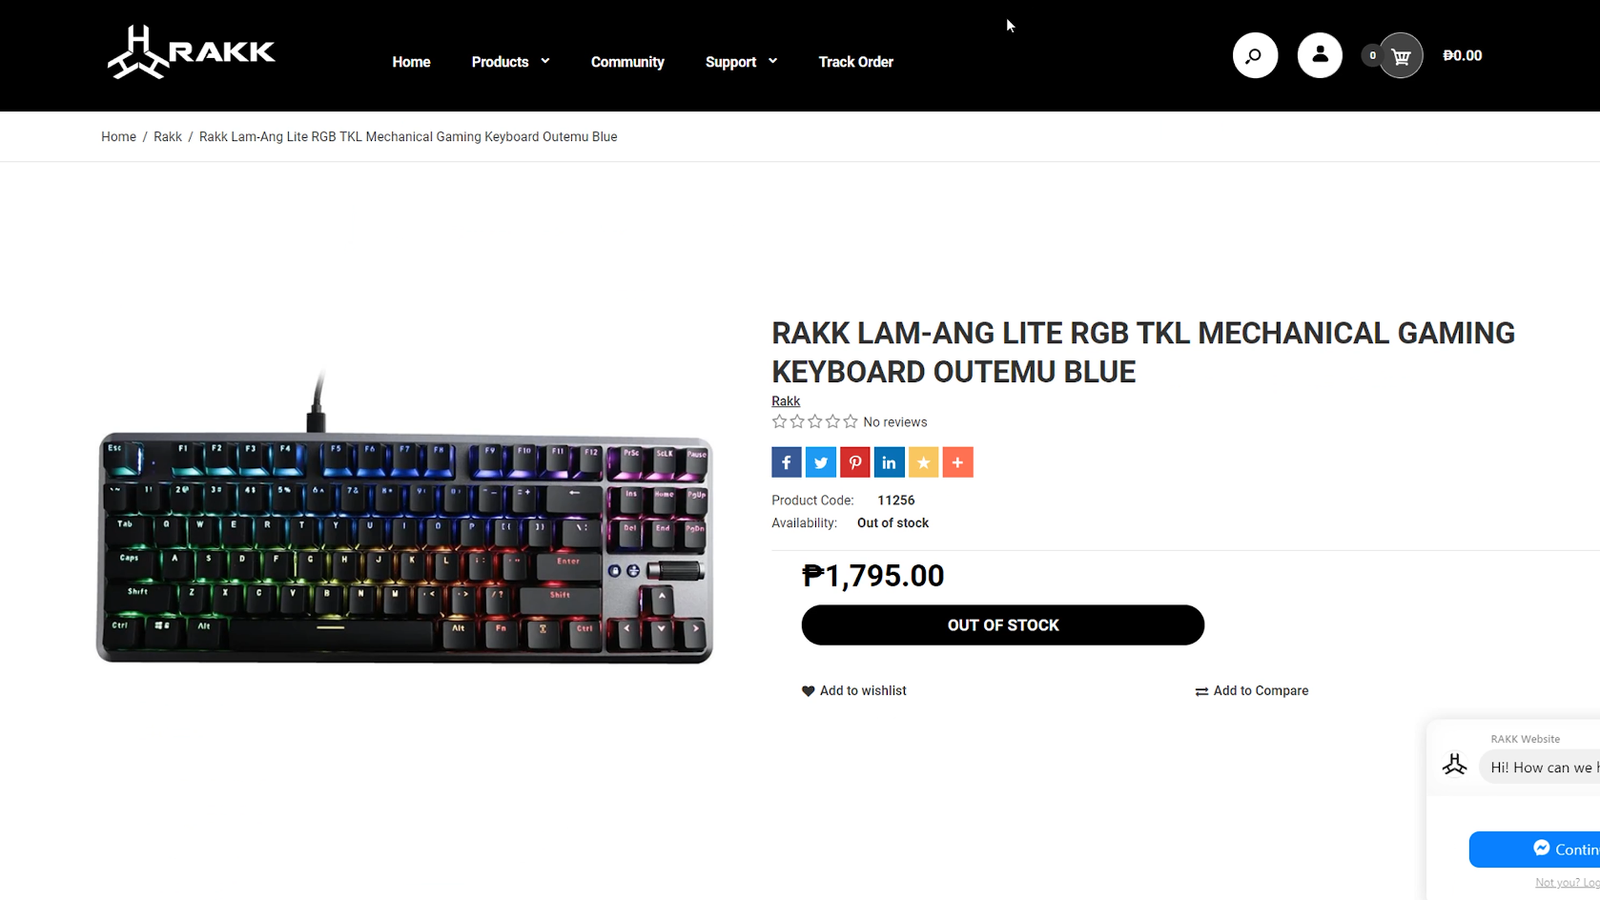
Now, there are other hot-swappable boards in the budget category like the Rakk Lam-Ang lite,
Rakk Ilis,

Rakk Tandus,

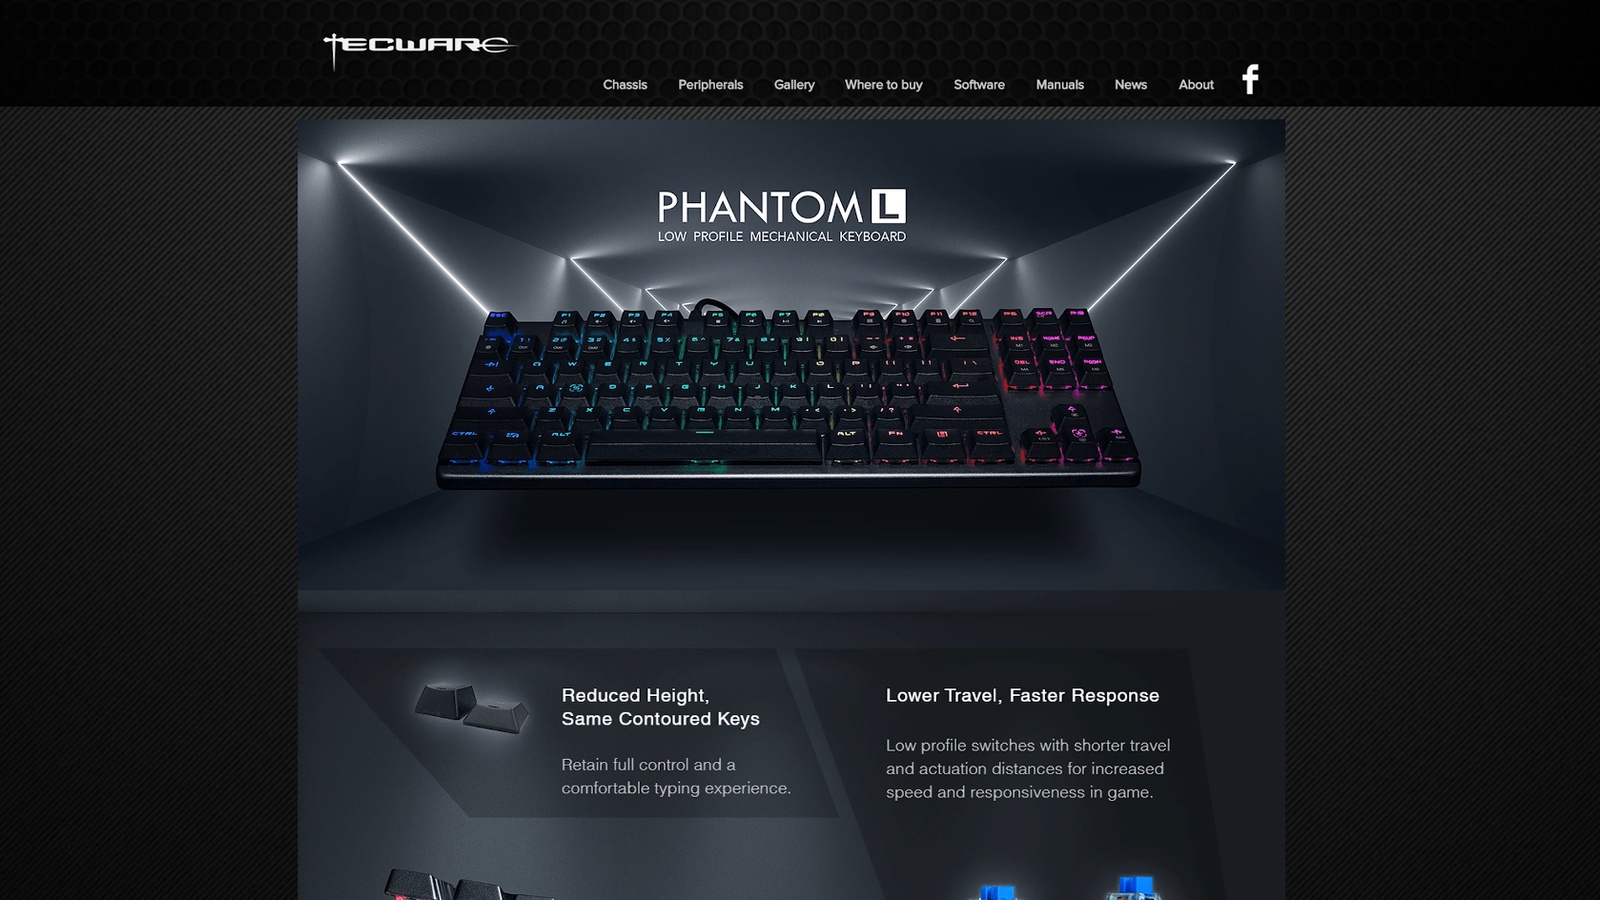
Tecware Phantom L,
And Tecware Spectre, but they are all using just Outemu hot-swap board and are only limited to Outemu switches.

Build Proper
Keycaps – Mars Colony
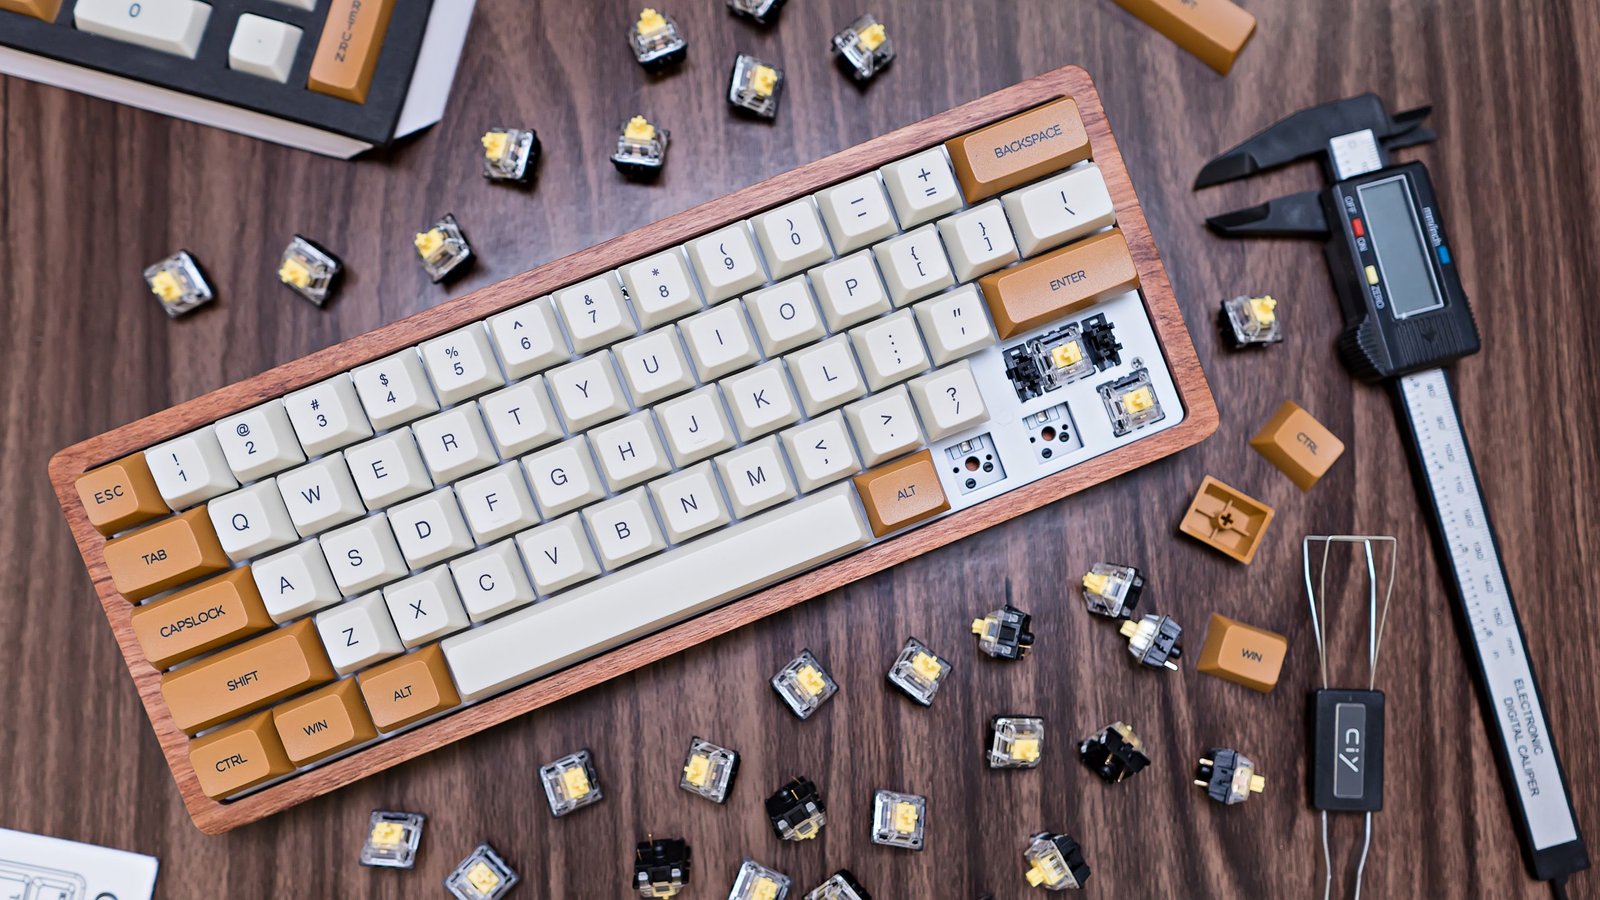
Going back to our build, aside from the barebones keyboard, we need a set of keycaps again depending on your preference, in our case since we have a wooden keyboard. I chose the Mars Colony set of keycaps which should perfectly match the aesthetics of our barebones. So it has blue, brown, and I guess cream-colored keycaps.

This is actually a full set with 165 keys, and the reason why I chose this other than the theme is that I want to show you that there are set of keycaps out there that has a ton of different sizes of modifiers which is perfect for custom builds especially for builds that have an unconventional layout. So essentially, you have everything you need here. And usually, the most common set of keycaps is just around the standard 104 keys.
As for this Mars Colony set of keycaps, it features dye-sublimated legends and features an XDA profile. If you want to learn more about those features, you can check out my review of the Moon Landing 165 set XDA profile keycaps.
Now, for a budget alternative since this extensive set right here is quite expensive, you can just grab some generic Doubleshot PBT keycaps which I also did a review here.
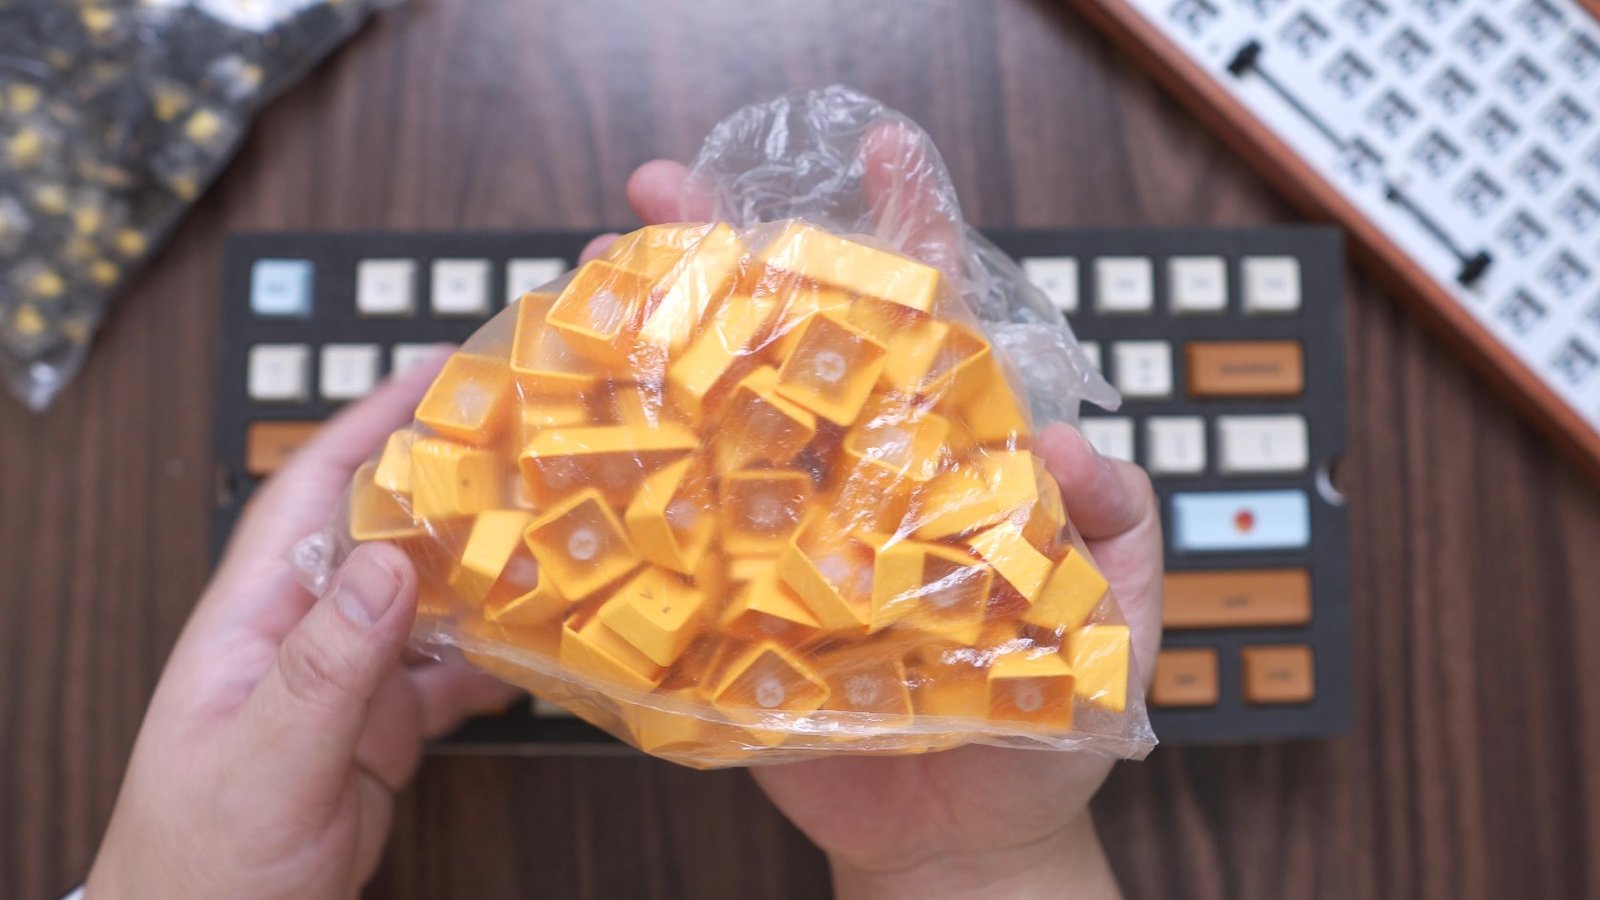
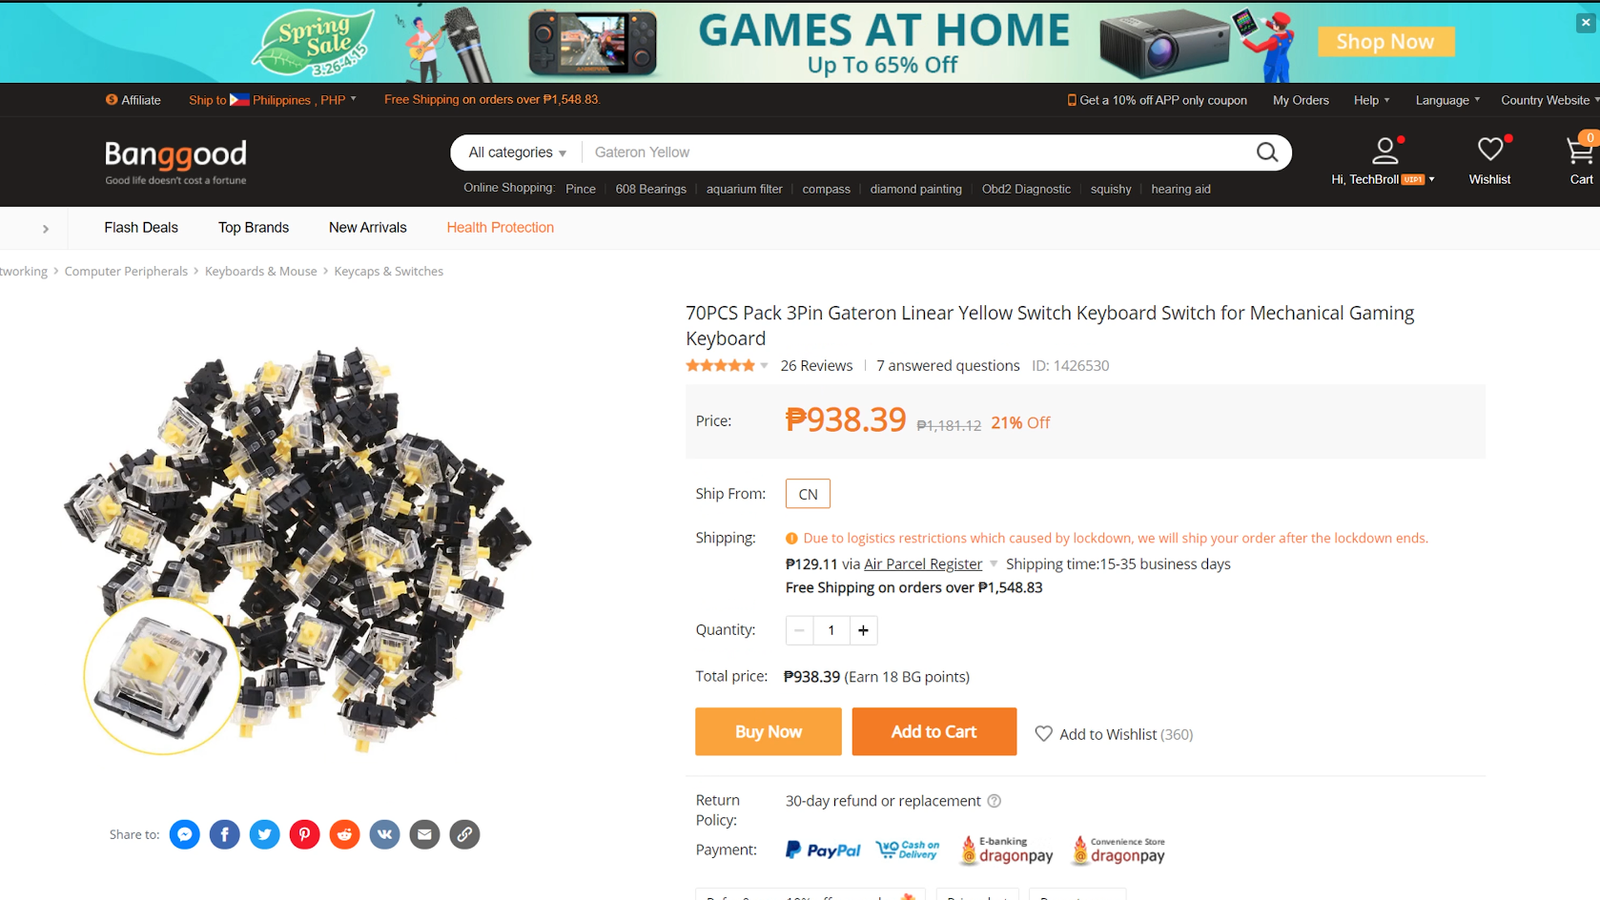
And lastly, of course, we need a set of switches and what we have here is the Gateron Yellow switches.

By the way, all of the things mentioned here you can get from Banggood.com, you can check out their website and look for different barebones, PCBs, keycaps, switches, and other components of a keyboard for your own build.

Switches – Gateron Yellow
Now, the reason why I chose Gateron Yellow is that I really like the smooth travel of Gateron switches and I like the relatively light actuation force of the Gateron Yellow in specific. So this is the SMD version with black bottom housing and clear top housing for the illumination to pass through but you can also get this in other versions such as milky and ink but that is a little bit more advanced for most beginners and a topic for another day.

Now, before we build this, I think it is important for me to show you how this barebone is built so that you can have a better understanding on how a keyboard is constructed should you choose to build your own from scratch like choosing a bottom housing, backplate, PCB and stabilizers.
Barebones Teardown
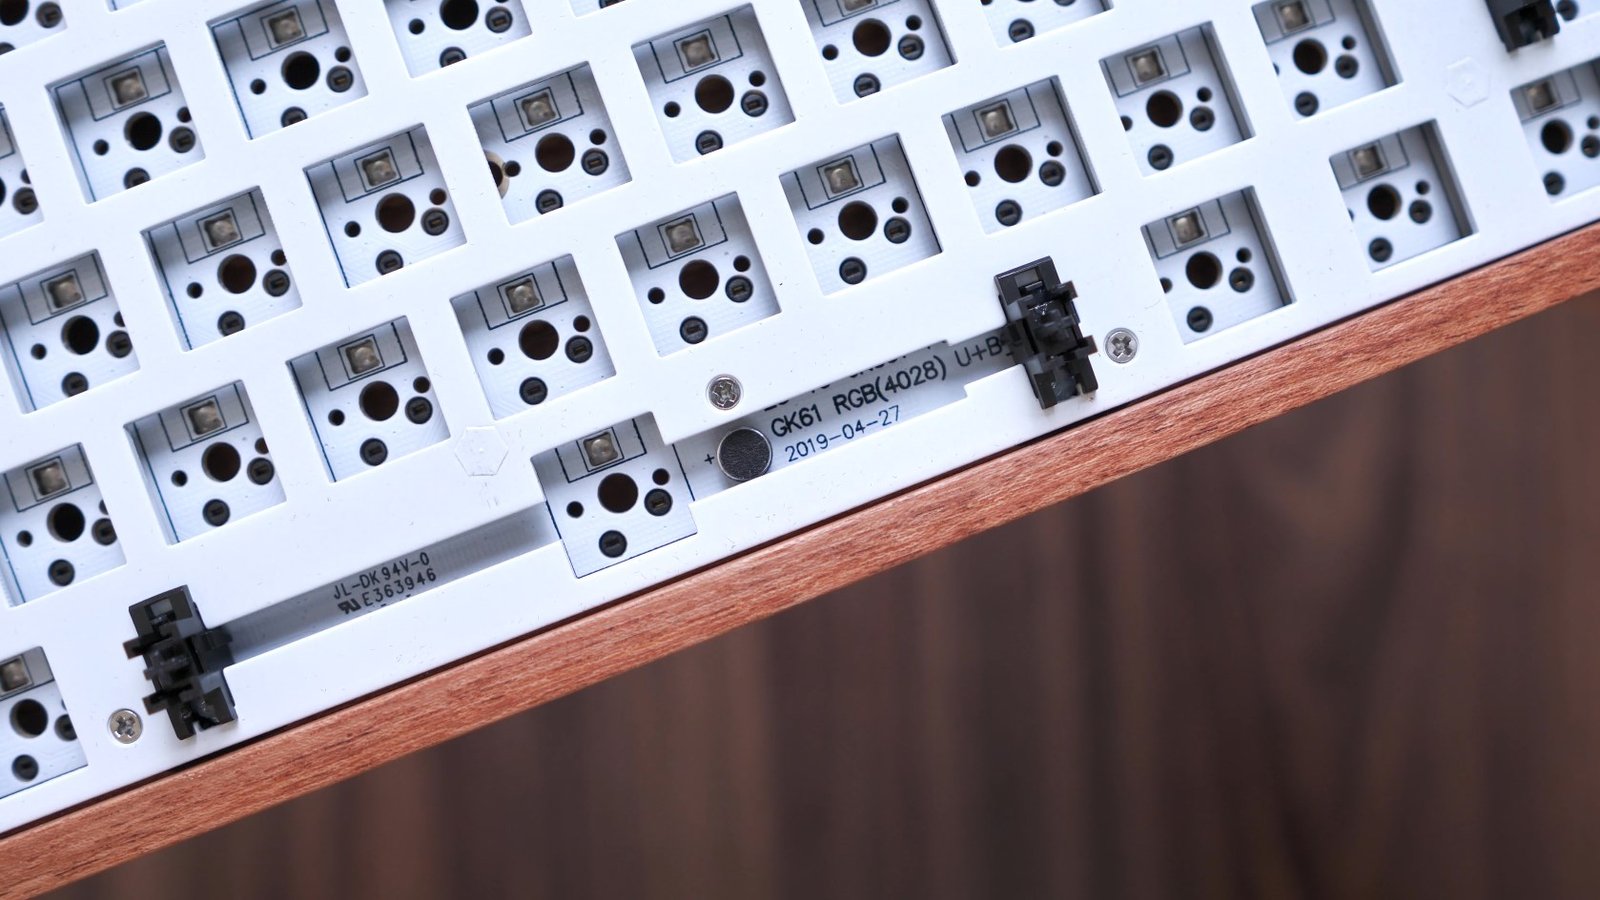
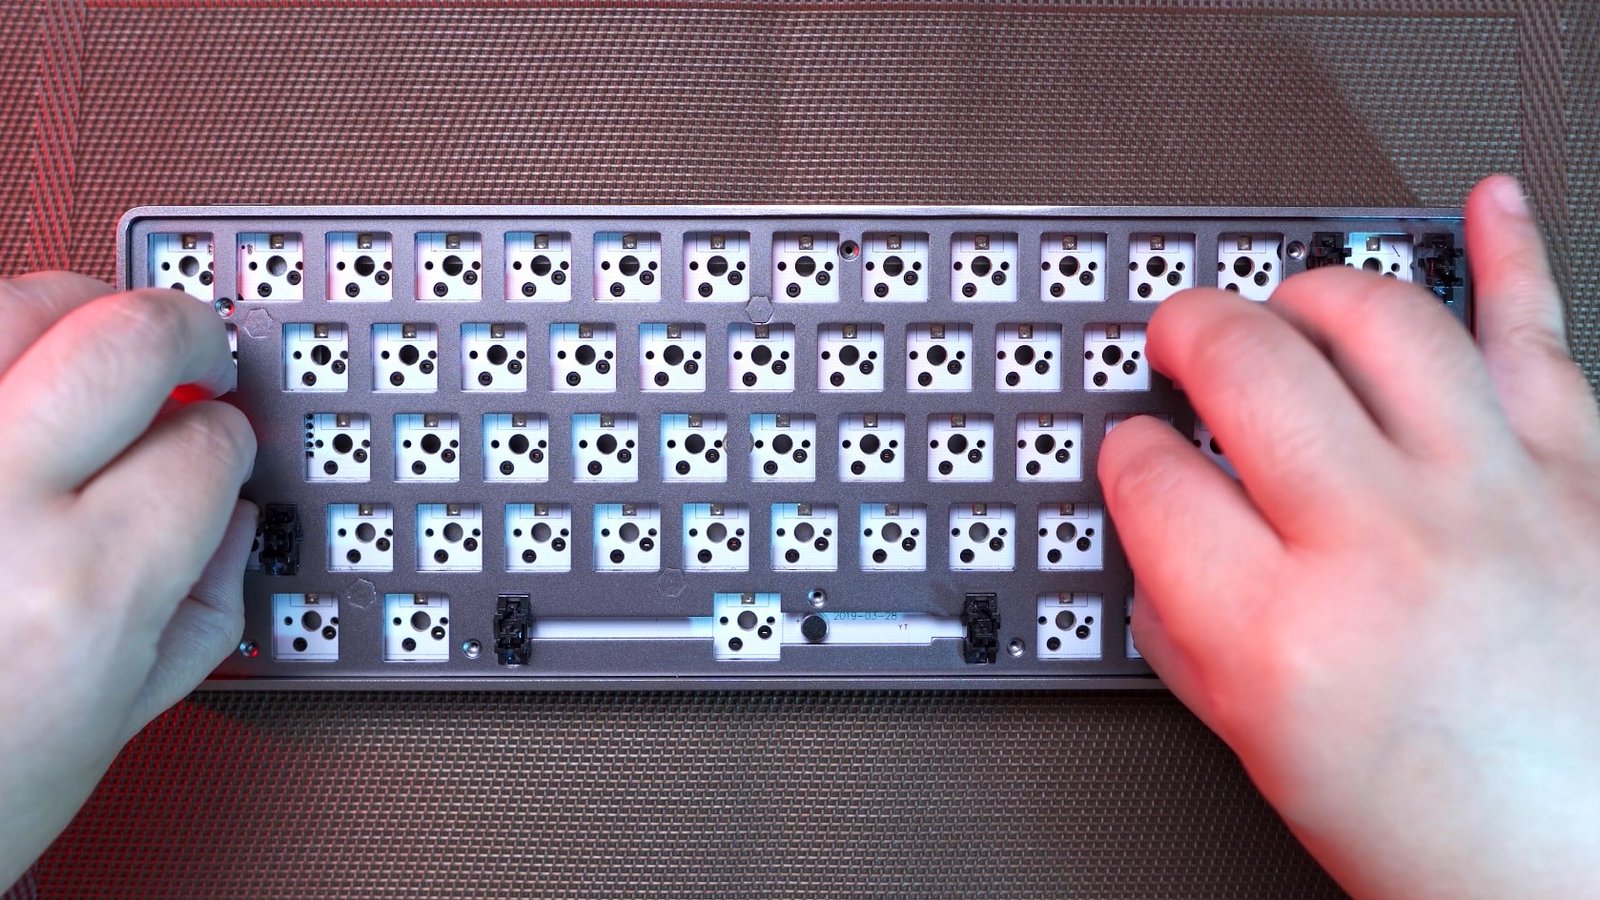
So after removing the screws, we can just simply pull the backplate out and as you can see, the PCB is screwed on the backplate itself.
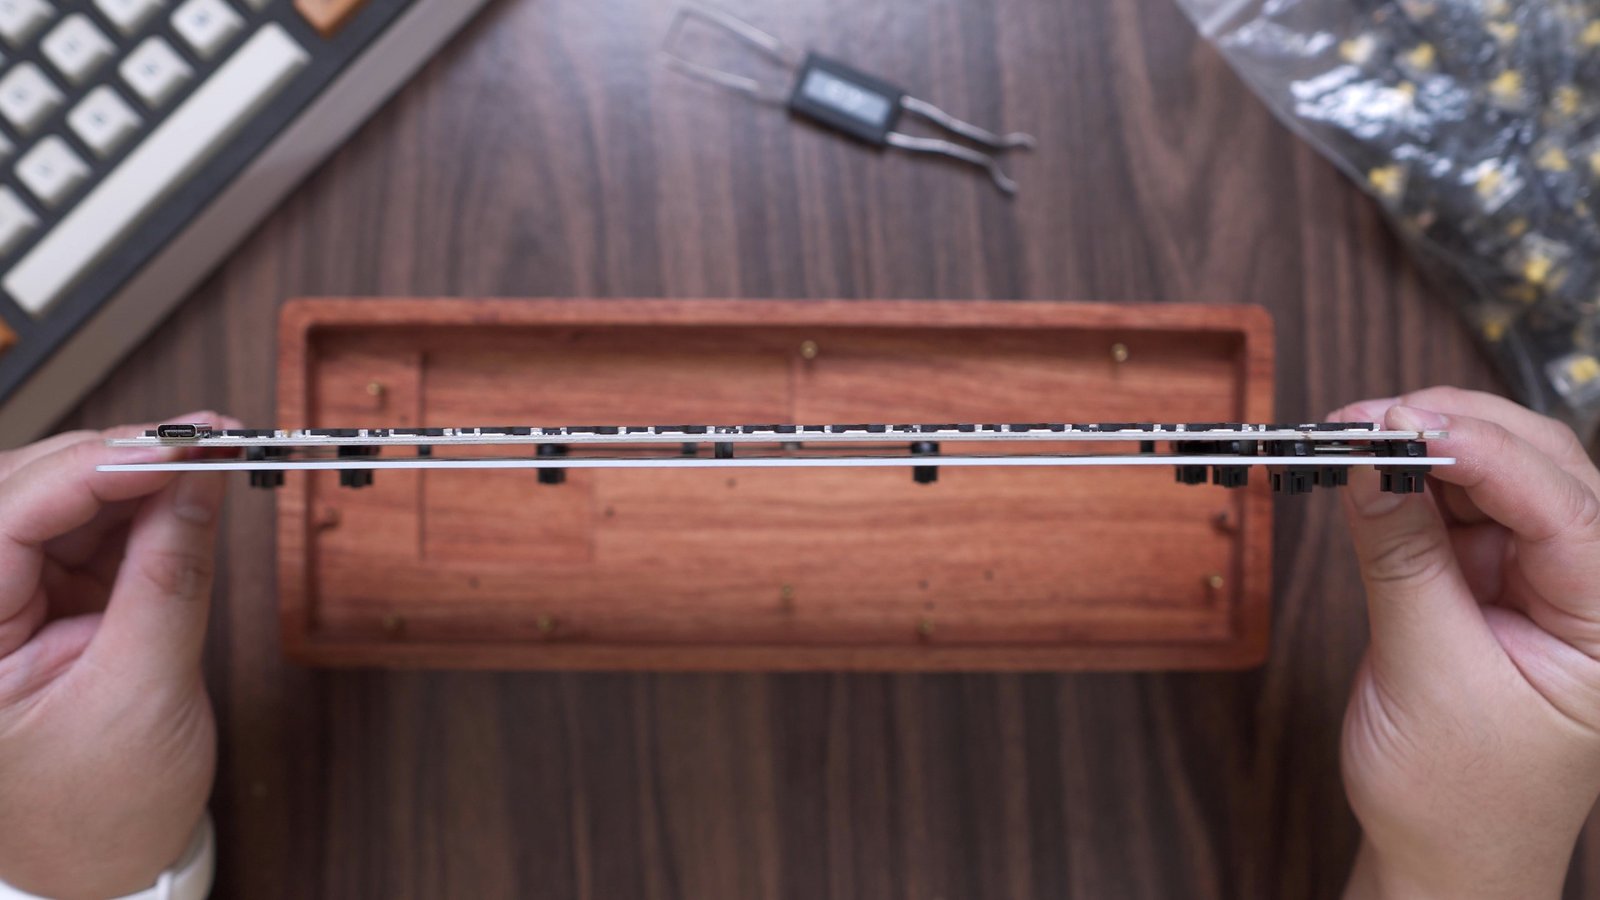
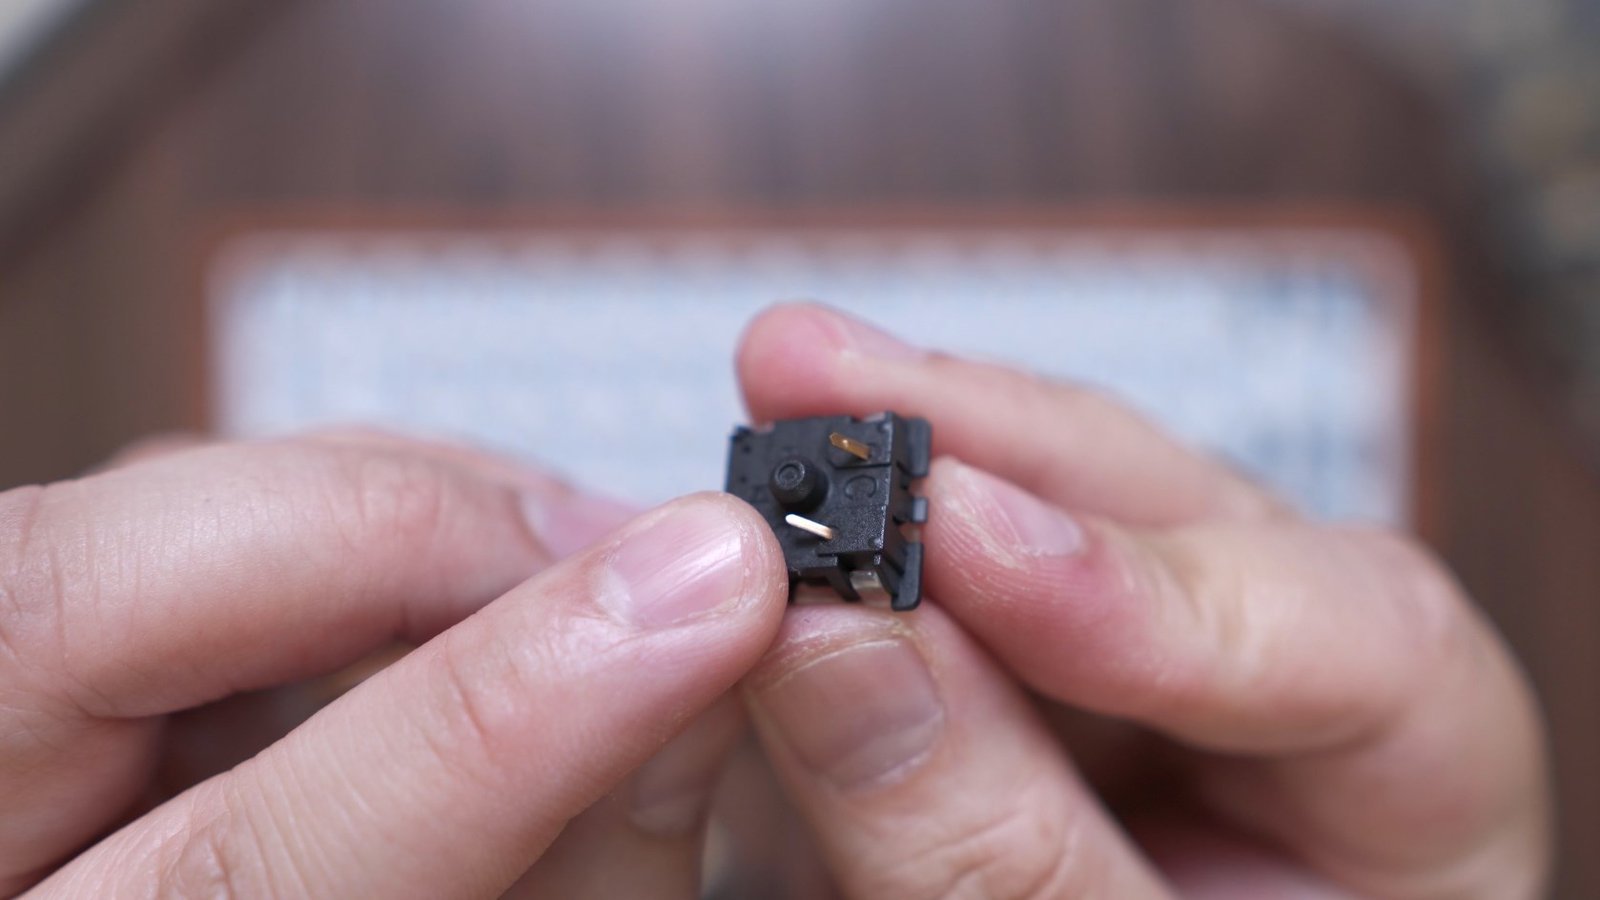
Looking at the back, we can see here that this board uses Gateron universal socket and like I said earlier, it is compatible with most Cherry MX style switches.
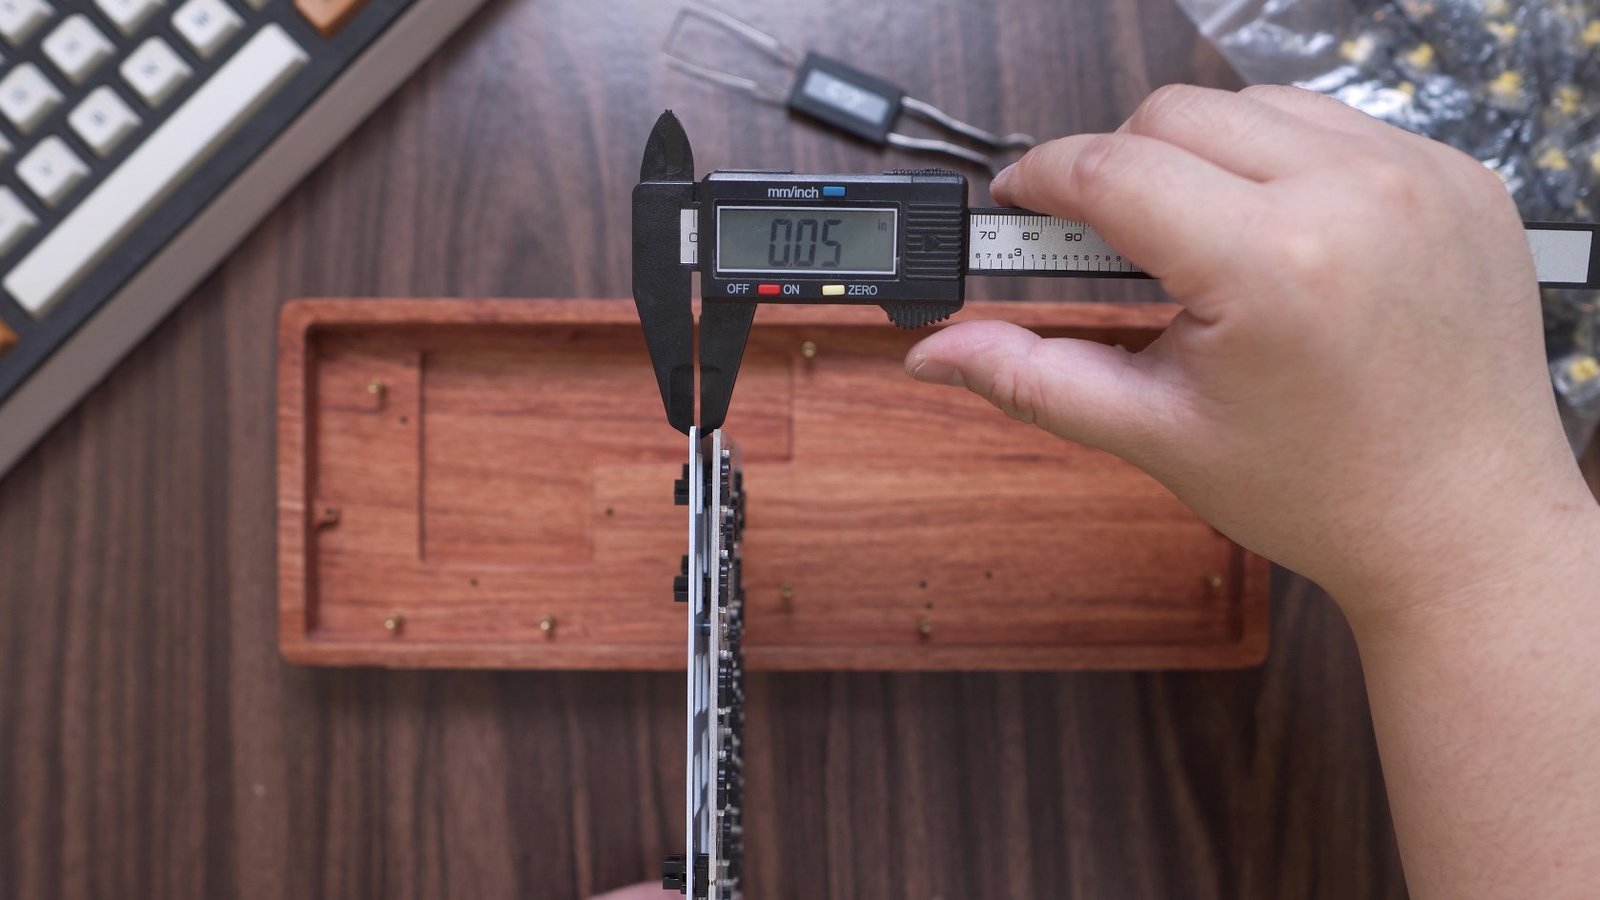
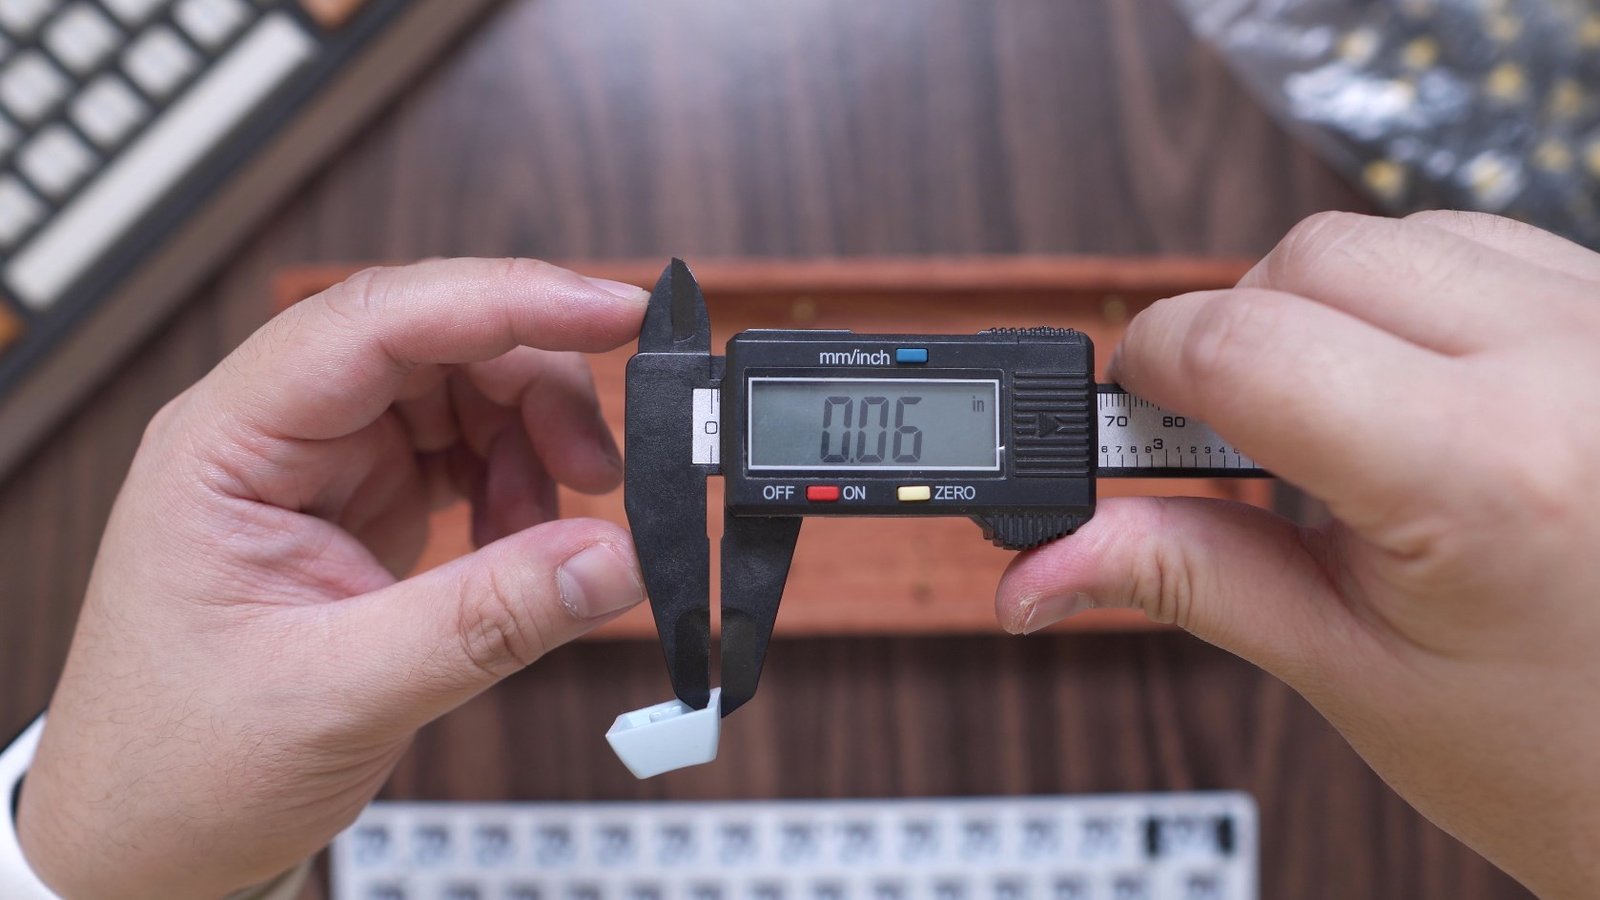
While we’re at it let’s measure the thickness of the backplate and PCB for those of you who are interested. The PCB has a thickness of around .06 inches or 1.mm,

While the backplate has a thickness of around 0.05 inches or 1.3 mm.
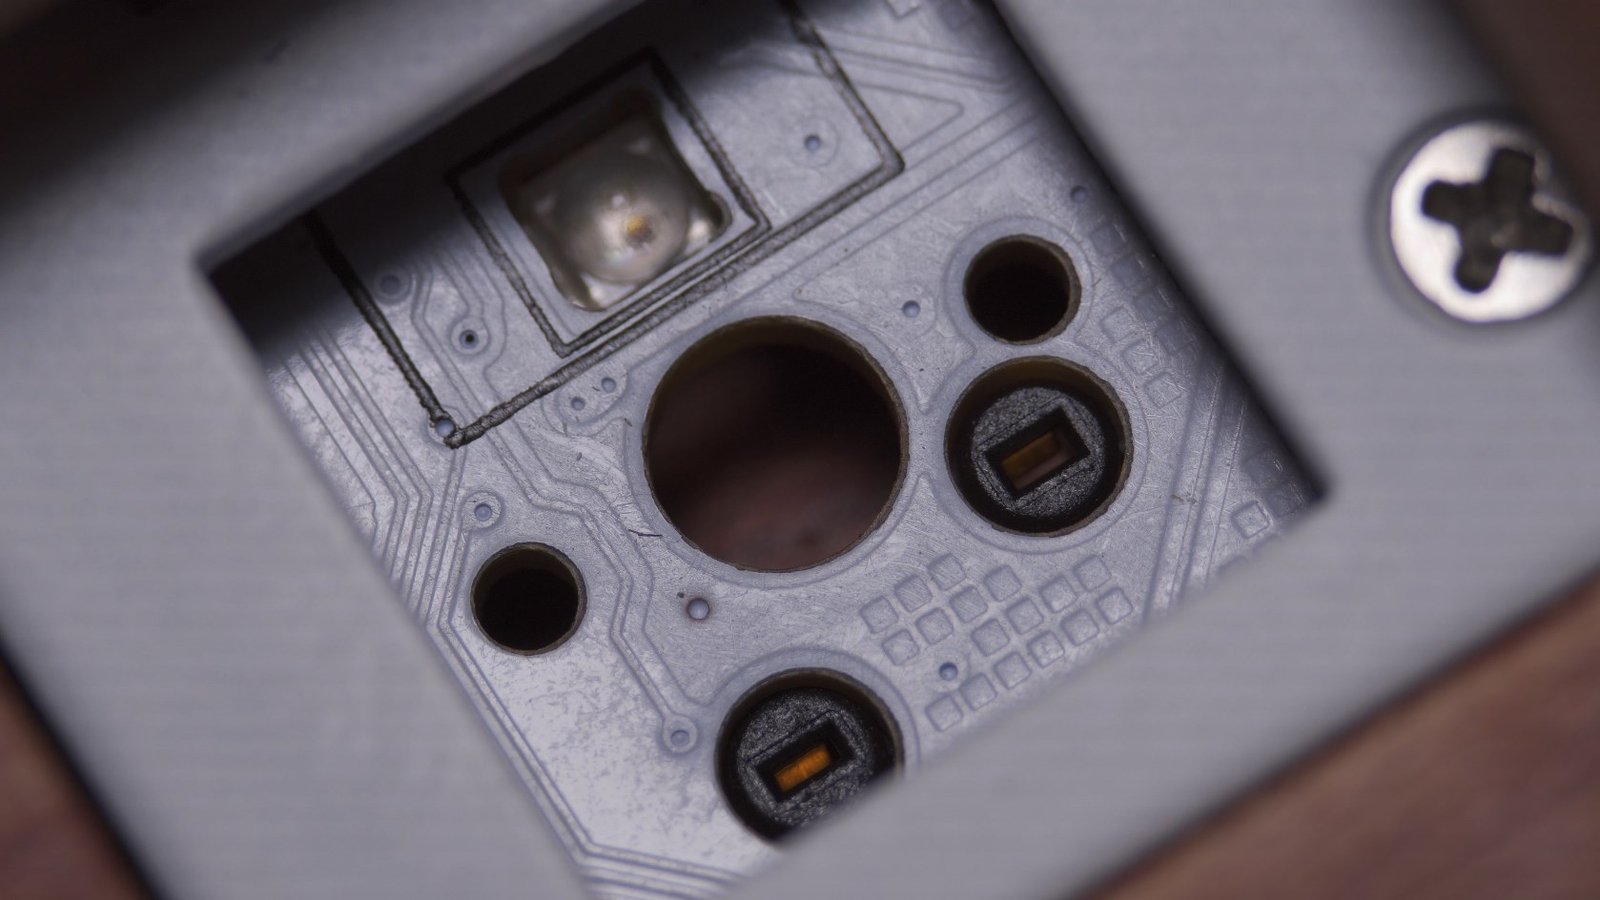
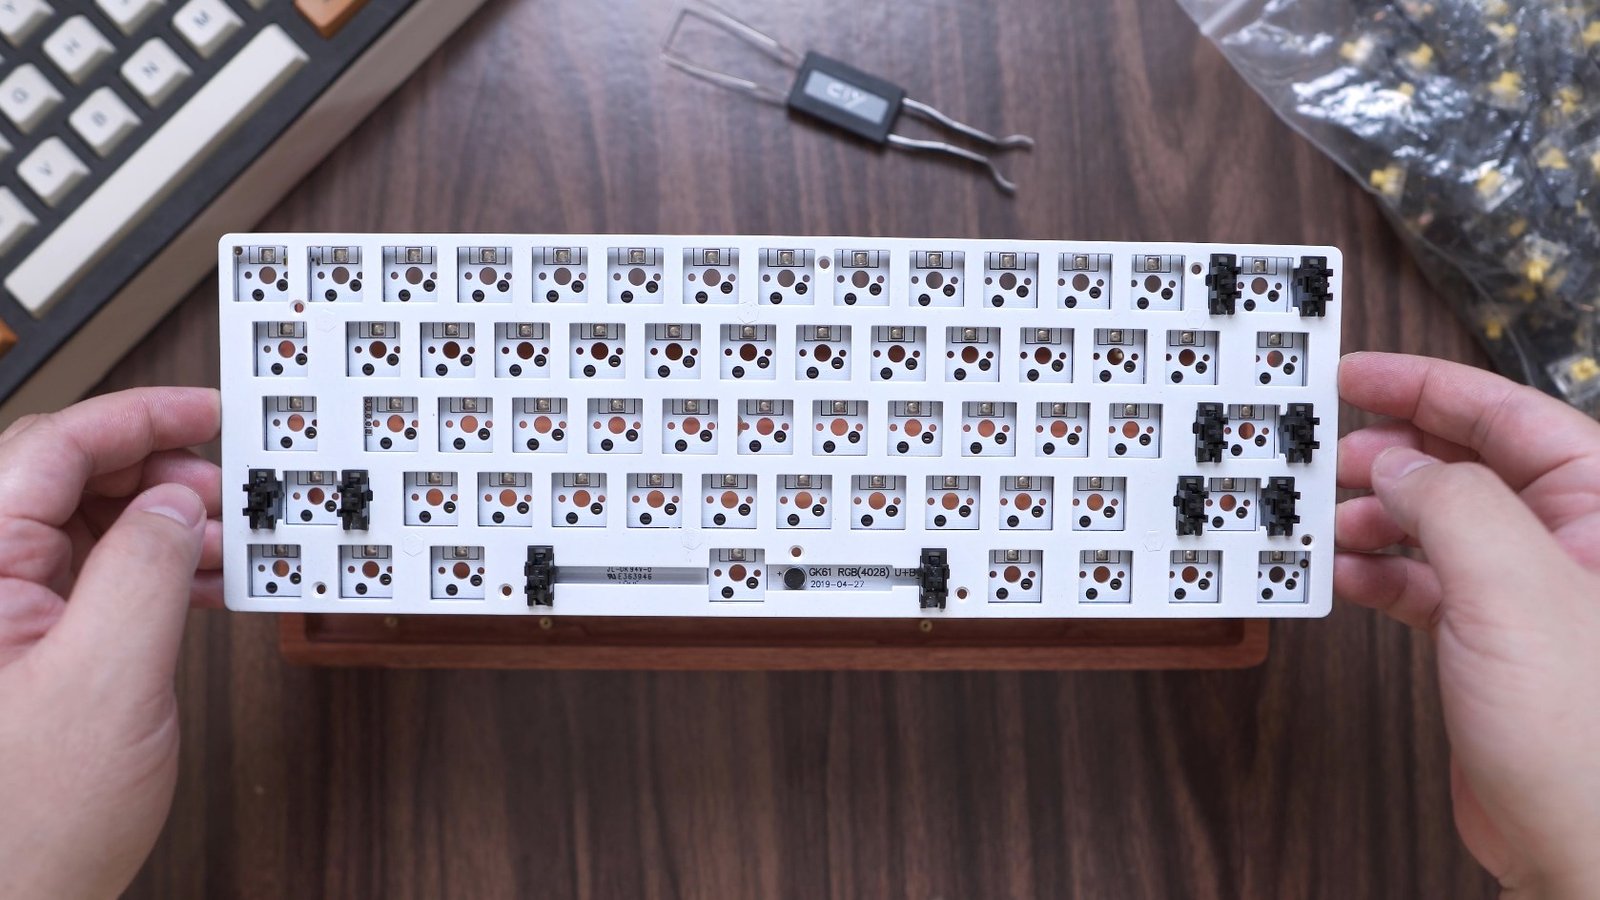
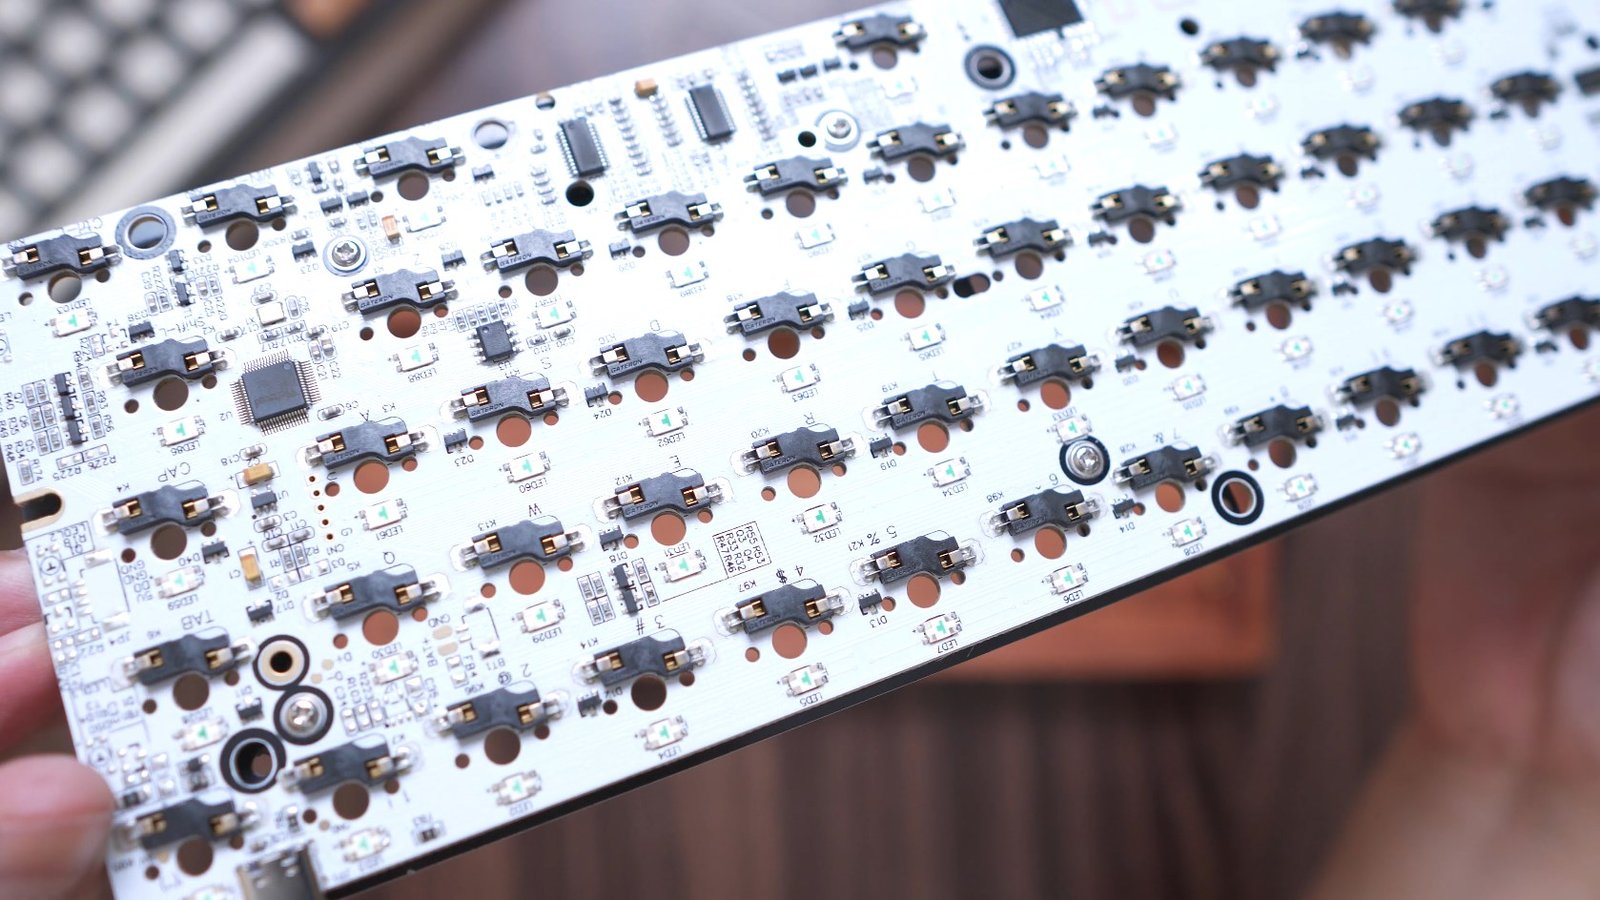
The socket itself consists of 2 sockets for the switch pins, 3 holes for the plastic pins for both PCB and Plate mount type switches, and the SMD or surface mounted LED.

For this particular board, we also have a physical microphone right here for the audio visualizer feature.

As for the wooden bottom housing, we have some nice brass standoffs,

A cutout probably for a battery for a wireless version,

And the cutout for the USB Type C port.

I can also see here other holes for the standoff so there’s a possibility that you can move it around for compatibility with other boards, but I am not 100% sure about that.

Before I forgot, the keycaps thickness, by the way, is around 0.06 to 0.07 inches or 1.5 to 1.8mm.

While we’re at it, let’s check out the weight of this barebones, so the wooden case alone weighs around 387g,

And the PCB and plate weigh around 260g for a total of 647g give or take.

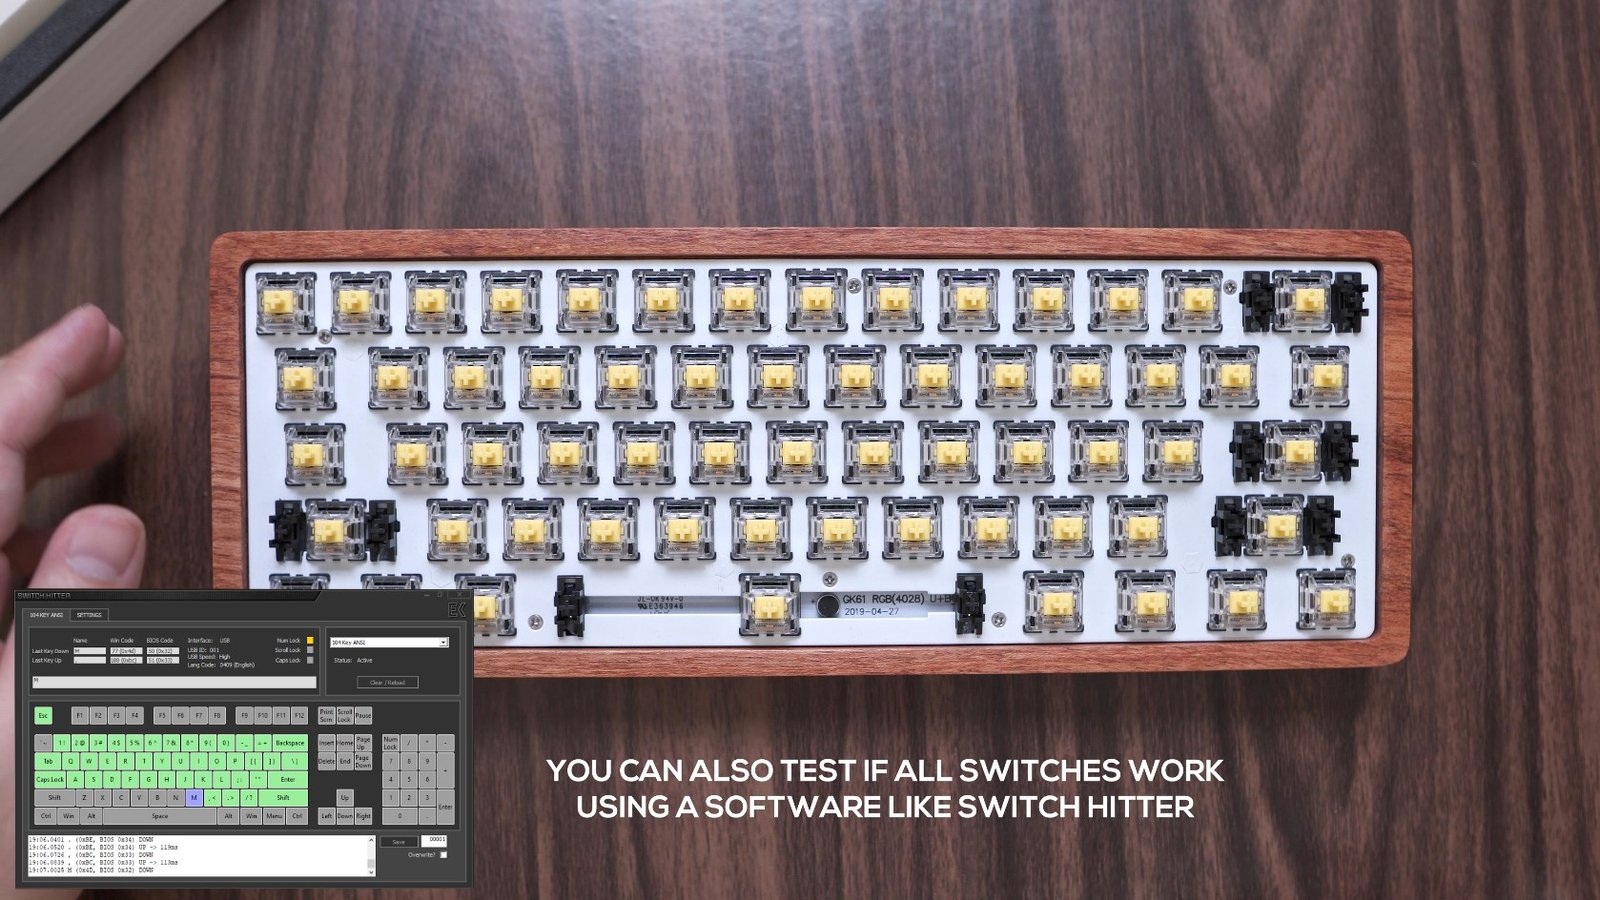
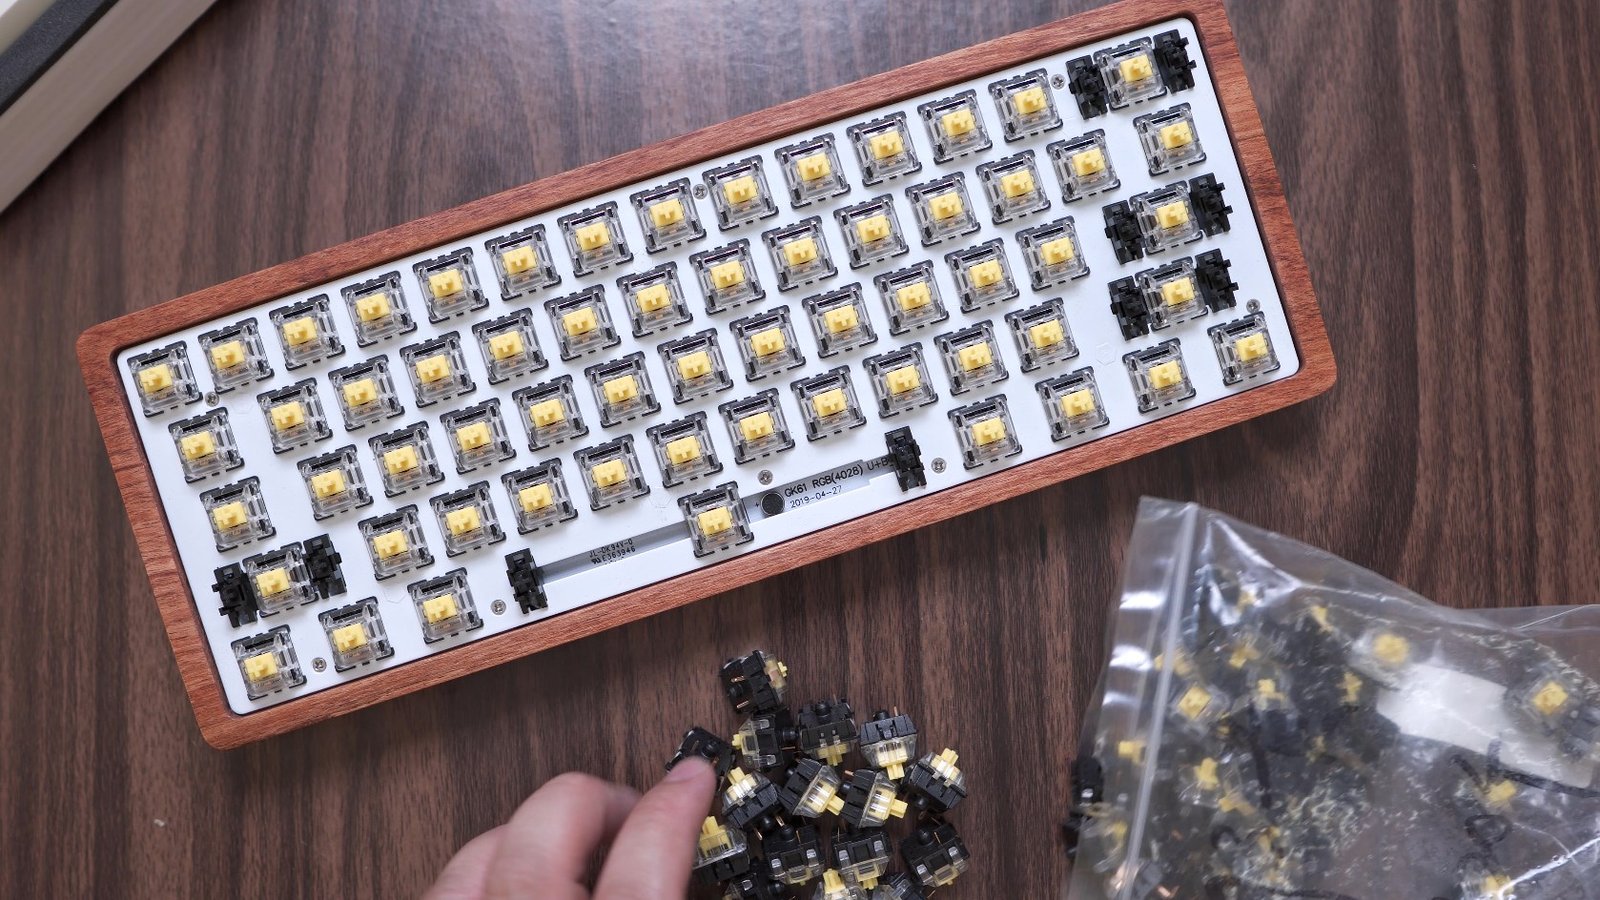
Installing the Switches
Alright, so with all the components checked out, let’s finally build this which is actually pretty straightforward, you just have to install the switches, carefully, making sure that the pins are perfectly aligned because if not, you’re going to damage both the switch pins and the socket itself.
So it is very important to make sure that the pins are straight and if ever you feel like there’s some resistance when you’re inserting the switch, hold back and check it again to make sure.

Hot-swappable Pros and Cons
Now, using a hot-swappable board like this has its advantages and disadvantages, the advantages are you can easily swap switches out just in case some of them becomes faulty at some point or if you simply want to try other switches. The disadvantages are the switches are a little bit wobbly due to the fact that it is not solidly attached to the PCB, and that the hot-swap socket themselves can also suffer from wear and tear due to frequent replacement of switches. But don’t worry much about that because I’m pretty sure before it even becomes loose, you’ve already considered building or getting another board. So just enjoy it while you have it.

And once you’re done finding the best switch for your preference, you can now consider building your own custom keyboard with soldered switches.
Just a quick tip when buying switches online, make sure you get extras as you don’t know what can happen during shipping and so that you have extras for replacements down the line.
Installing the Keycaps
As for the keycaps, there’s not much to it, all you have to do is gently insert the keycaps on the stem with just enough force to get it in there without much pressure to not damage the keycaps.

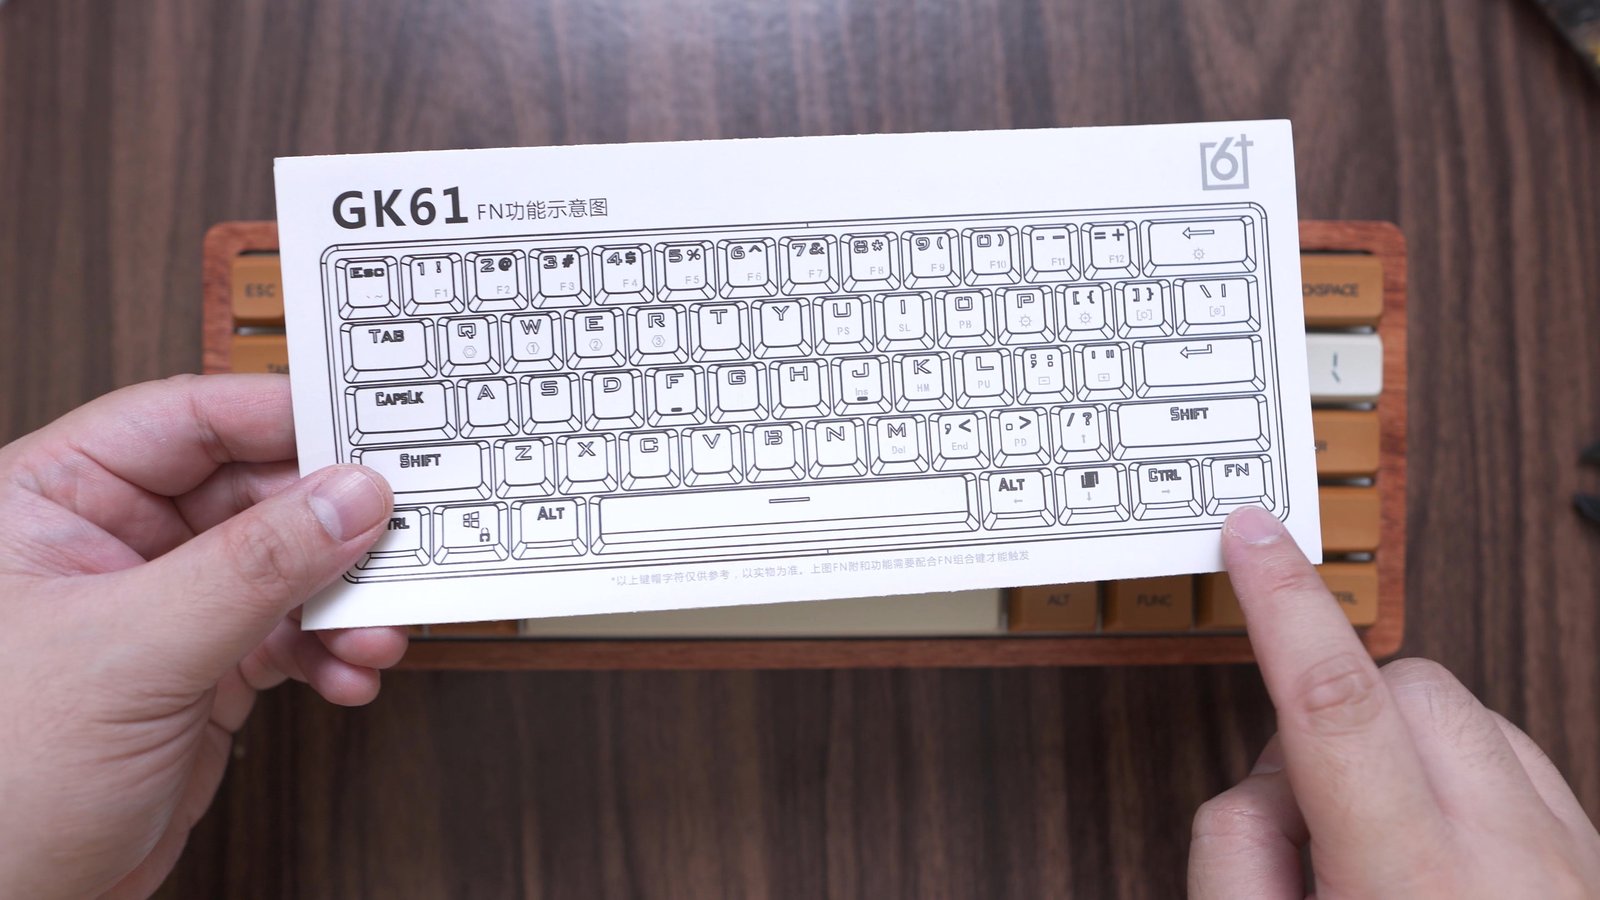
And for an unconventional layout like with a 60% keyboard like this, you can refer to the manual or online to make sure you properly match the keycaps placement with the layout.
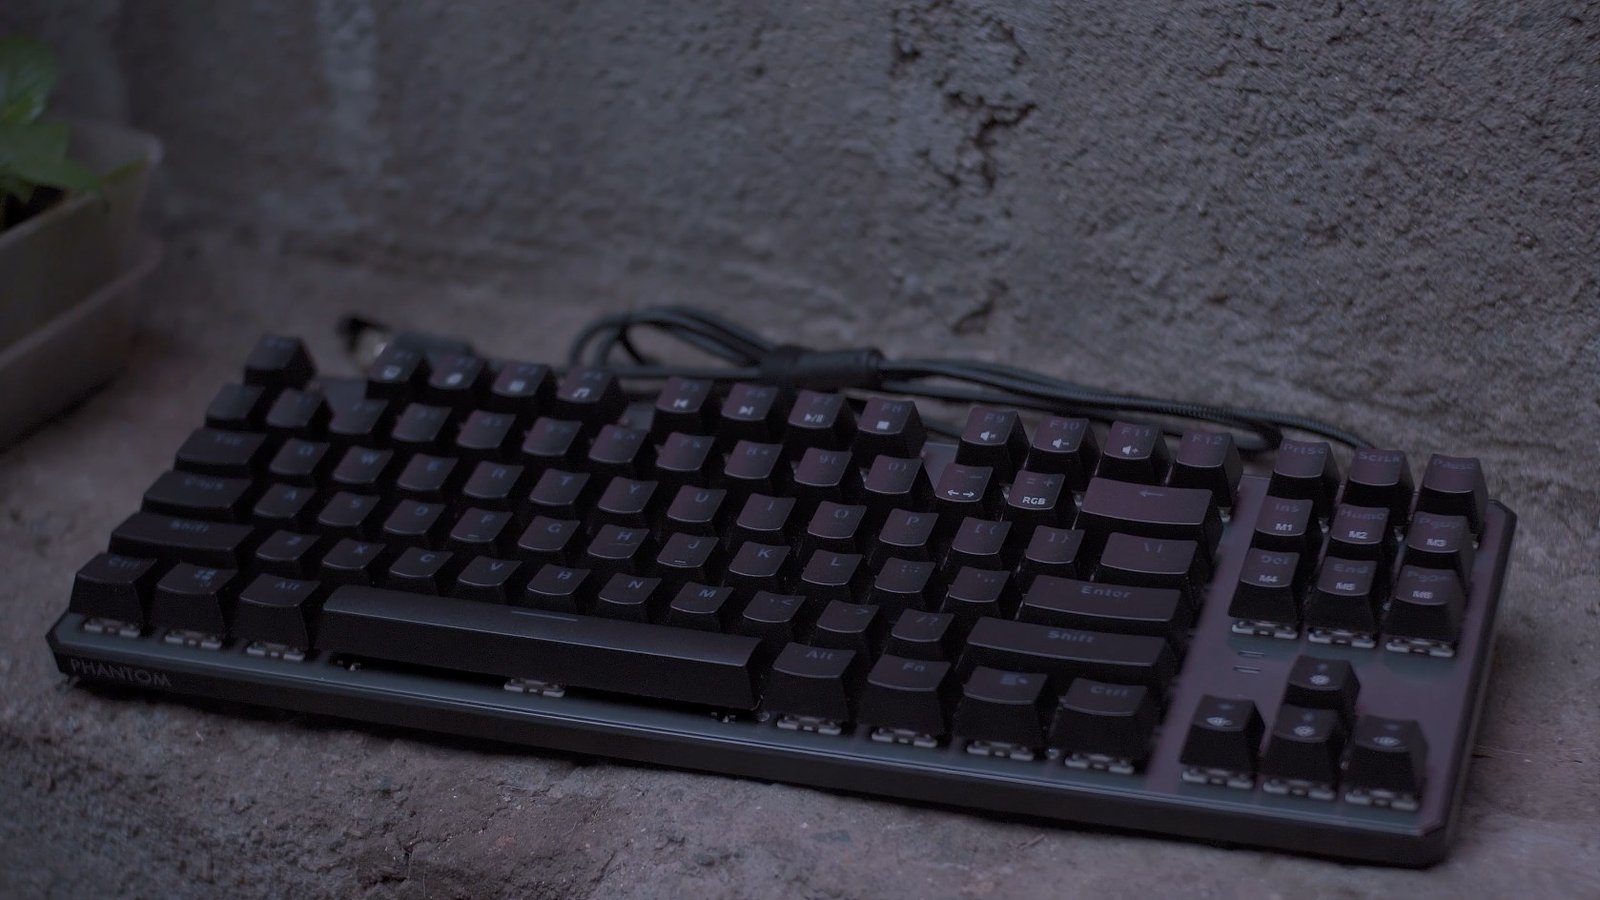
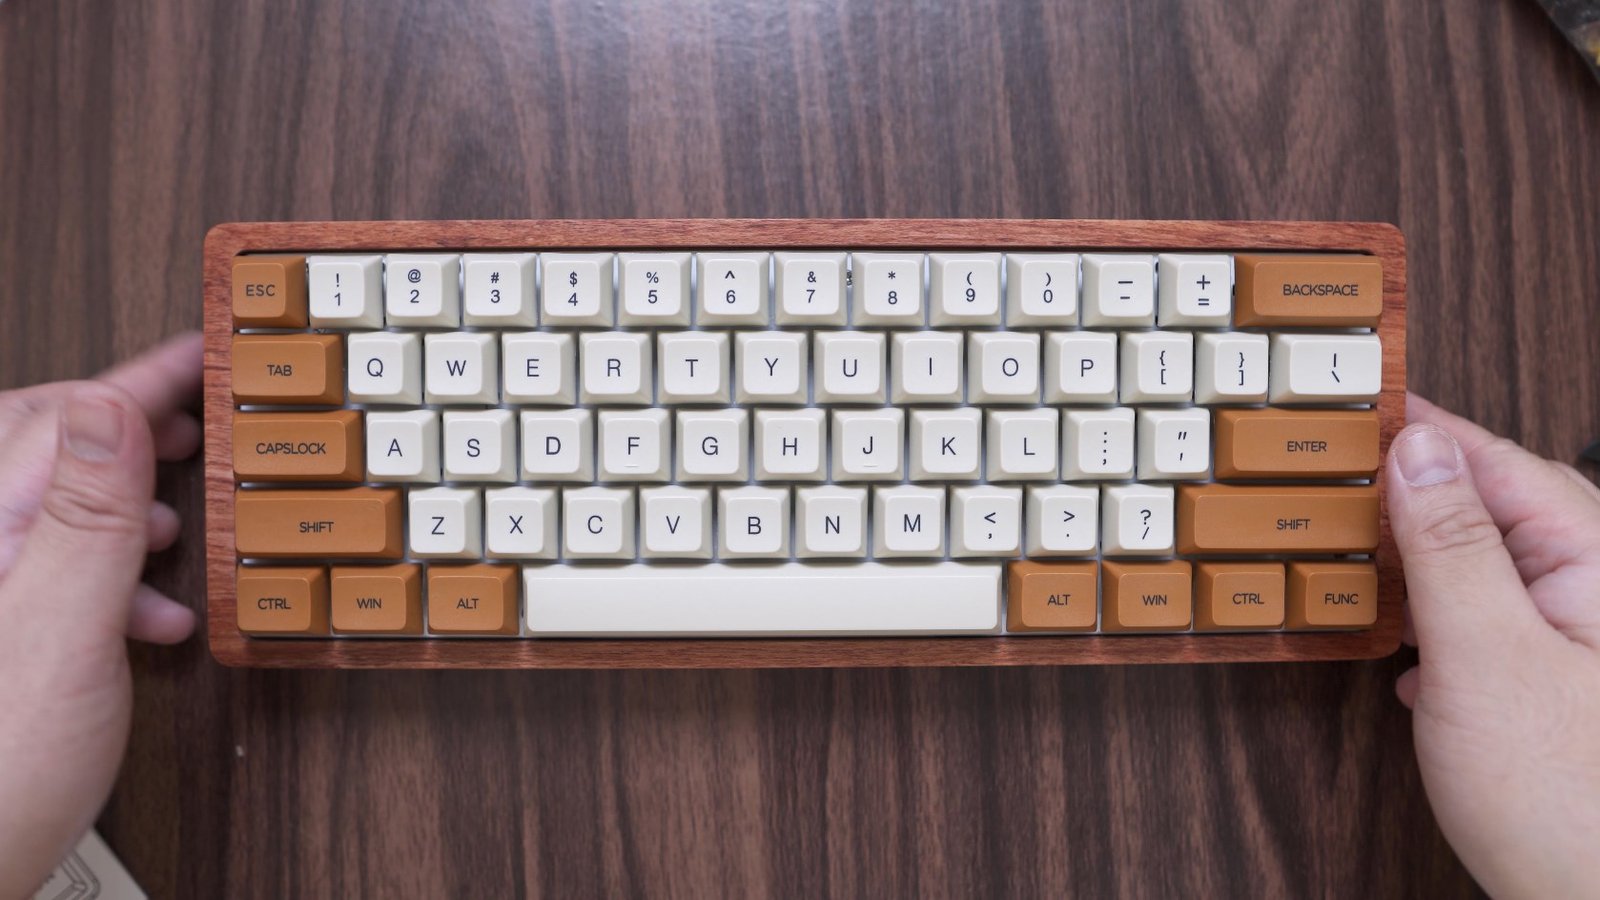
And there you have it guys, we now have our own custom mechanical keyboard with our preferred casing, layout, switches, and keycaps. And without all the technical details that I shared with you earlier, you can pretty much build this in just a matter of minutes.

The total weight of our finished build is around 855g which is quite heavy thanks to the wooden bottom housing.

Now, before we end this article, for those who are interested to follow the same path. Let’s talk more about the characteristics of this particular build.
Build Review
Gateron Yellow Switch
Let’s start off with the switch of choice, which is the Gateron Yellow. Gateron Yellow has an actuation force of only around 50g which is relatively lightweight and I’d say right in the middle between the 45g red switch and the 60g black switch. This is linear which means there’s no tactile bump or click and it just presses straight to the bottom. Gateron Yellow is considered to be one of the smoothest stock and mainstream switches out there and is ideal for gaming and typing especially if you prefer a relatively quiet switch.

Mars Colony Keycaps
As for the keycaps, what we have here is made of durable PBT plastic with dye sublimated characters that become part of the plastic, which means the legends will never fade away over time.

The XDA profile is flat across all rows which means it is good for custom builds because you don’t have to worry about the height of the keycaps. It also has a relatively larger surface area compared to most keycap profile.

Wooden GK61 Barebones
As for the barebones itself, the stabilizers come pre-lubed which is nice, and though it still has some rattle to it, it’s not entirely bad especially compared to other boards at this price range.

Like I said it also has a physical microphone for the audio visualizer which is quite unique.

The cutout for the type C is substantial enough and should fit most USB Type C plug,

And lastly, the wooden case is nicely finished with a smooth texture to it.
Overall, I am pretty happy with this simple build that we did. All the components perfectly match my personal preference from the colors, the materials used, up to sound and typing preference.
By the way, if you want to learn more about the Geek GK61 especially the performance and the software, you can check out my full review here, though the one I reviewed uses optical hot-swap board, the layer implementation and software should pretty much be the same
VERDICT
To conclude, the mechanical keyboard hobby is deeper than we actually thought, there are a lot of things to consider and sometimes it’s kinda overwhelming where to start, and I also understand that a lot of you are not into custom build and just prefers prebuilt keyboards, which is perfectly fine, there’s no problem about that. But just in case you want to dive deeper into it, I am here to help you and we can dive in together as I am also relatively new to custom builds. It might be expensive at first compared to most prebuilt keyboards but like I said, it is way satisfying and you can tailor your build to your own personal preference that should last you longer than any prebuilt keyboard out in the market.
Ultimate RGB Mechanical Keyboard! – Womier K66 Review
Maibenben DMK01 Review VS Royal Kludge RK61
Geek GK64 Aluminum Case Review + Teardown
NEW 35 Grams Kailh Box Red Switch Review – Extremely Lightweight!
AKKO DragonBall Z Keyboard and Mouse – AKKO RG325 Review
Ultimate Hacking Keyboard Review – Best Split Mechanical Keyboard!
Royal Kludge RK61 60% Mechanical Keyboard Review – Best Budget 60% Keyboard!
Tecware Phantom Elite 87 Keys Review – Hotswappable Keyboard!
Tecware Phantom Elite 87 Keys Unboxing and Overview
Kailh Switches Review and Teardown – Kailh Switch Tester!
Best 60% Mechanical Keyboard Under $80
Cooler Master CK350 Mechanical Keyboard Review
Akko 3108 Tokyo World Tour Review – Five-Side Dye Sub!
Akko 3108 Dragonball Z Goku Review – Five-Side Dye Sub Spacebar
Rakk Lam-Ang Pro Mechanical Keyboard Review – Universal Socket Keyboard!
How to Build a Custom Keyboard – The EASIEST way! – Wooden GK61 + Mars Colony Keycaps

Thanks to Banggood for making this review possible, You can get this keyboard from the links below.
🛒 BUY IT AT BANGGOOD 👉 Wooden GK61: https://bit.ly/2RLMOAn Mars Colony Keycaps: https://bit.ly/3espjX3 Gateron Yellow Switches: https://bit.ly/2RMkTk8 10% off code: BGTOMEX (for all keyboards and mouse )

The Broll who always got your back online!