PC Building in most cases is usually a very straightforward process. You come up with a particular budget, you pick your PC components and you’re off to the races. However, sometimes there are a few special cases where you need to deal with some crossroads before you arrive at your long-term goal whether it be due to budget constraints, parts availability, and things of that nature. Sometimes we need to pick a certain combination of parts for now, with the intention to upgrade it later or to simply test it out while you’re still deciding about your ultimate end game PC Build.
Today, we’re going to test one of those scenarios with a very unorthodox PC Build partnering a top-of-the-line processor in the form of the Intel Core i9-12900k to a respectfully beefy but not the possible best motherboard to partner it with, a more budget-friendly B660 Aorus Master Motherboard.
Ideally, you would want to partner the Intel Core i9-12900k with an equally top-of-the-line Z690 motherboard. However, what if you already have a B660 Motherboard from your current PC build and your budget only allows you to upgrade the processor first before the motherboard? (if it is really necessary at all). Or let’s say, you have no plans of overlocking but you want the best-in-class processor and choose to get a beefy B660 motherboard instead of a cheap Z690 motherboard? Granted, you can definitely get a cheaper unlocked Intel Core i9 processor like the Intel Core i9-12900F, but let’s just say you really want to use the Intel Core i9-12900K on a B660 Motherboard, can it handle it? As far as my research and testing go, it actually depends on the motherboard and I gotta say and spoiler alert, the B660 Aorus Master can definitely handle it. Now, let me share with you the rest of my tests and thoughts about this kinda weird but interesting experiment.

Let’s start with the introduction of the components, although I would say, these are just supplementary components for our main goal/experiment and isn’t really part of the actual “scenario” we’re looking for when it comes to the “budget” part. We used these components because these are what we have in the studio and just to be able to build a properly functioning PC with an adequate combination of components. Again, for context, one of the possible scenarios we are thinking of is what if someone already has a B660 motherboard and the budget only allows for a processor upgrade first, before the motherboard.

Motherboard
For the motherboard, we’re going to use the B660 Aorus Master DDR4 which is the top-of-the-line option from Aorus for the B660 chipset.

It features robust power delivery offering a 16+1+1 twin hybrid phases digital power design with solid pin power connectors, fully covered VRM heatsinks, ultra-durable PCIe armor, aluminum heatsinks, and ample amount of internal headers.


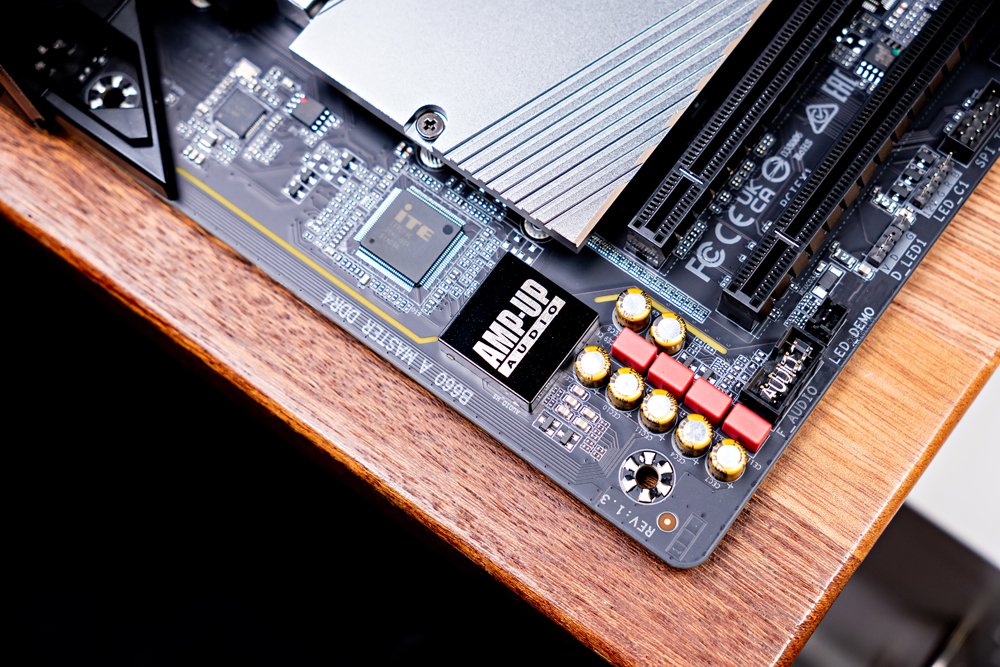
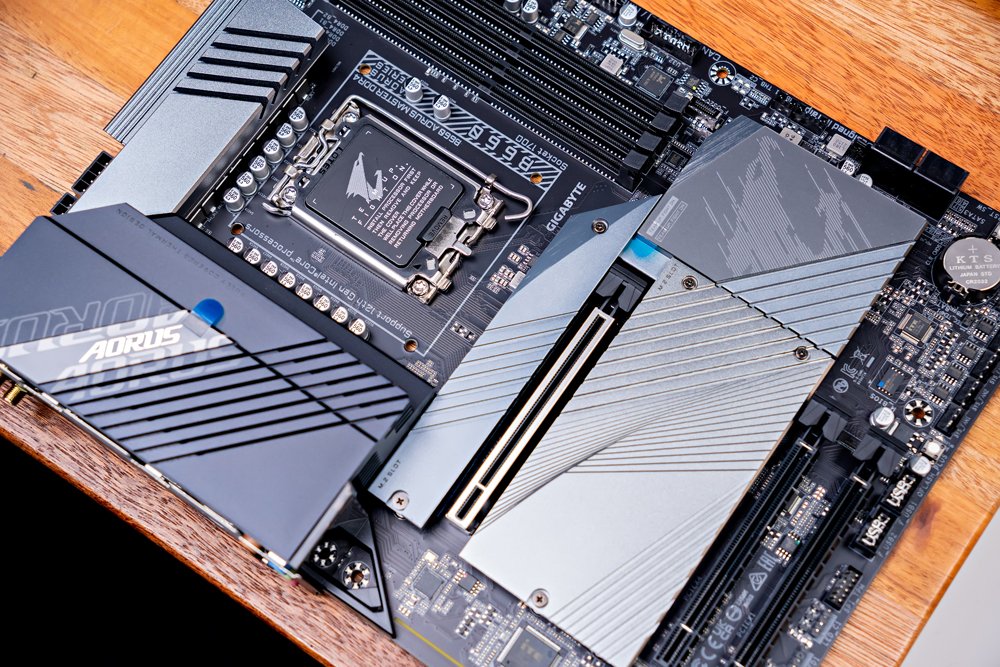
It also features Wifi 6 connectivity with Bluetooth 5.2 and a good amount of input and output ports on an integrated IO shield.

Processor
For the processor, as I’ve pointed out earlier, for this experiment, we’re going to use the 12th-Gen Intel Core i9-12900k.

Now, the rest of the components that I will mention are just supplementary components but are all necessary to make sure we take full advantage of the performance of the 12th-Gen Intel Core i9-12900k.
Graphics Card
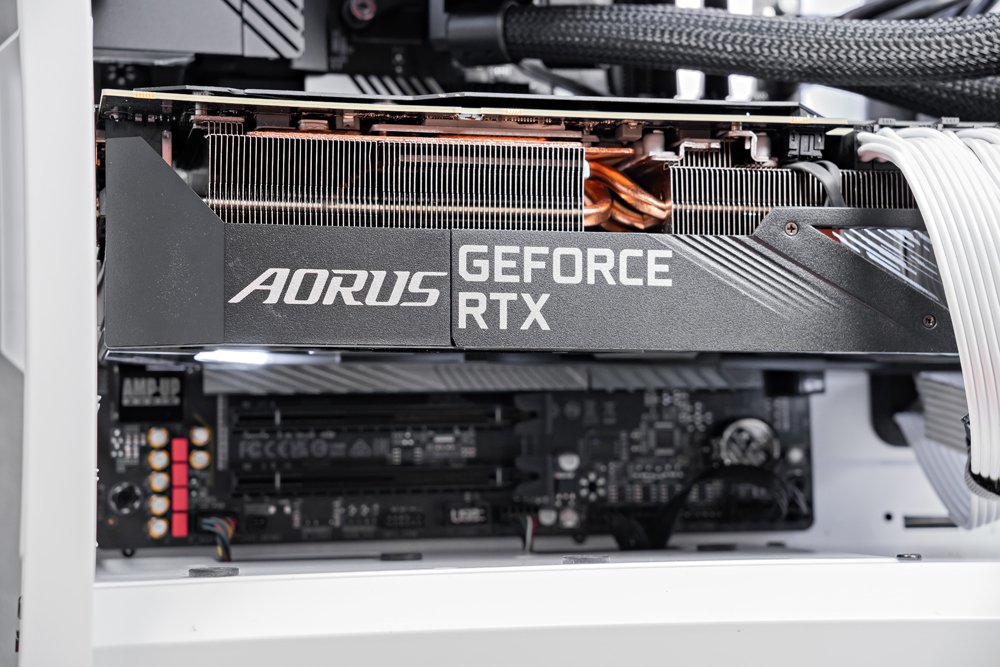
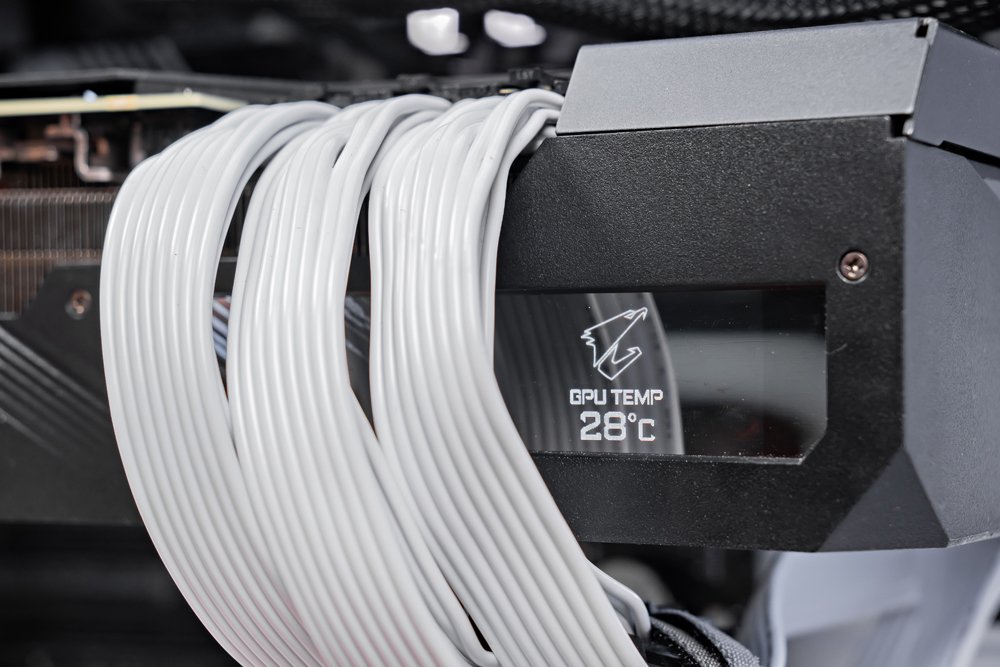
For the graphics card, we’re going to use the Aorus Xtreme 3080 graphics card which is an absolute beast.

It features the so-called “Max-Covered Cooling” design with 2x115mm and 1x100mm unique alternate spinning fans to completely provide airflow to the massive heatsink. Of course, it offers everything an NVIDIA RTX 3080 has to offer both in terms of performance and software features.

It also offers a completely unnecessary but undeniably cool LCD display and RGB lighting all around.


Memory
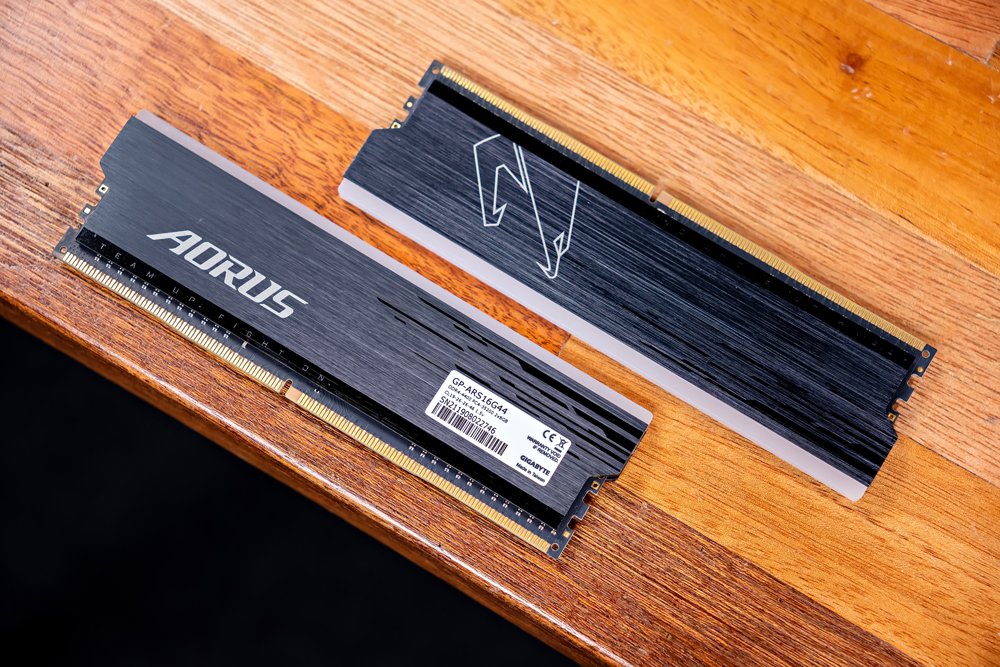
For the memory, we’re going to use the Aorus RGB DDR4 4400MHz 16GB Memory Kit which should be sufficient enough for this build.

It features a minimalist heatsink design with a clean-looking RGB lining.
Storage
For the storage, we’re going to use the Aorus Gen4 7000s NVME SSD.

It features a robust integrated heatsink with a very cool design.

CPU Cooler
To adequately cool the Intel-Core i9-12900k processor, we’re going to use the Aorus Waterforce X360 AIO. And like the Aorus Xtreme RTX 3080, it also features a highly customizable LCD display where you can flex your CPU temperature, clock speeds and even your profile picture if you’re into that. Animated memes are welcome too!

Power Supply
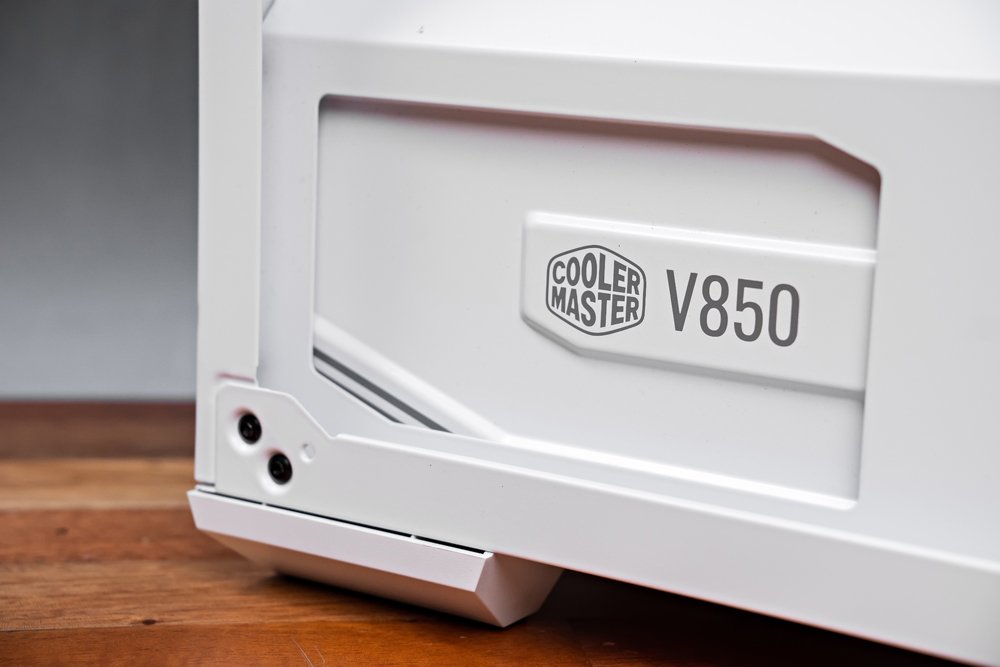
For the power supply, we’re going to use the Cooler Master V850 80+ Gold 850 watts fully modular power supply. This should substantially power all our system components including the absolutely insane 3 8pin power requirement of the Aorus Xtreme RTX 3080.
Case Fans
For the case fans, to be honest, I forget where I put the ARGB case fans that came with my Cooler Master TD500 Mesh so I used my old but trusty ID-Cooling DF-12025 case fans that feature up to 2000 RPM and 56.5 CFM.

Chassis
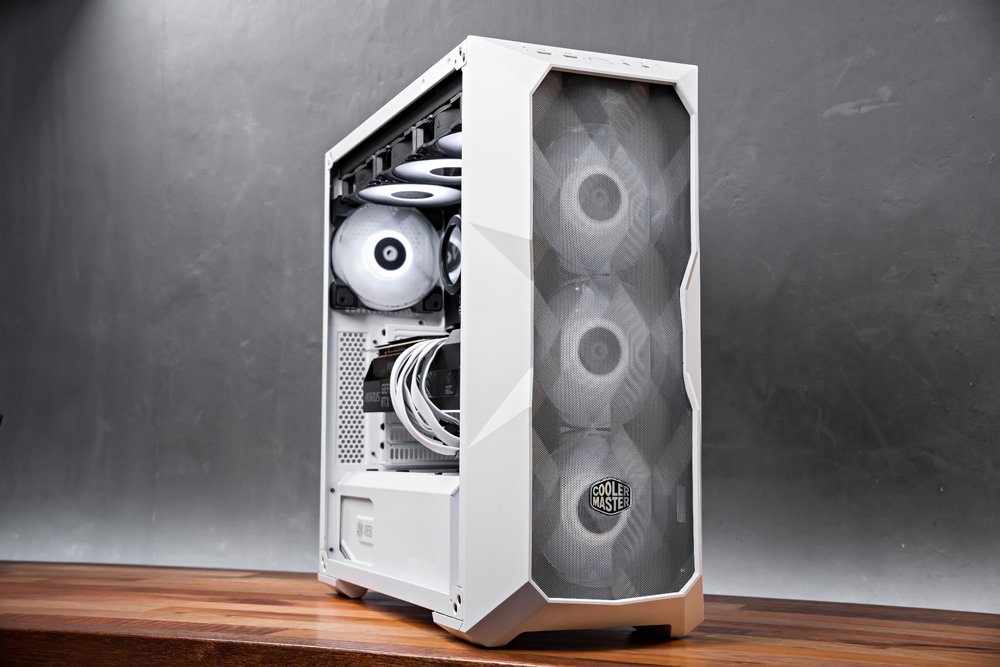
For our chassis, I’m going to use one of my favorite ATX chassis of all time, the Cooler Master TD500 Mesh. I chose this because not only it is one of my favorites, but it is the only chassis that I have here in the studio (I’ve got a bunch) that supports top-mounted 360mm AIO.

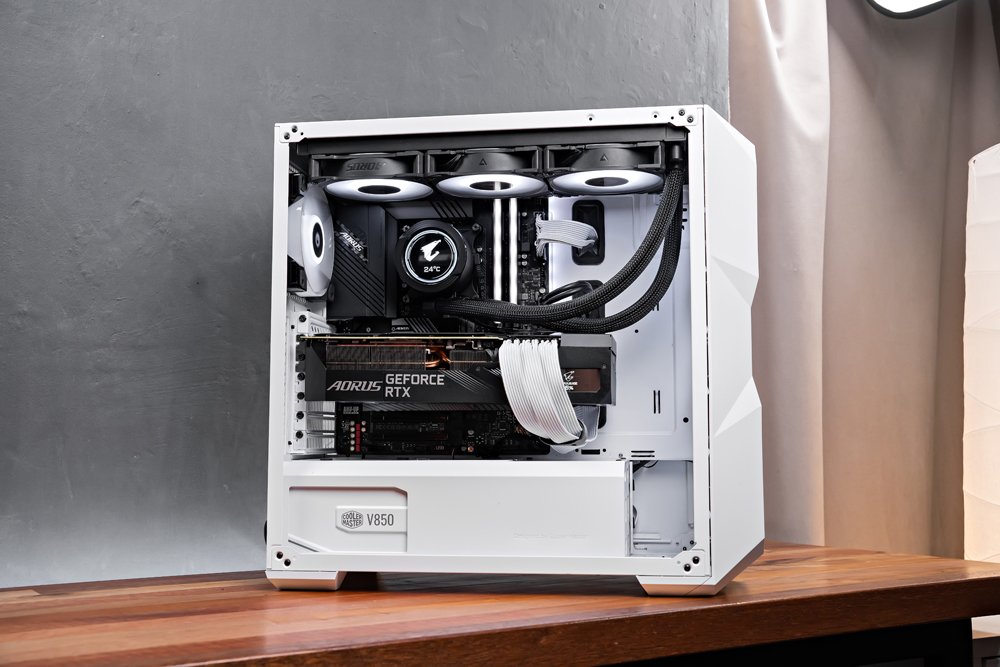
Finished Build
Finally, sharing with you the finished PC Build featuring all the components that I’ve mentioned above. I think it looks exceptionally gorgeous, especially with the classic black and white aesthetic that I went for.


Benchmarking Methodology
Here’s my current methodology for testing PC Builds, and I believe it is important for me to share this information with you so that you can have an idea of how I came up with these results.
For our benchmarks, I made sure the following were observed:
- Motherboard Bios, Chipset driver, Graphics driver, and all the necessary drivers are updated
- Windows operating system is up to date
- Ambient temperature is controlled, not too far off from each test
- Verify settings for each run
- Set all fans to the maximum to make sure performance is not hindered by thermals
- All benchmarks are an average of 3 identical runs unless specified
- All benchmarks are done inside a closed case as anyone would typically use a PC on a daily basis.
Results
Alright, just reiterating, our main focus here is to test if the B660 Aorus Master can handle the Intel Core i9-12900k when it comes to stability in terms of clock speeds, CPU temps and VRM temps on its stock configuration.
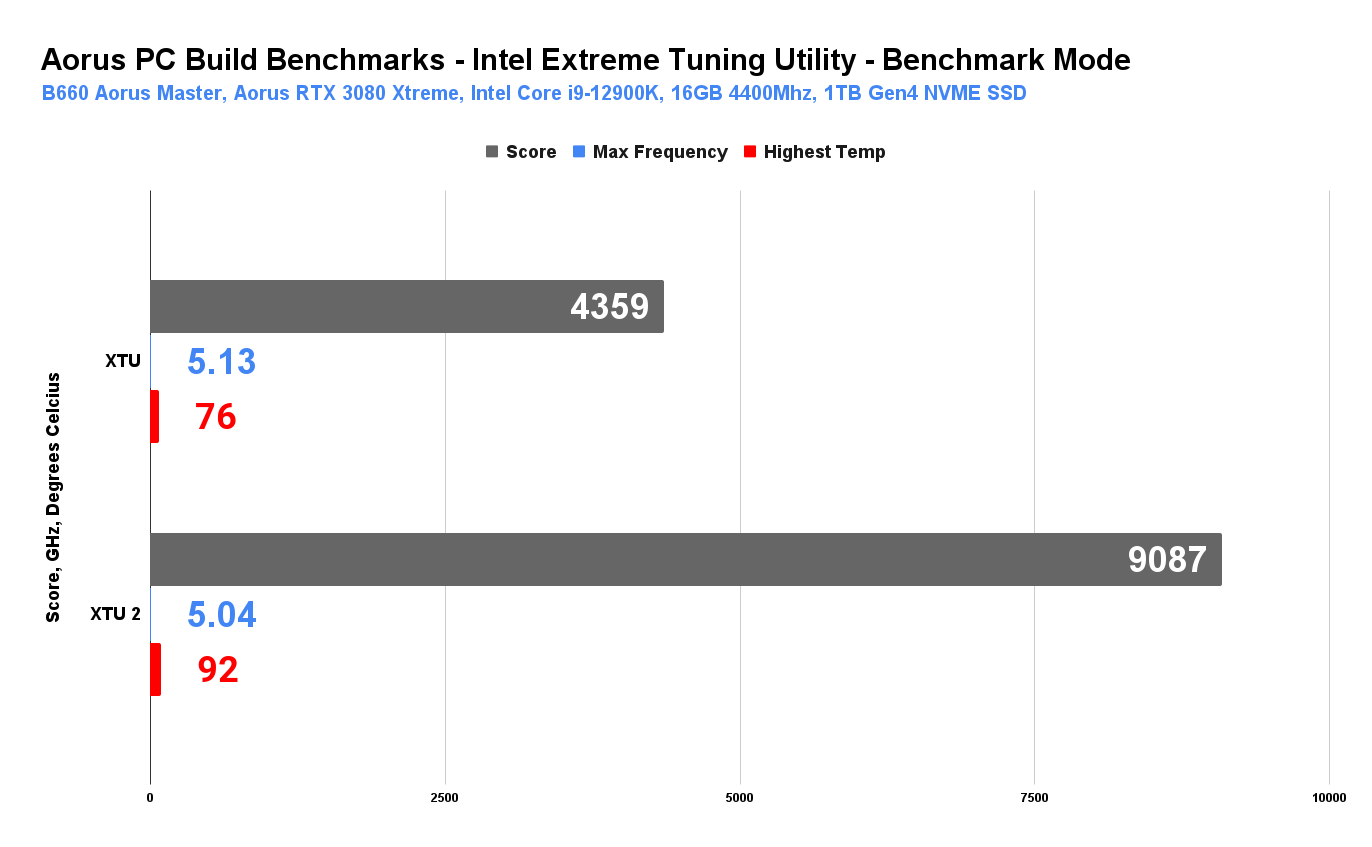
Let’s start with the easiest test that anyone can do on their own which is using the Intel Extreme Tuning Utility.
Intel Extreme Tuning Utility – Benchmark Mode
As you can tell, the Intel Core i9-12900k was able to perform at its peak without throttling on both XTU and XTU 2 benchmarks going well above 5Ghz frequency with temps maxing out at 92 degrees. A bit hot but at least it didn’t thermal or power throttled.
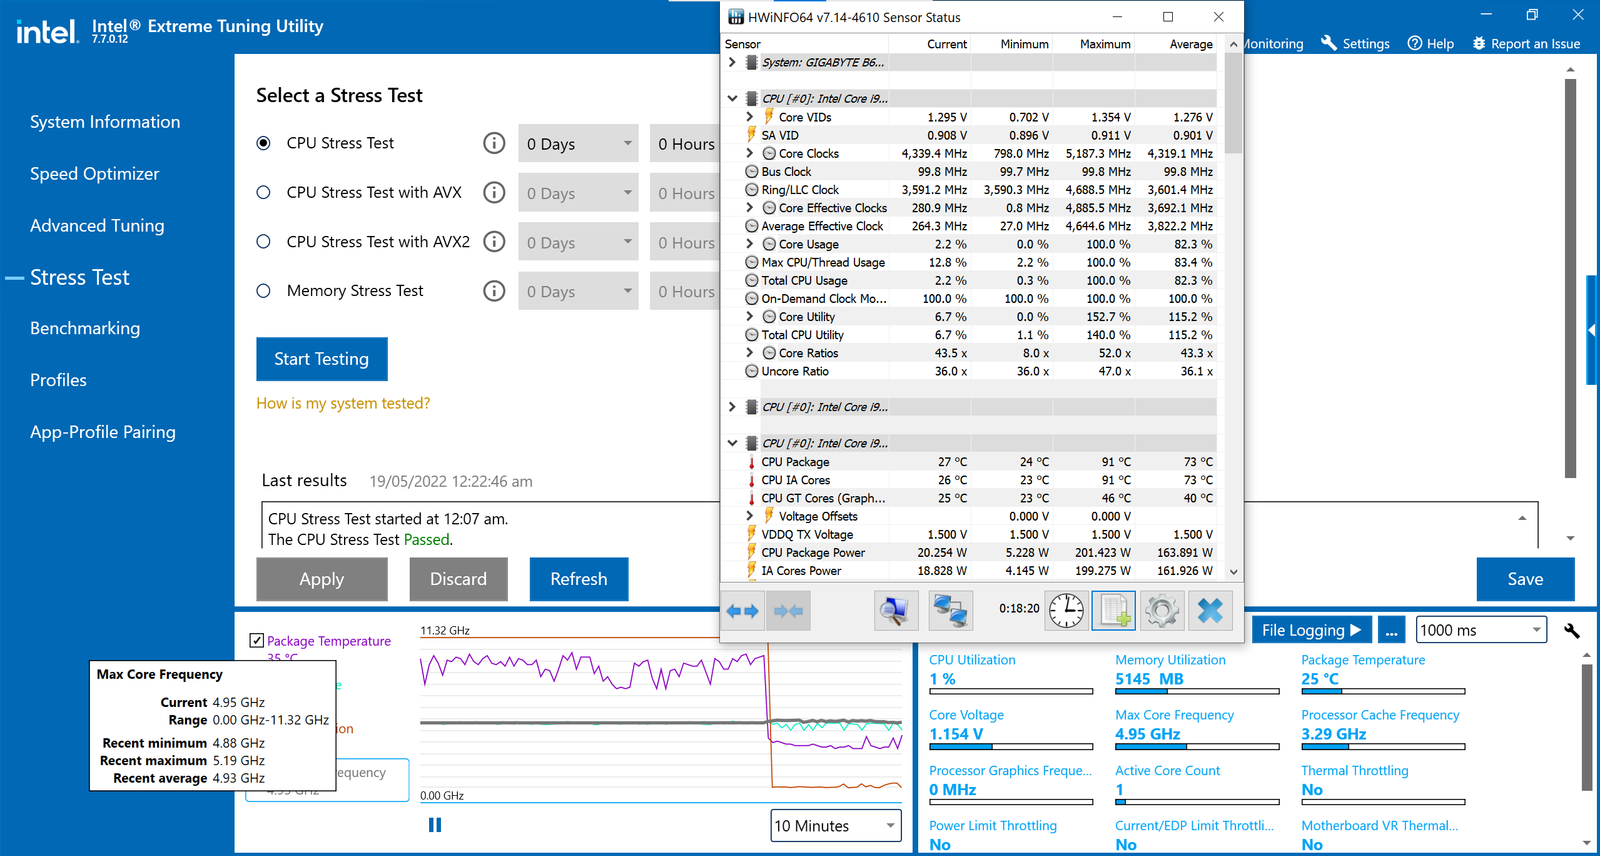
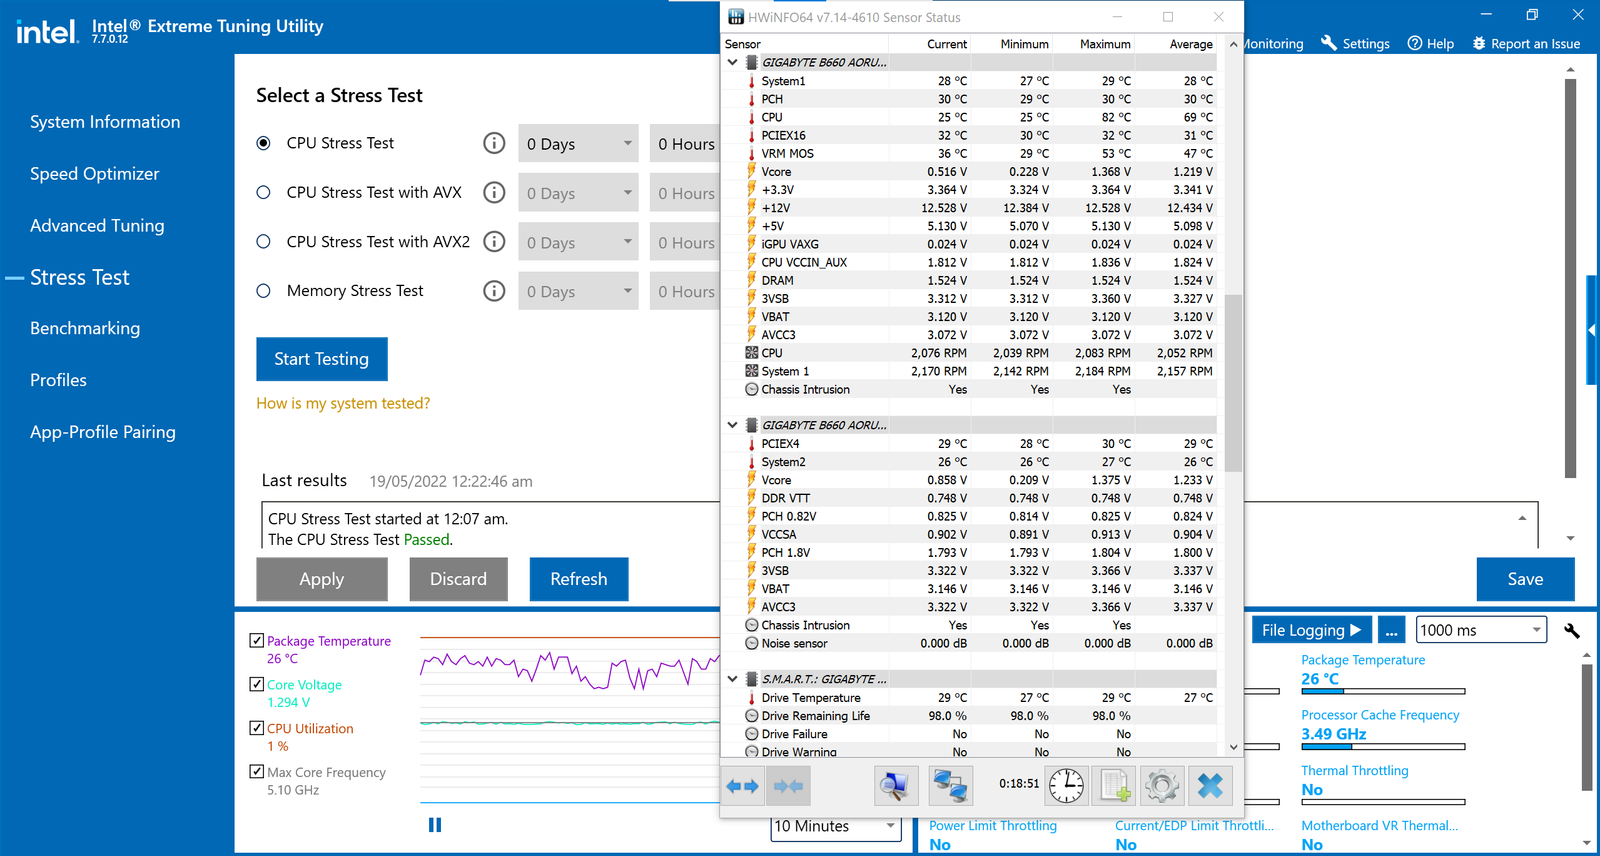
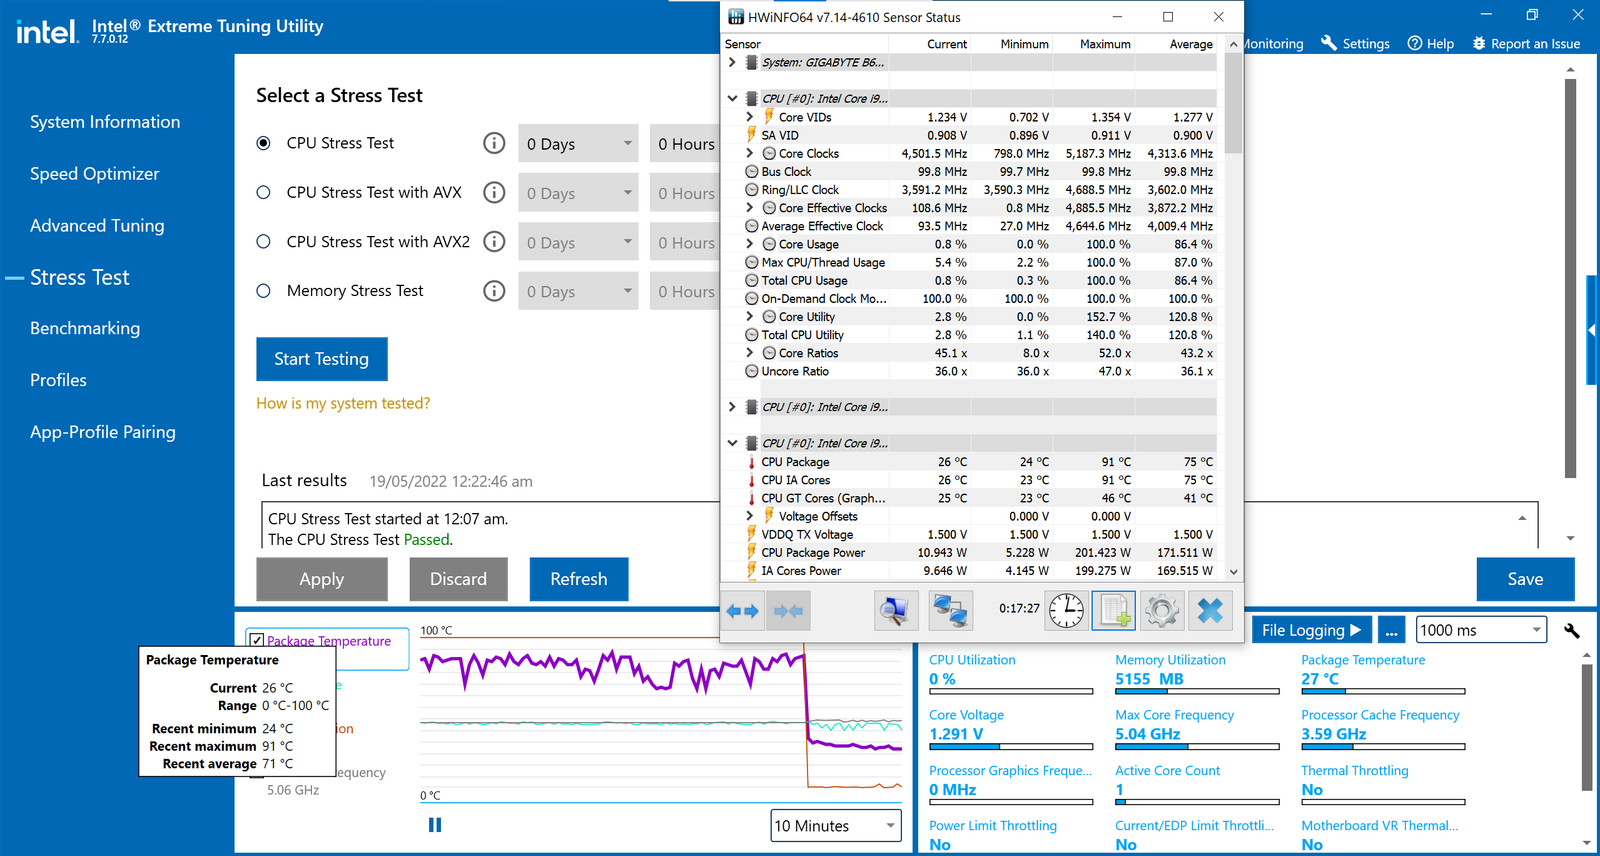
Here are the RAW screenshots for your perusal.


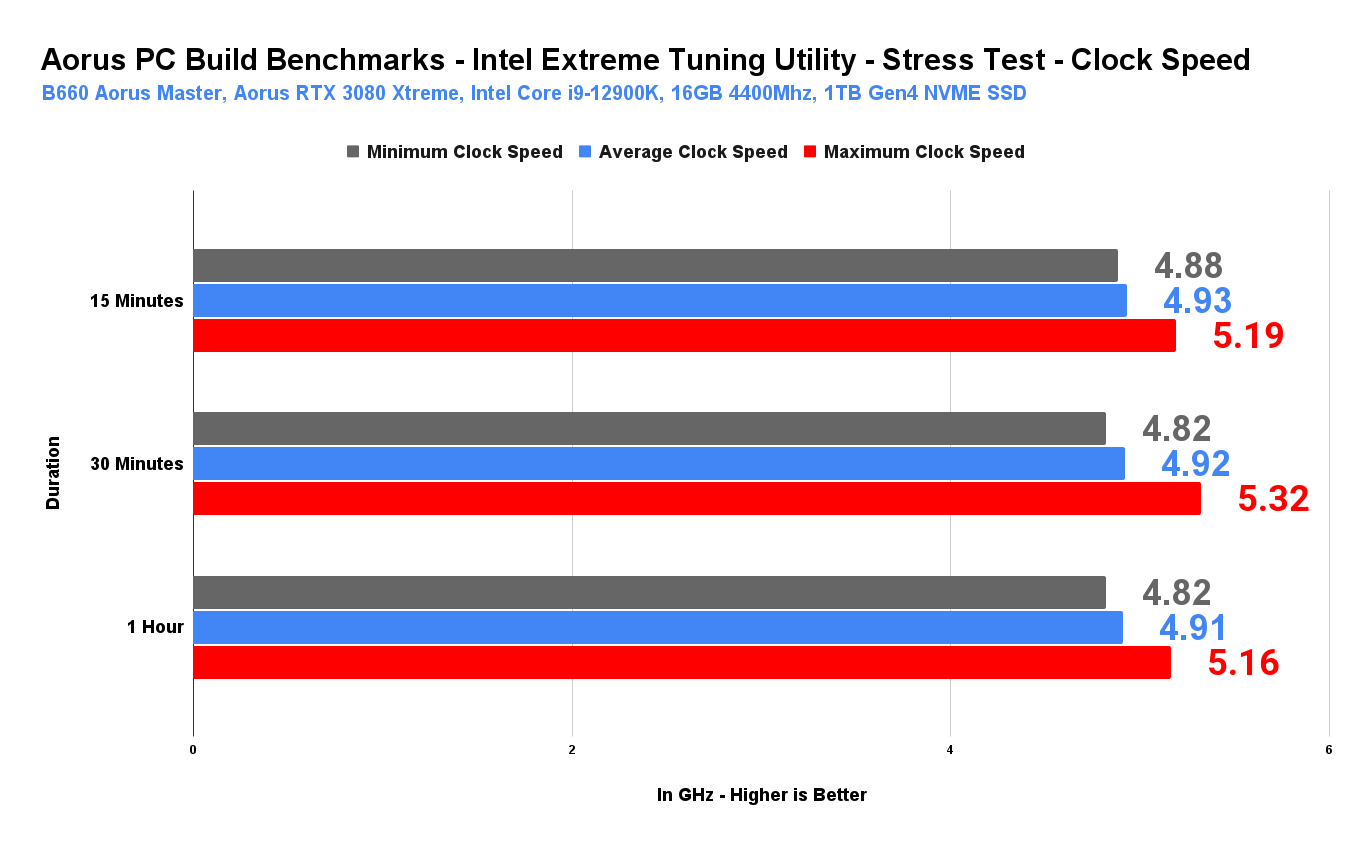
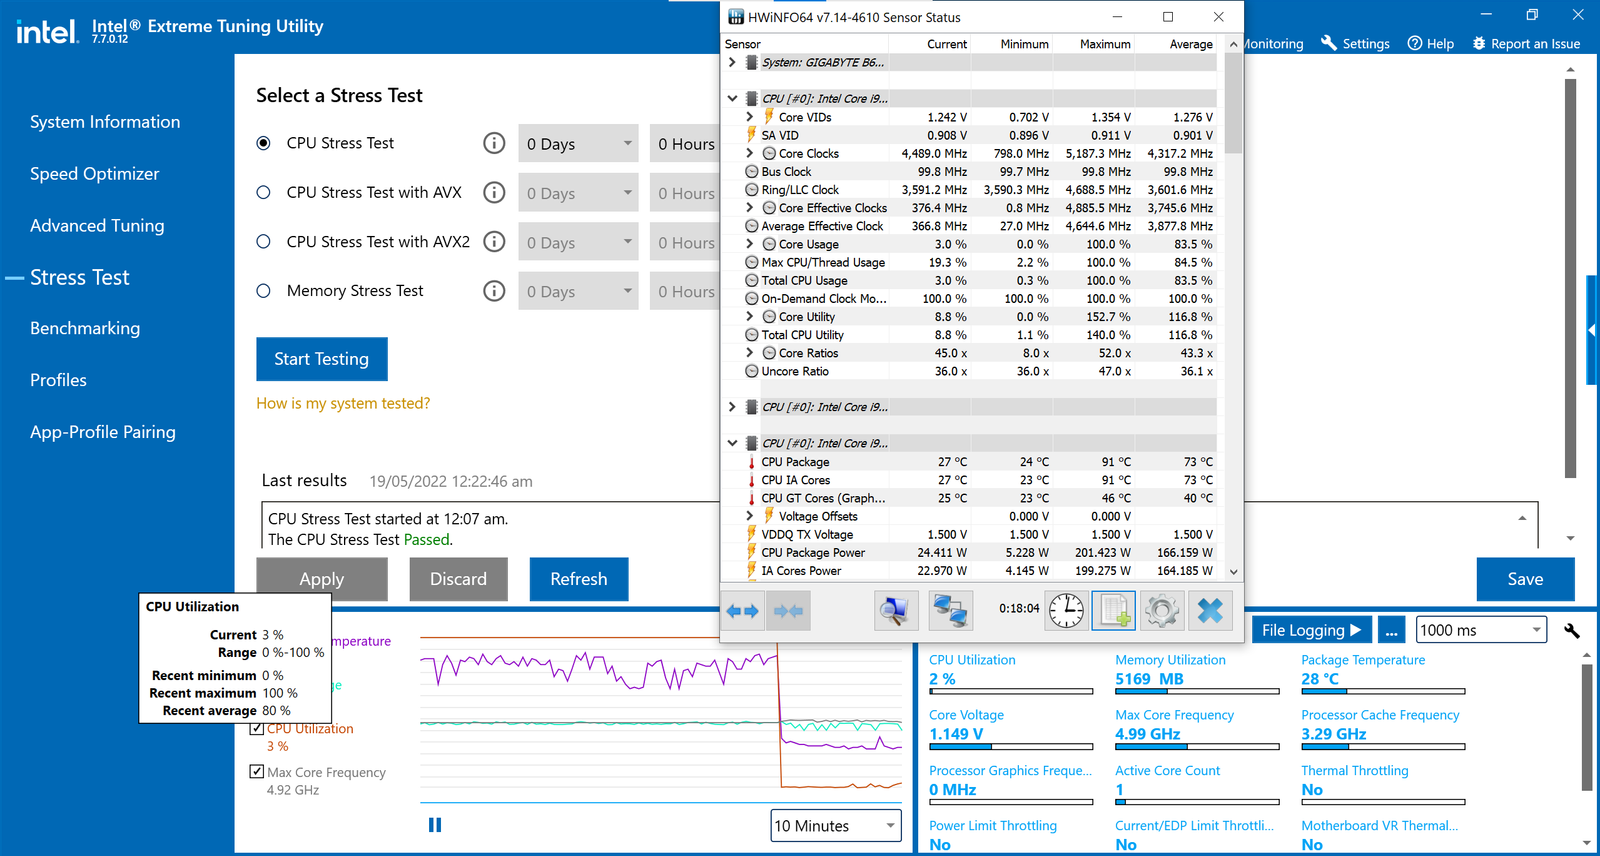
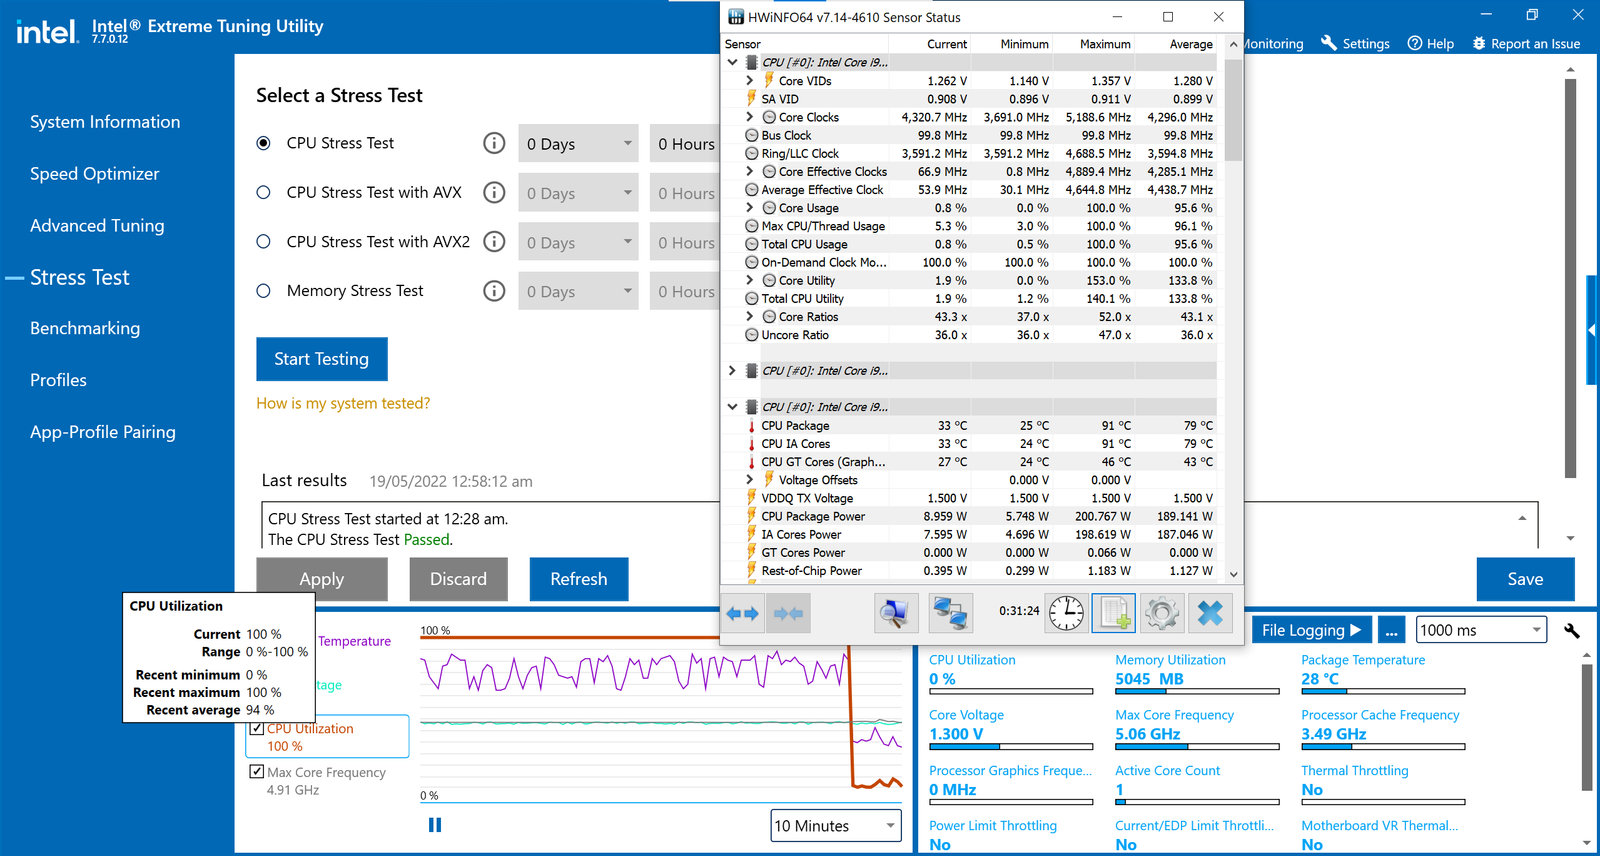
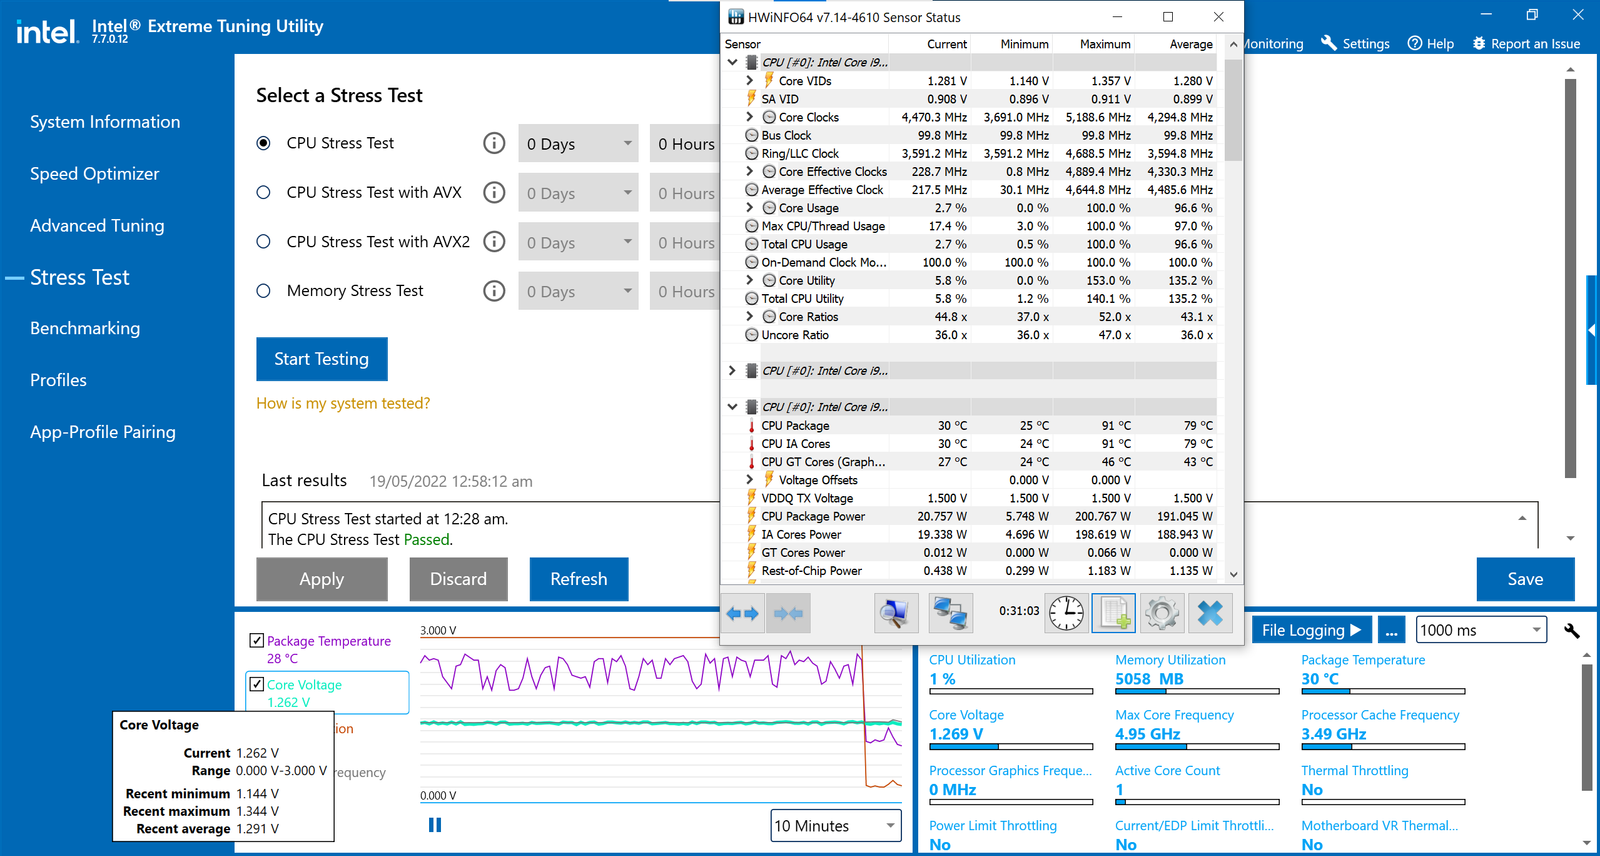
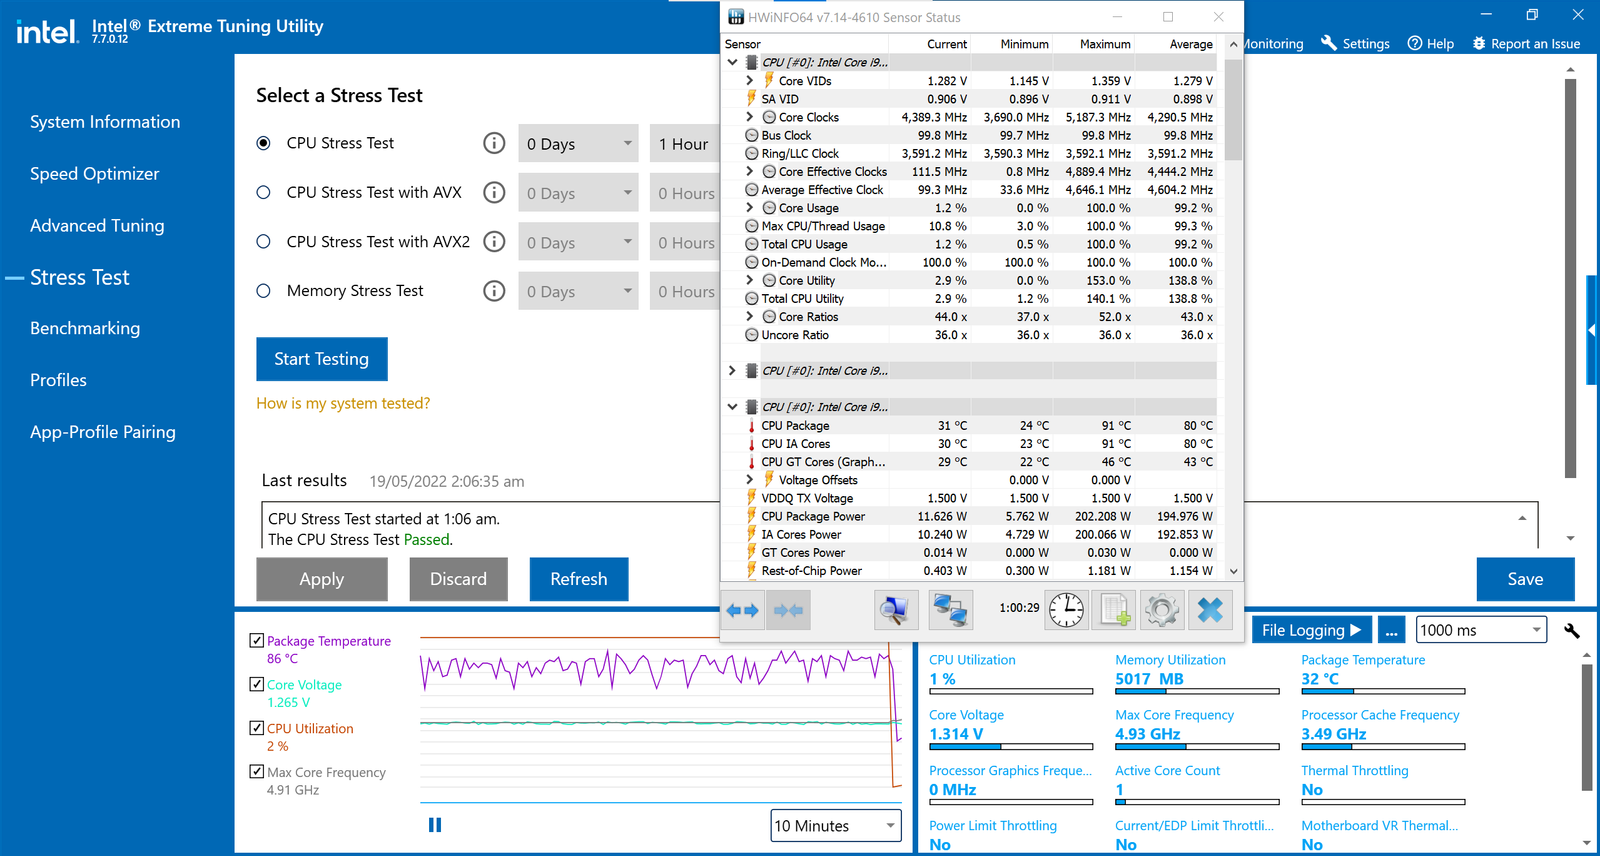
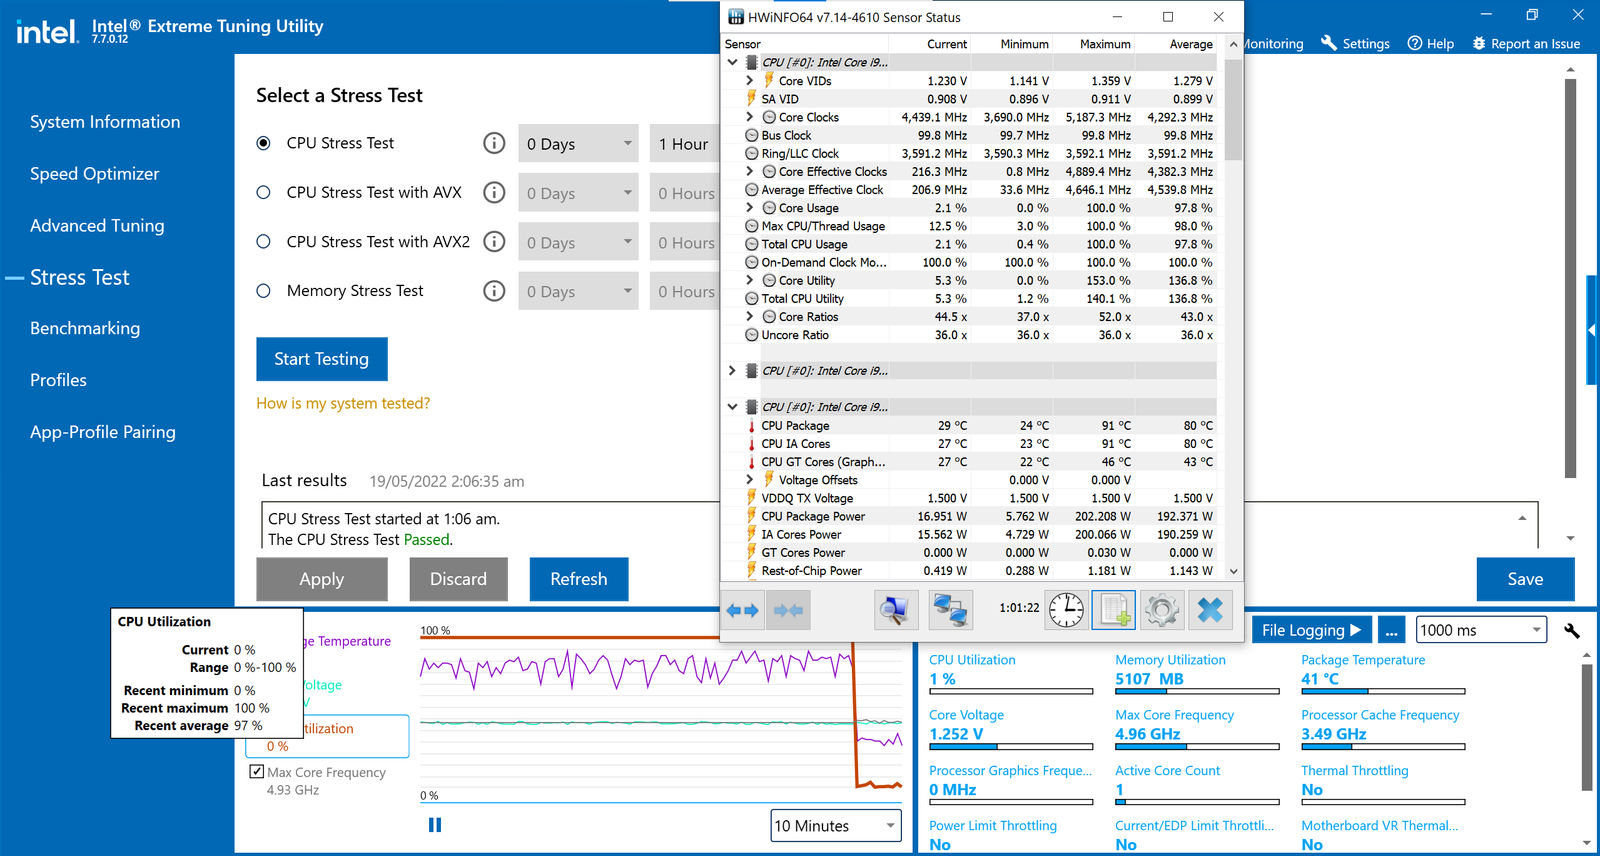
I also did 3 Stress Tests using the same Intel Extreme Tuning Utility to test the stability long-term with 15 minutes, 30 minutes, and 1 hour. Honestly, I think this is enough to simulate a long-term use case to make sure a system is stable enough.
CPU Temperature
As you can see, the 12th-Gen Intel Core i9-12900k’s temperature is within a safe margin averaging around 75-80 degrees with some spikes around the 90s.

Clock Speed
It also didn’t thermal or power throttle at all even during the 1-hour stress test averaging around 4.91 to 4.93Ghz and boosting up to 5.32Ghz.
VRM Temperature
I don’t have a proper thermal probe to test the VRM temps so I just relied on the data captured using the HWINFO64 application and as you can see, the VRM temps are quite cool averaging just around 47-52 degrees and spiking just a tad above that.

Here are the RAW screenshots so that you can have a full look at the results.
15 Minute Stress Test

30 Minute Stress Test


1 Hour Stress Test


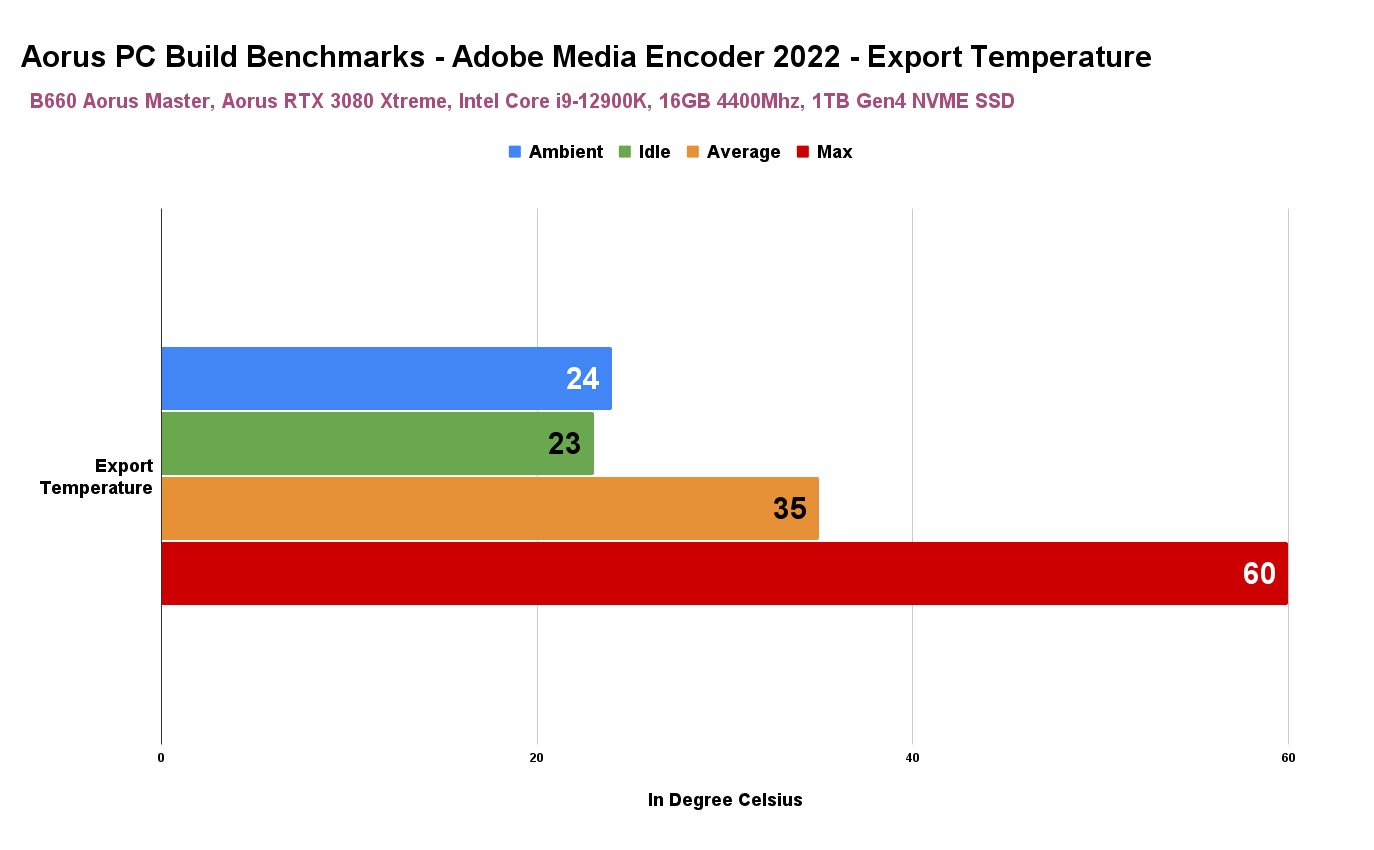
I also did a quick real-world performance testing exporting our standard 13.92-minute 4K project in Adobe Media Encoder.
Adobe Media Encoder
Our PC Build was able to export the video for just under 6 minutes which is pretty awesome and right around what we should expect.

Thermals are good as well averaging only around 35 degrees and spiking just around 60 degrees which is not a surprise since Adobe Media Encoder doesn’t really utilize all 16 cores during the entire encoding process, not to mention, it also gets some help from the graphics card. Regardless, this is a good real-world test that I personally would be interested in.
Now, while we’re at it, let me share with you the rest of the benchmarks that I ran including a few gaming tests just to also give you an idea of how this entire PC Build as a whole performs.
Cinebench

3DMark Benchmarks

3DMark – CPU Profile – Score

3DMark – CPU Profile – Thermals
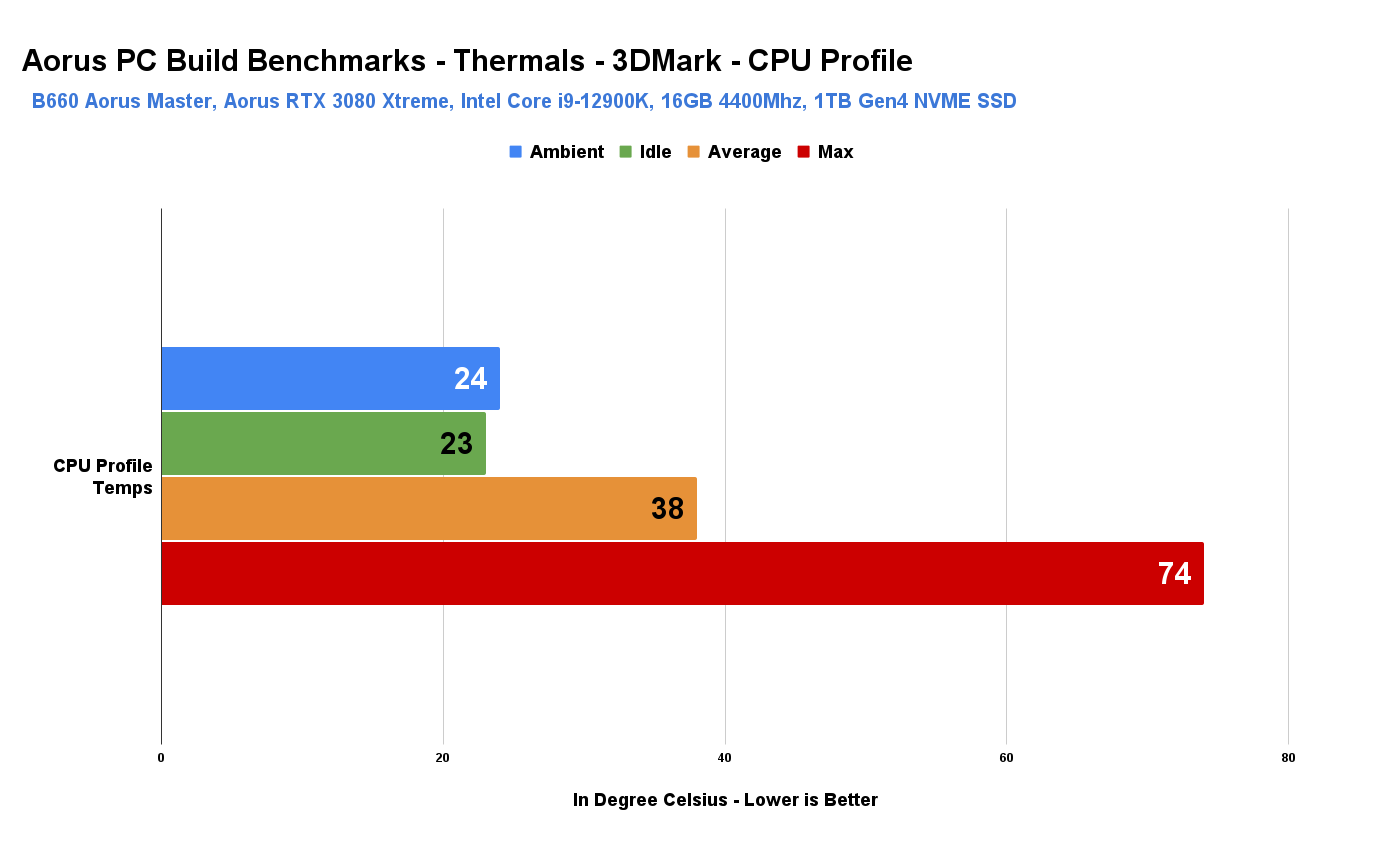
3DMark – CPU Profile – Clock Speed

Gaming – Frames Per Second

Gaming – CPU Temperature

Gaming – VRM Temperature

Gaming – GPU Temperature

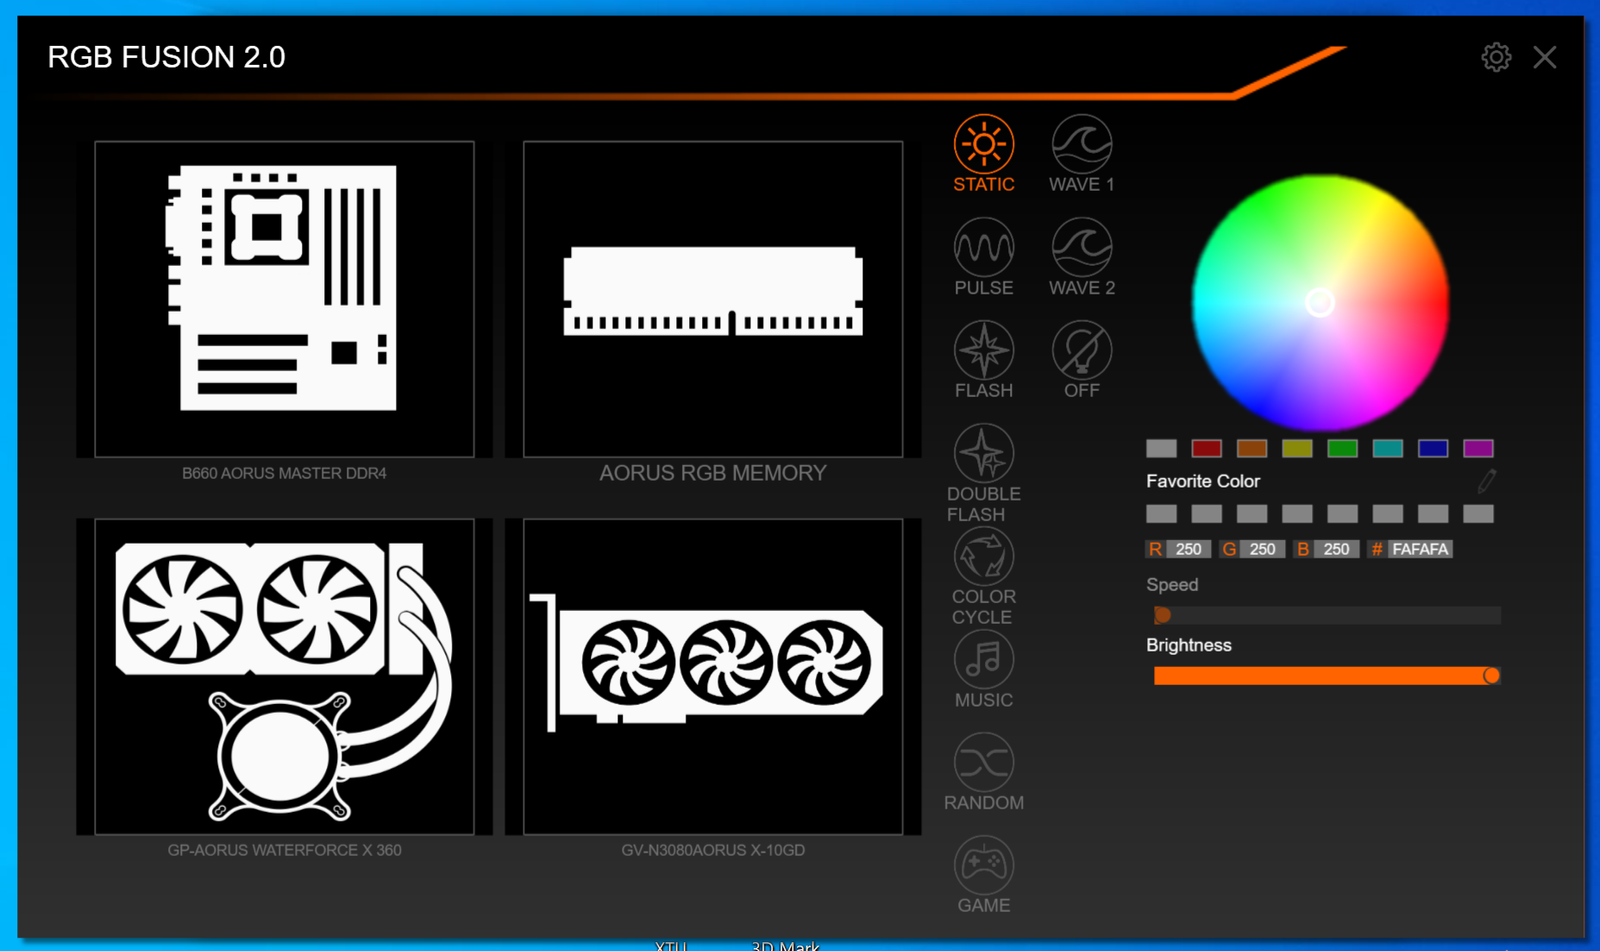
By the way, I gotta say, while it’s sometimes slow and buggy, Aorus’ app center is probably one of the best when it comes to setting up a completely fresh PC Build. I love almost everything about it except maybe the RGB Fusion 2.0 which I honestly feel still lacks some features and is a bit slow and buggy.
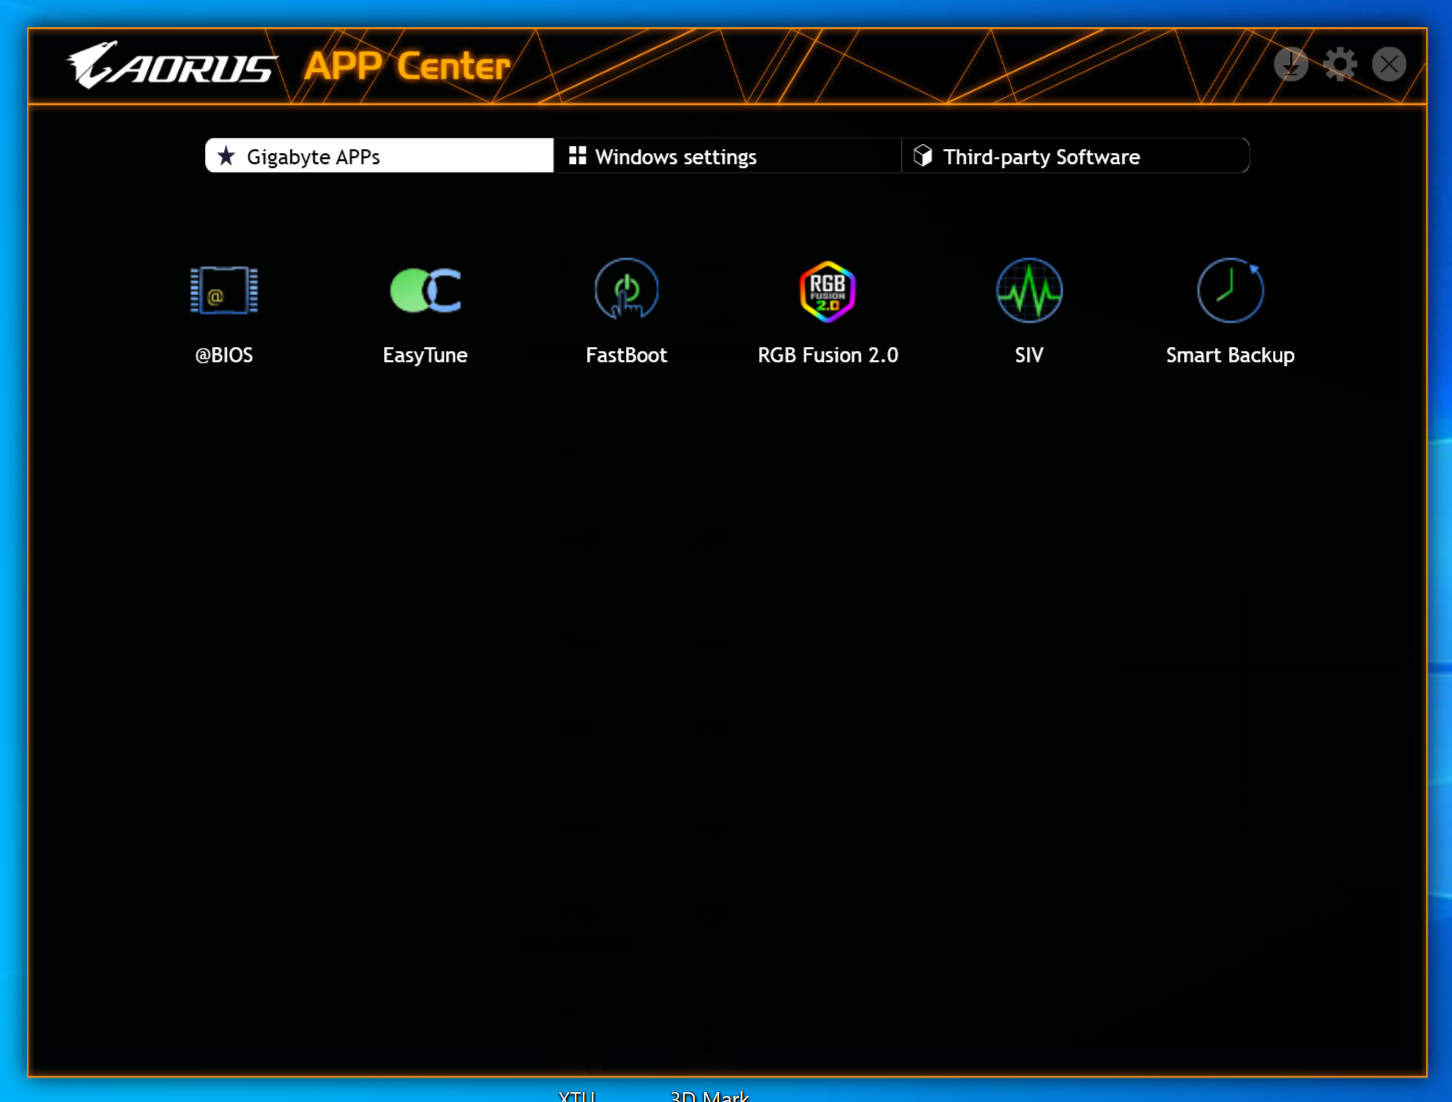
I like the fact that you can update the Bios right inside the application without going through the typical Bios Flash utility using a USB drive and things like that.

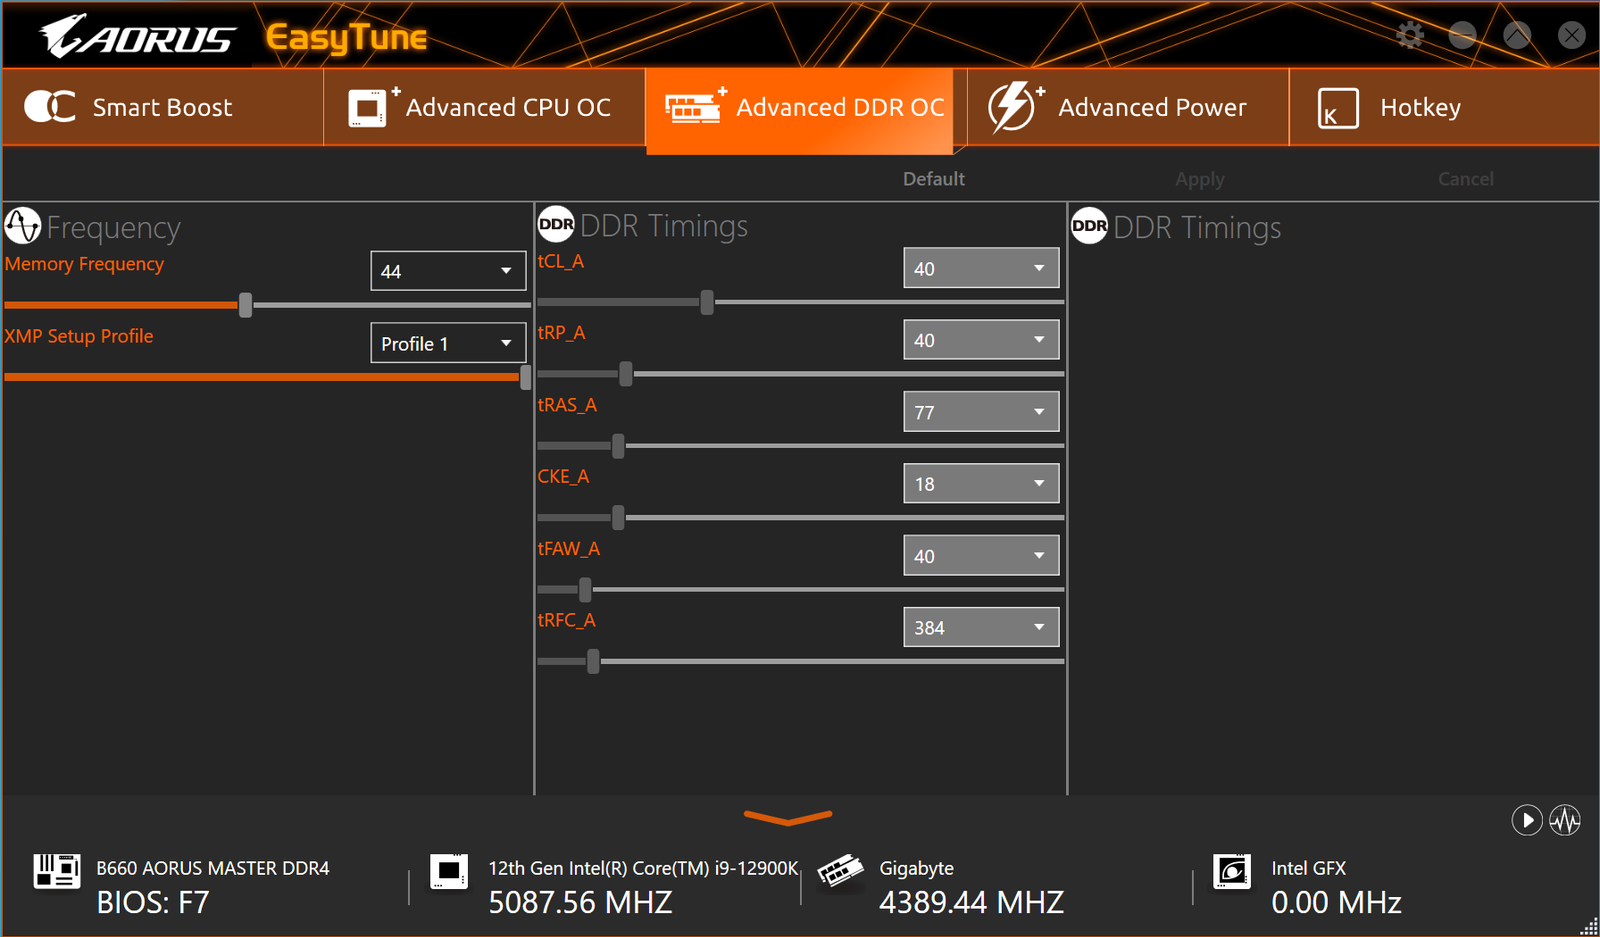
If supported by the motherboard, you can also easily overclock inside the app.
If also supported by the motherboard, you can also take advantage of the Smart Boost feature which is a user friendly way to customize the performance of your PC build

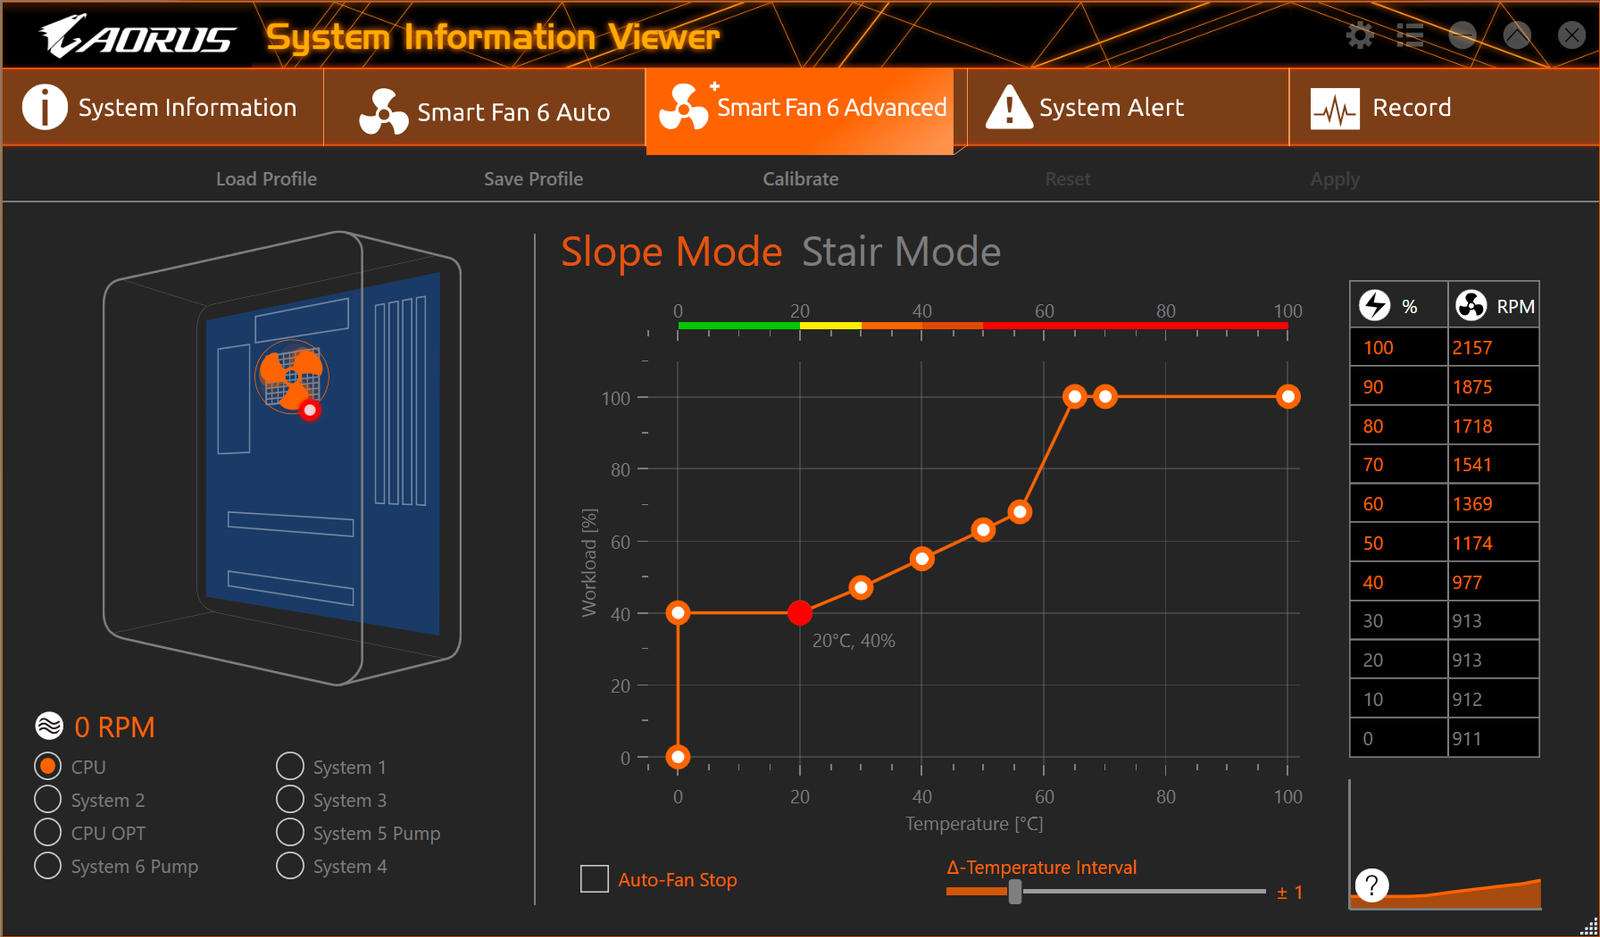
One of my favorite features here is the Smart Fan 6 wherein you can easily set custom fan curves depending on your preference when it comes to balancing thermal performance and fan noise.
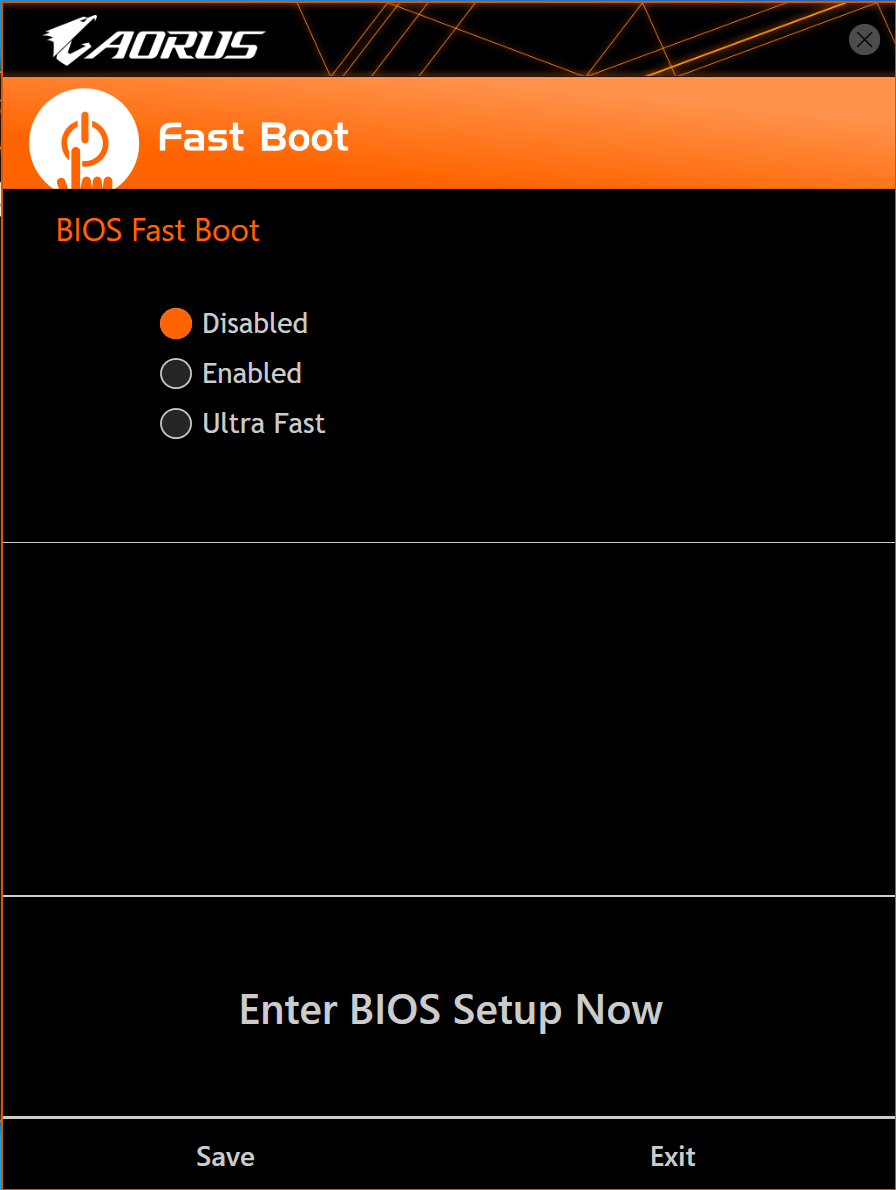
Aside from those things I’ve already mentioned, we also have a Fast Boot and Back up feature.

And the RGB Fusion 2.0 wherein you can customize the lighting effects of all the components connected to your motherboard’s addressable RGB headers.
VERDICT
Overall, these results give us an idea that the B660 Aorus Master can definitely handle the 12th-Gen Intel Core i9-12900k thanks to its beefy heatsinks and robust power delivery. The only thing it’s lacking is the ability for you to tinker with manual overclocking, otherwise, the performance is still pretty much what you can expect on a stock 12th-Gen Intel Core i9-12900k. Besides, overclocking a 12th-Gen Intel Core i9-12900k requires a very good liquid cooling solution. Sometimes, even a 360mm AIO can’t keep up with overclocked temps especially when pushed to its limit, so it’s really quite a challenge. Also, the B660 Aorus Master does a good job auto overlocking the 12th-Gen Intel Core i9-12900k from 4.9Ghz to 5.1Ghz with relative ease and decent thermals, so you’re really not missing out that much in terms of performance.
But then again, honestly, I still wouldn’t recommend this setup unless it’s really necessary like the scenarios I mentioned earlier. One thing you can consider within the Aorus range is whether you should consider getting the B660 Aorus Master instead of the Z690 Aorus Elite which is the closest motherboard we can compare with in terms of features as they are quite similar. Is the Php 2000 savings worth it to go with a B660 Aorus Master motherboard or should you just go ahead and go for the Z690 Aorus Elite, the choice is yours. Another thing to consider is that most of the time, based on the trend of the previous Z560 and Z590 chipset, the top-of-the-line chipset usually has a quick end of life compared to the mid-tier chipset, so availability is one thing to consider as well depending on the timing of your PC Build. Overall, it is good to know that the B660 Aorus Master motherboard can handle the 12th-Gen Intel Core i9-12900k should you choose to go that route.
Credits:
Huge thanks to Aorus for letting me borrow most of the components used on this PC Build.
10th Gen Intel Core i5-10400 PC Build Tested in Cyberpunk 2077!
Aorus Z490I Ultra Mini-ITX Motherboard Unboxing and Overview
Aorus B550I Pro AX Mini-ITX Motherboard Unboxing and Overview
ASUS TUF Gaming 1660 Super OC Review
If you like this one, please consider subscribing to my channel by hitting the button below. Have a great day!


The Broll who always got your back online!