MY EARLY BREAKDOWN
Pros: Sleek and modern design, Front mesh with filter, Decent cable management space, Improved rubber grommets, Option for top-mounted AIO, Option for vertical GPU mounting, Decent build quality
Cons: Drive bay needs to be removed to easily install hard drives
SPECIFICATIONS
- Case: Mid Tower
- Dimensions: 425 (L) x 210 (W) x 492(H)mm
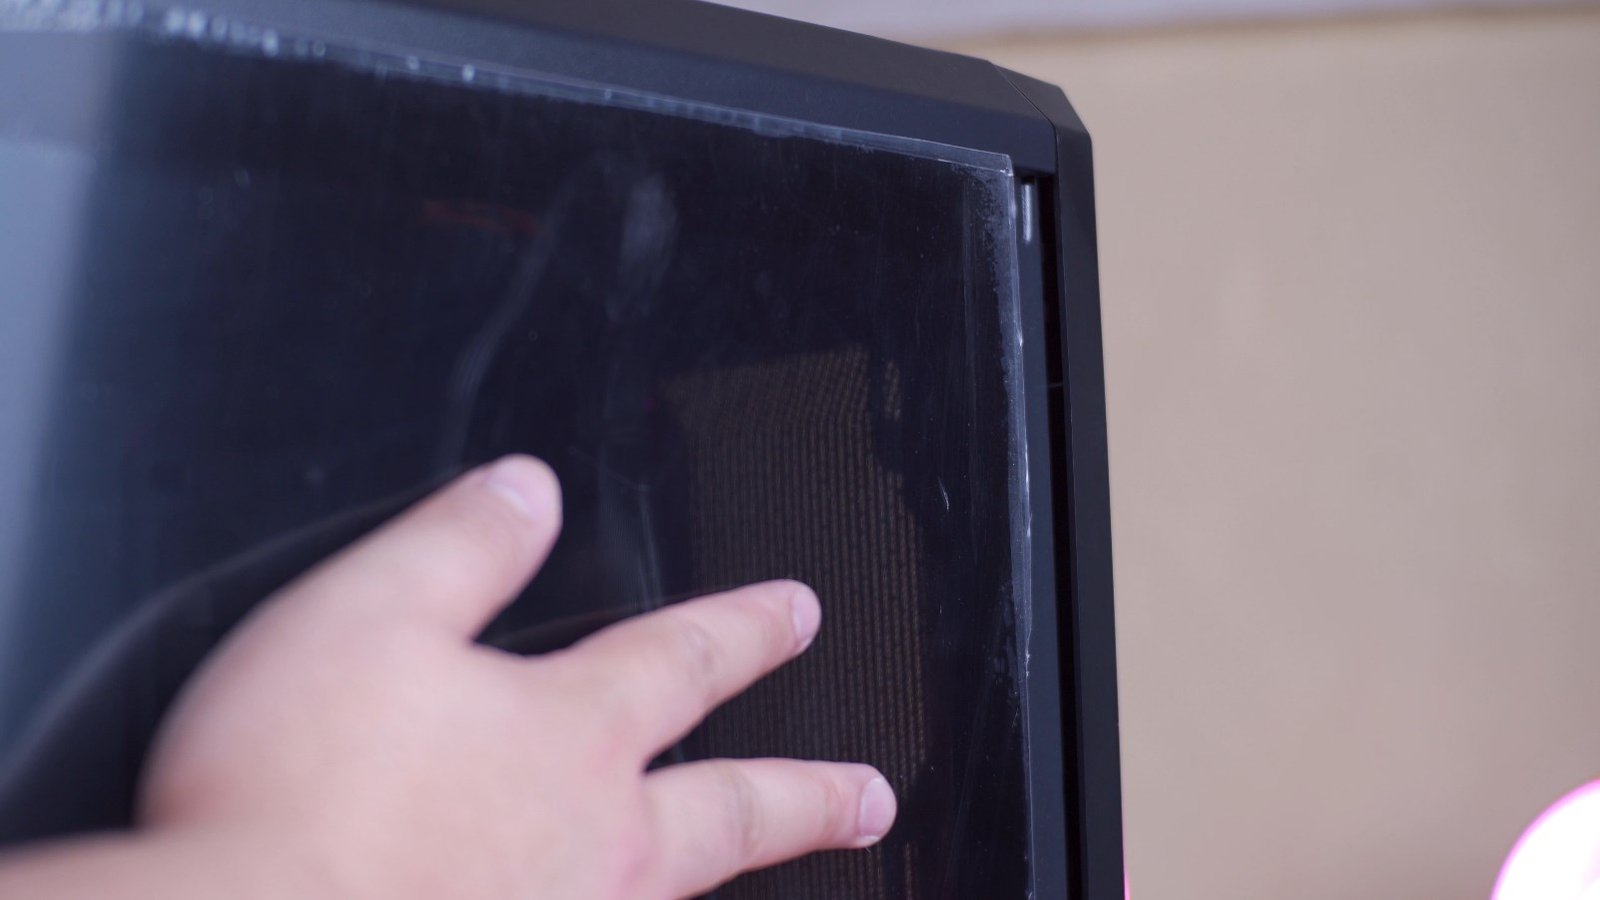
- Side and Front: 4.0mm Tempered Glass
- Expansion Card Slots
- Motherboard Compatibility: ATX, EATX, MATX, Mini-ATX
- Graphic Card Compatibility: Upto 370mm
- CPU Cooler: up to 160mm
- Cooling: Front 12cm Fan ~ 3 or 240mm water cooling
- Top 12cm Fan ~ 2 (optional)
- Rear 12cm Fan ~ 1 (optional)
WHAT’S IN THE PACKAGE
Alright guys, so I actually did an unboxing and first impression of this case already on our 2nd Pinoy Tech Broll Channel which I highly suggest you subscribe by the way although of course, it is in Filipino language. But let’s take a look again at the key features around the case here.
FULL REVIEW
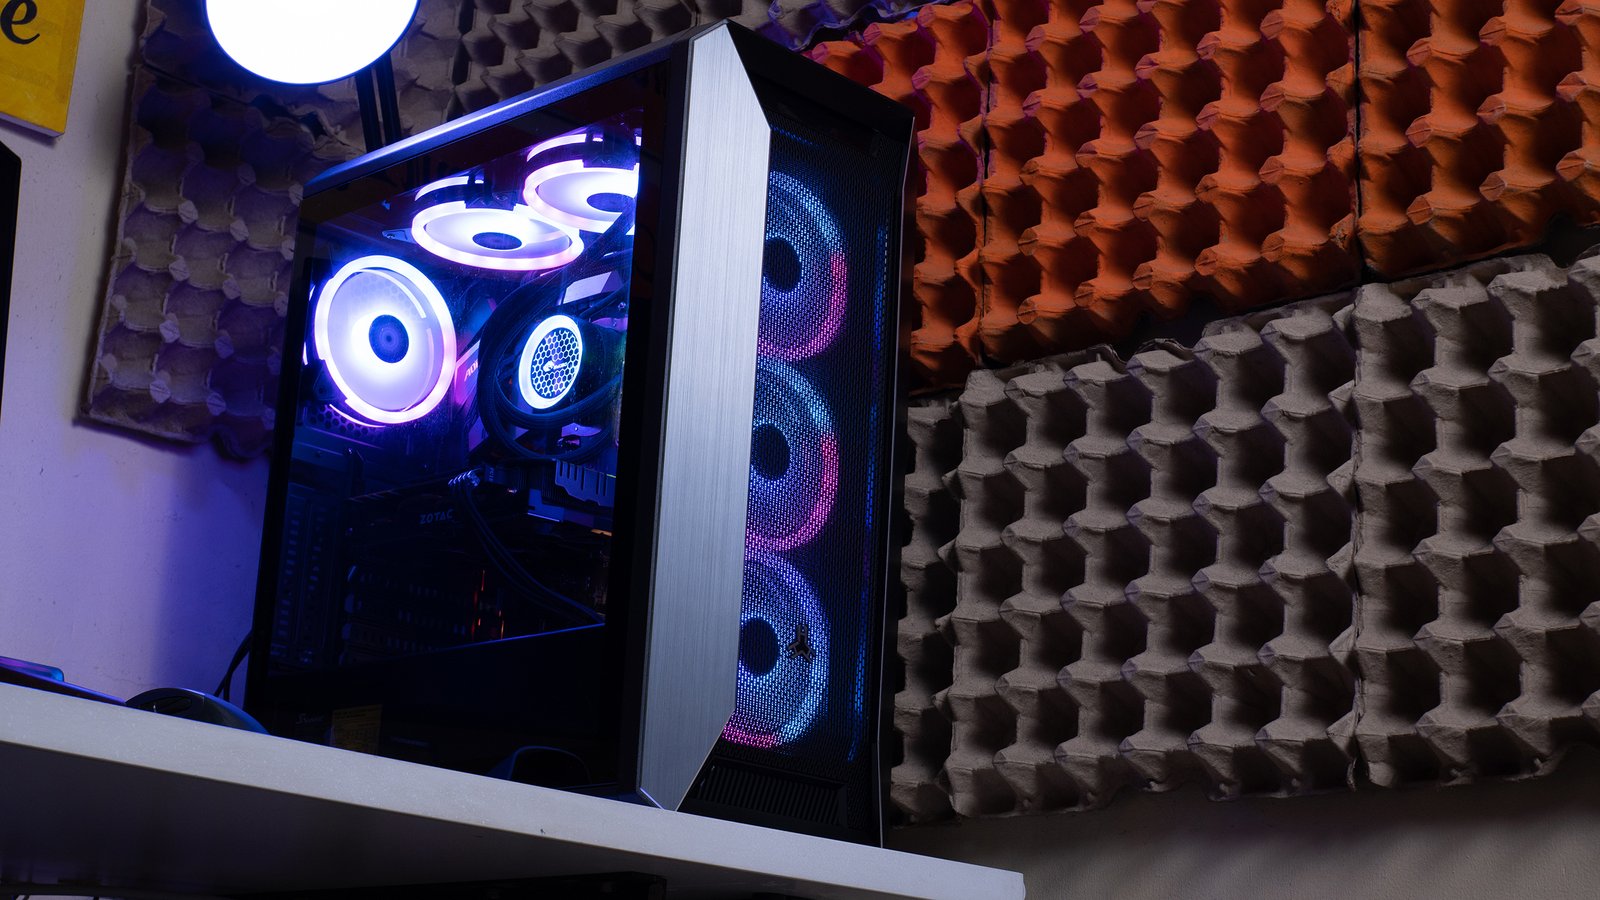
Design, Construction and Parts Overview
So the side panel uses only 2 thumbscrews at the back which is quite convenient with a sliding locking mechanism in front.

But you still have to be careful since it might tip over sideways.
Now, to remove the front panel, my suggestion is to first pinch the locks behind the panel,

Then gently pull it from the bottom, and then completely remove it from the top.

Upon removing the front panel you’ll be greeted by a nice magnetic dust filter which I really appreciate especially for a budget case like this.

And it also has another magnetic dust filter at the top.
Another nice improvement here is with the rubber grommets, it feels sturdy enough compared to what the Rakk Hawani have and it is also already preattached.
As for the drive cage, we have a rather small one at the bottom that can accommodate two 3.5″ HDD and possibly a 2.5″ HDD or SSD.

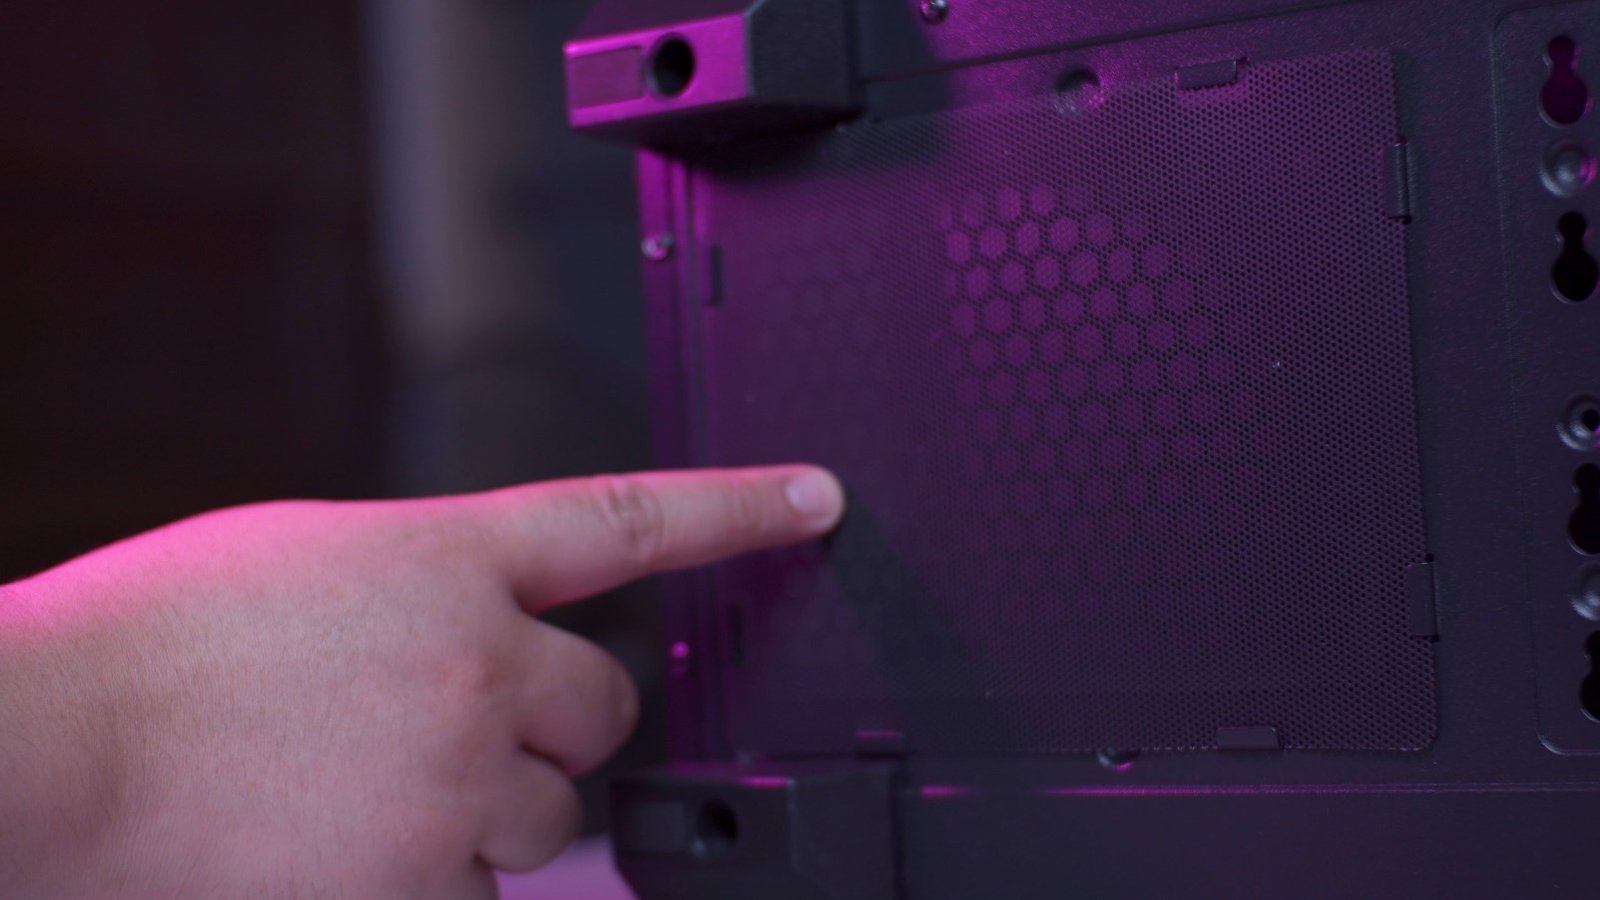
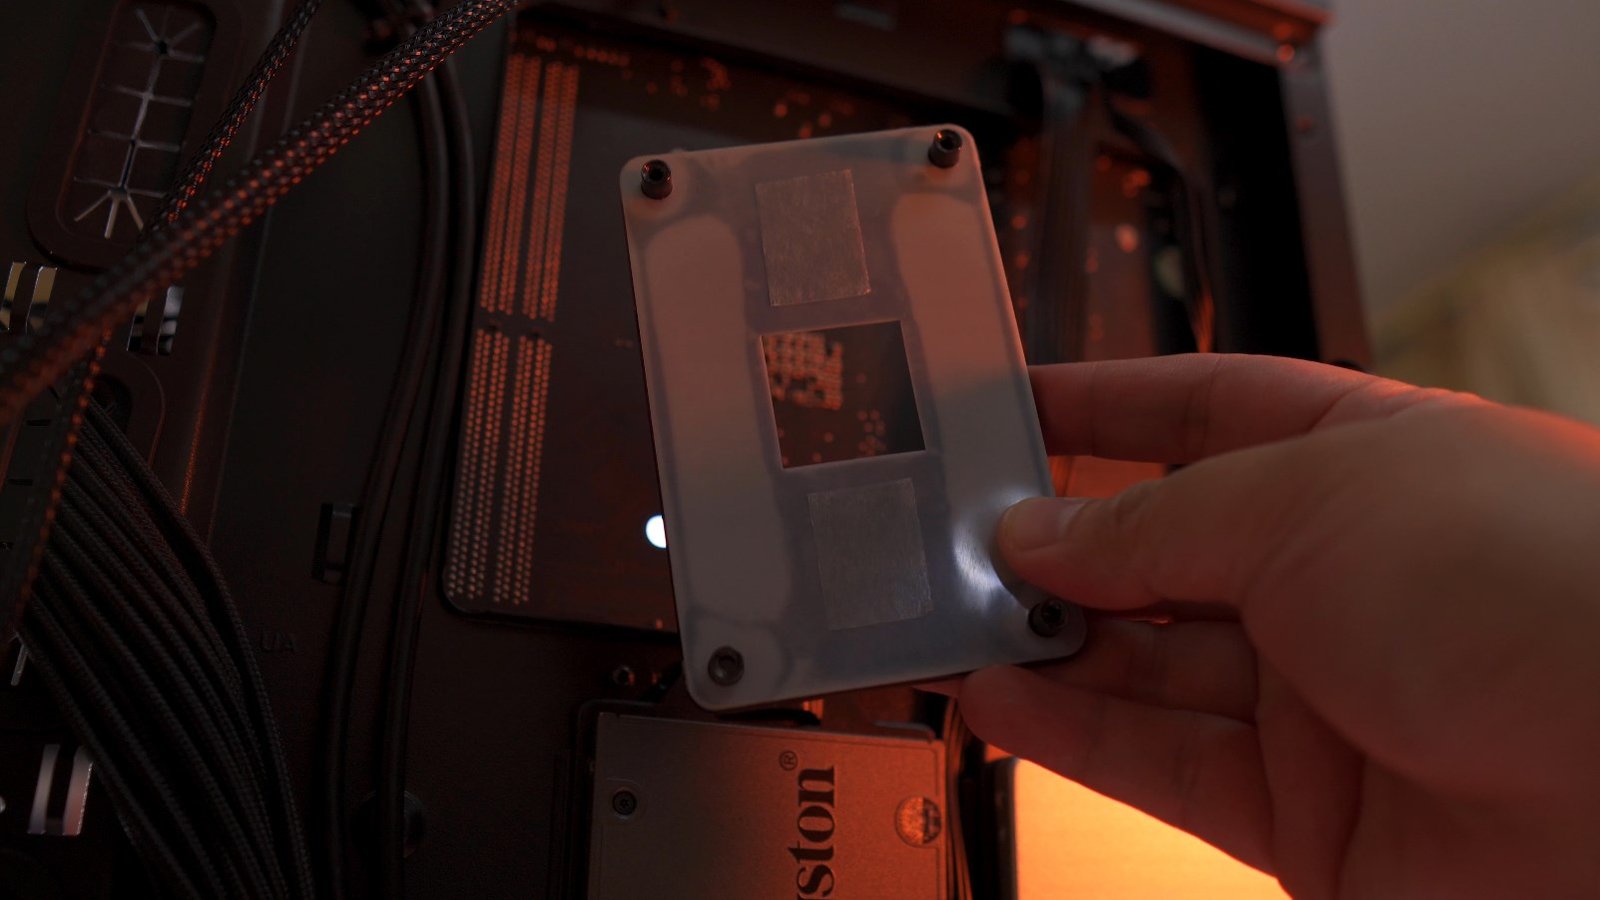
Aside from that, we also have 2 removable 2.5″ SSD trays at the back.

This case also supports vertical GPU installation with an included bracket but you’ll have to purchase a PCI-e riser cable separately.

Underneath the case, we have a small dust filter for the power supply, but it is just clipped and not a sliding type which is quite unfortunate.
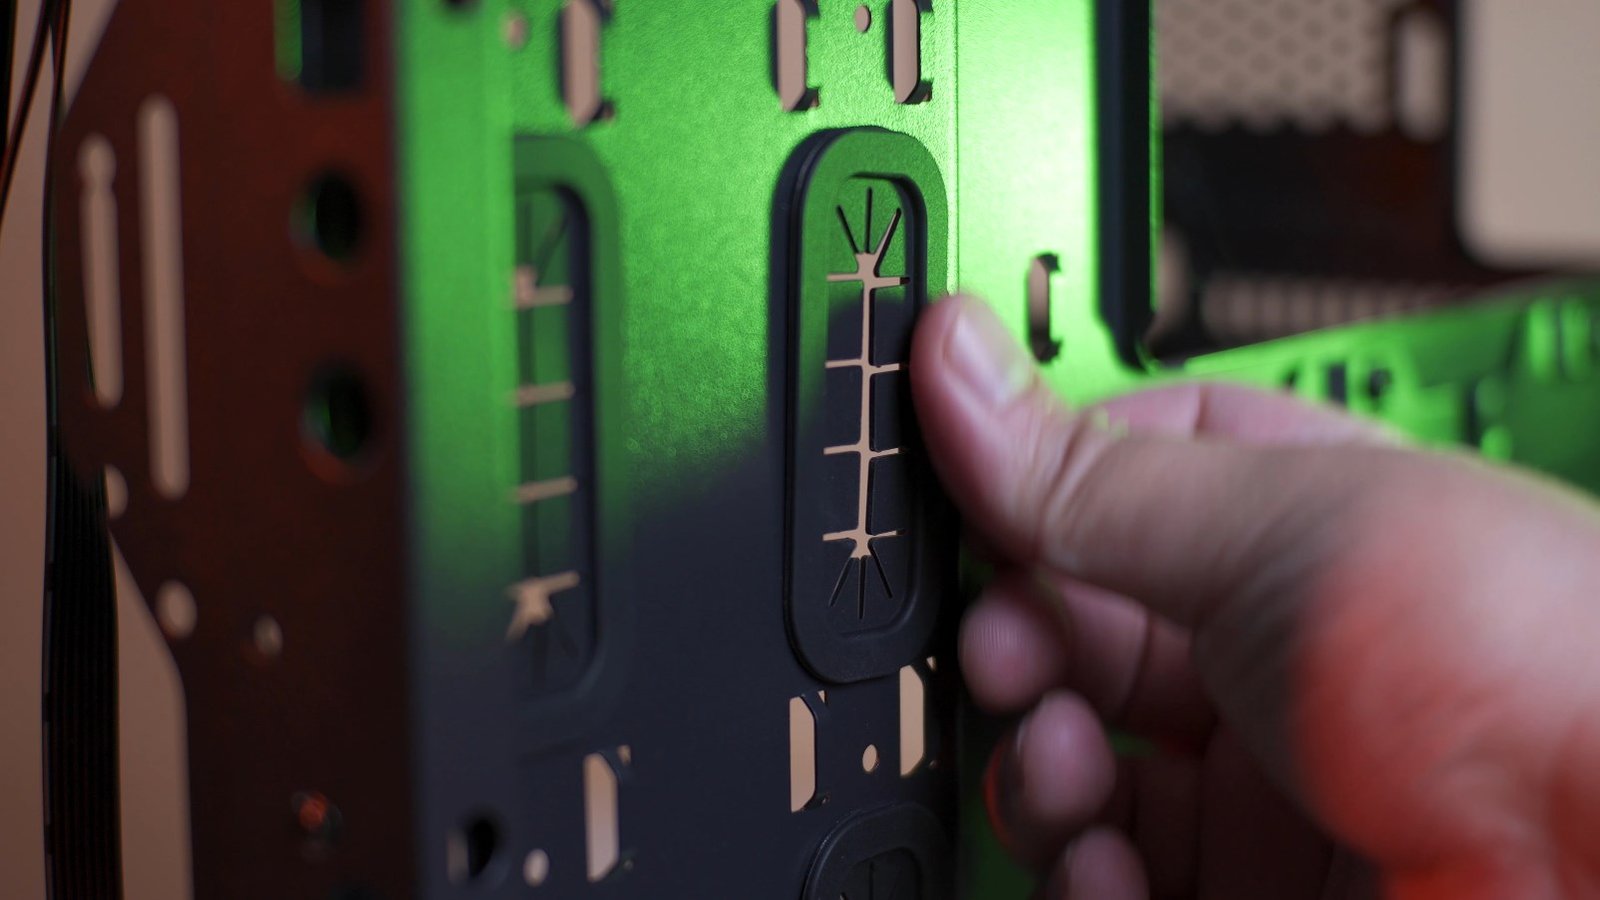
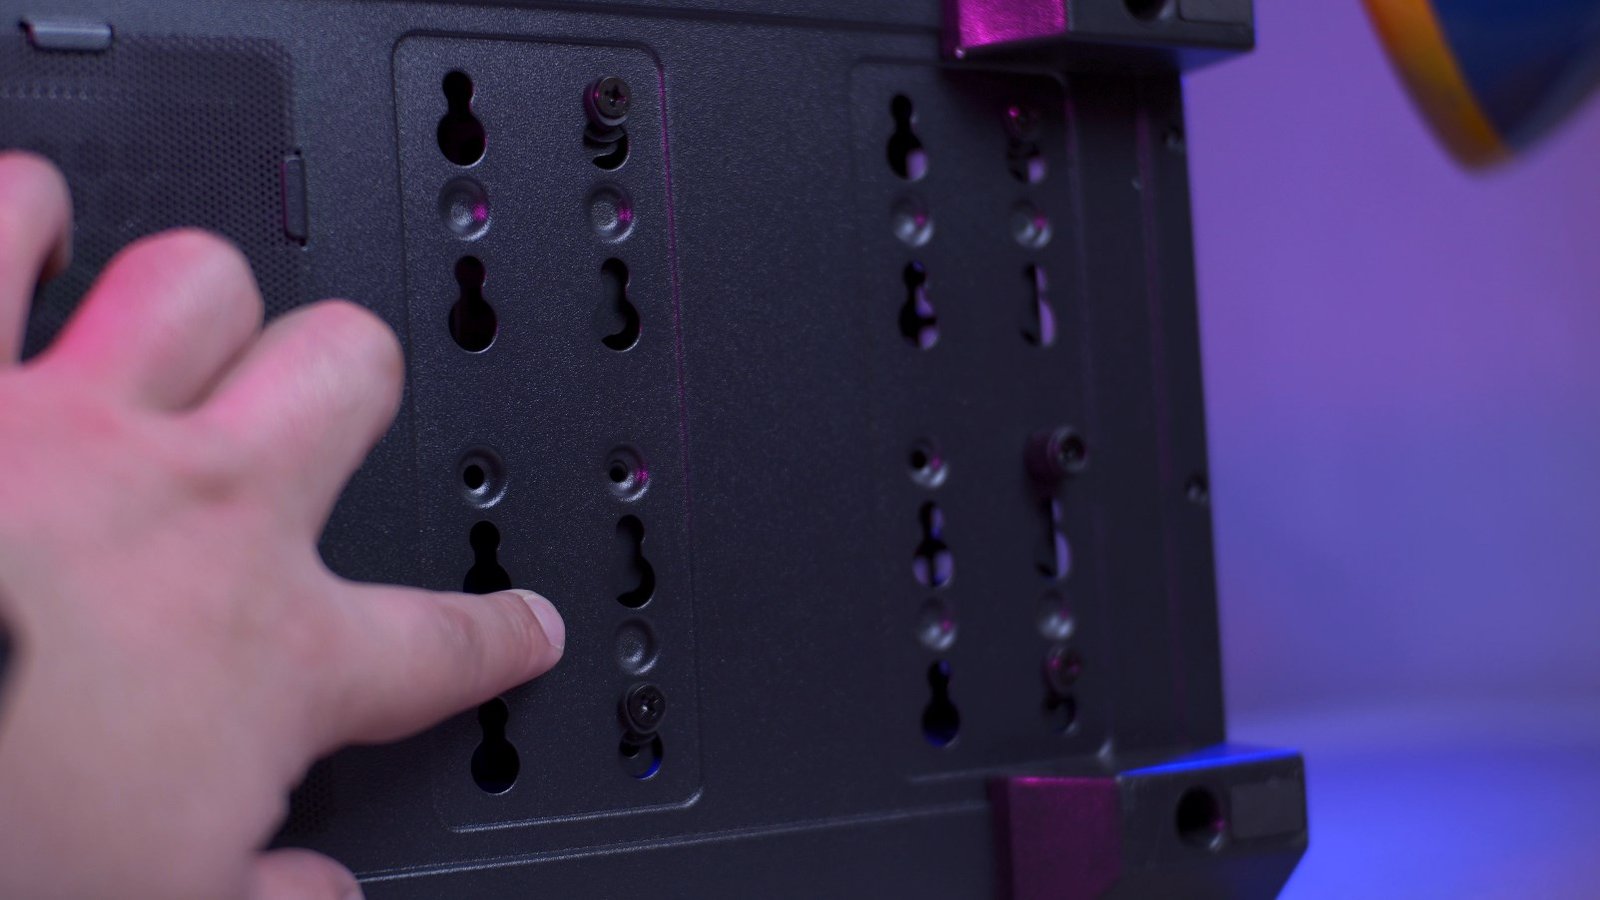
Besides that, we have here the mounting holes for the drive cage and this is actually quite important which we’ll discuss later.
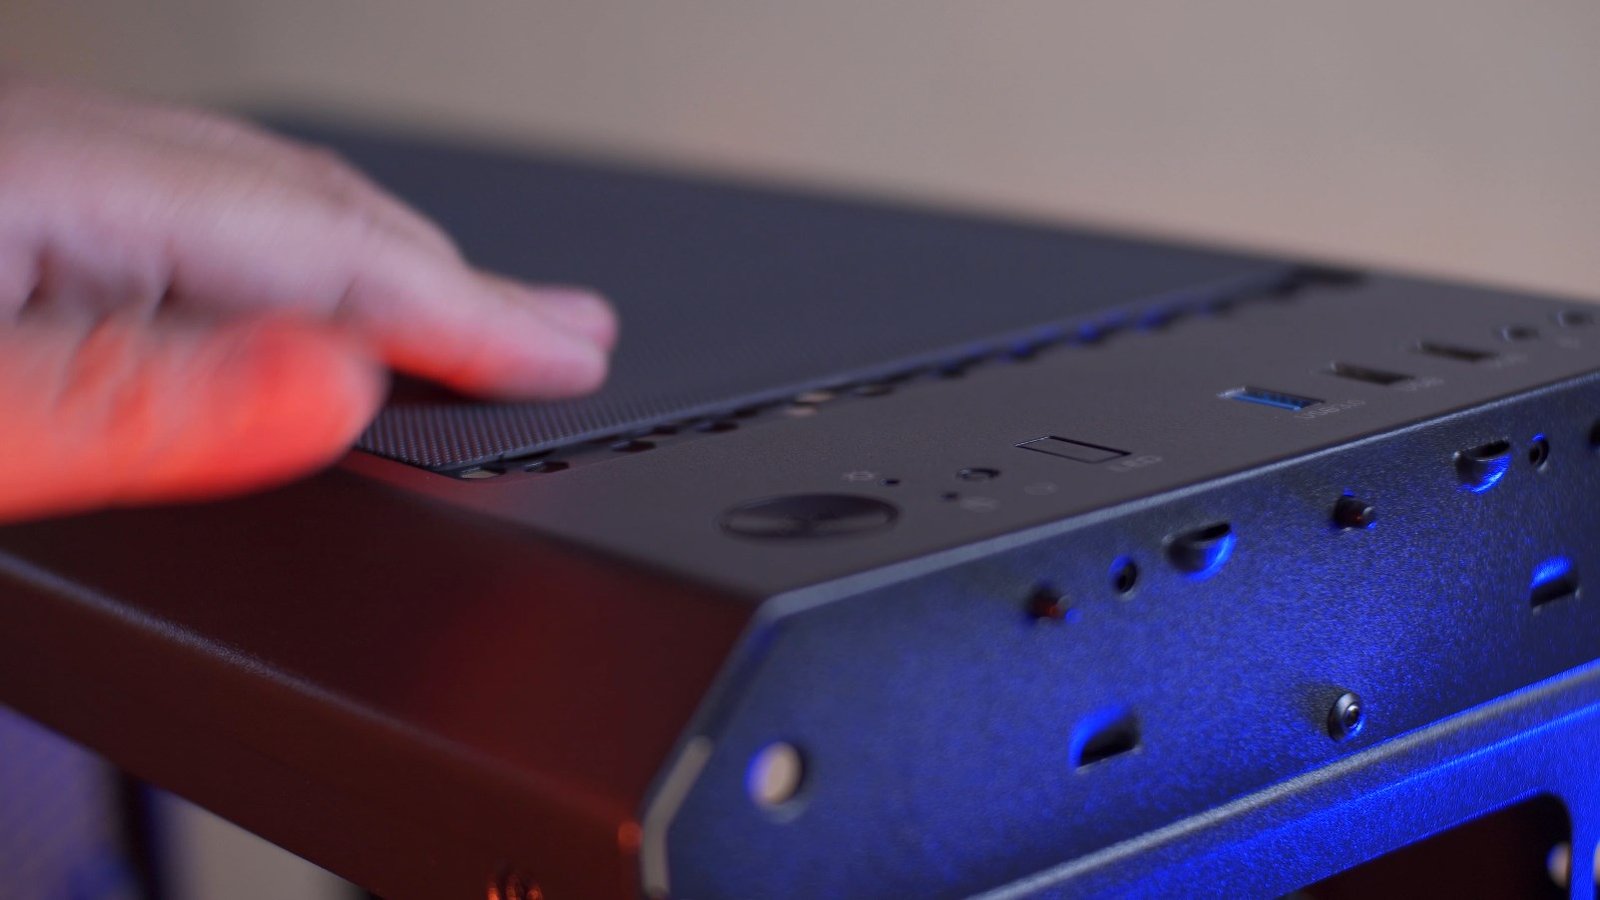
As for the top IO, we have a large power button, 2 led indicators, a super small reset switch, an LED button, 1 USB 3.0, 2 USB 2.0 and the microphone and headphone ports.
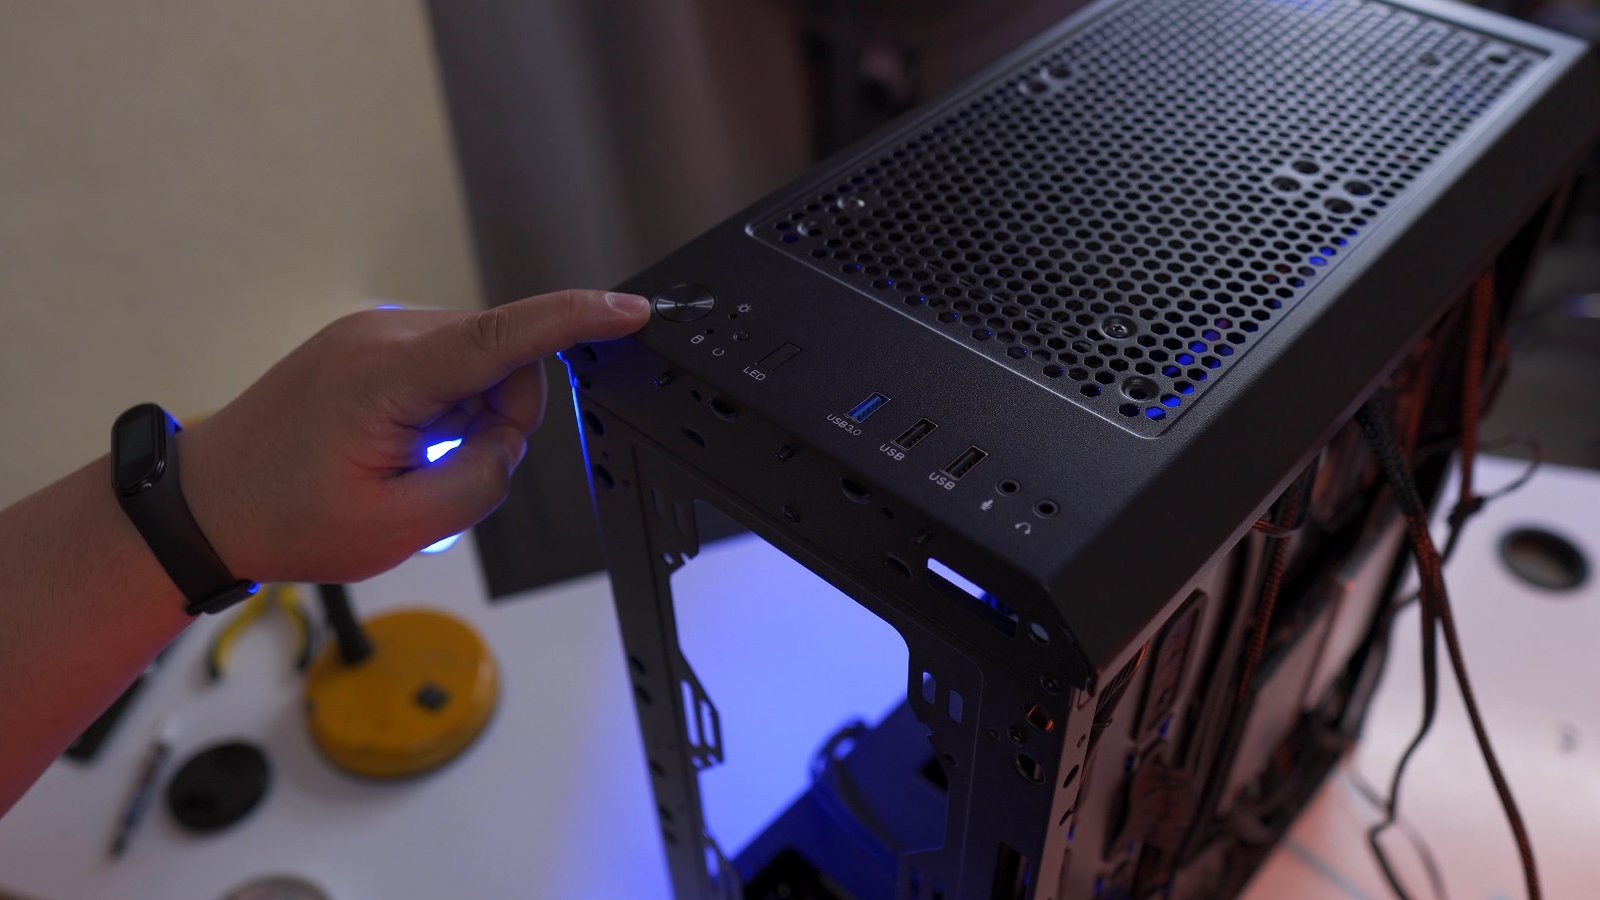
Unfortunately, we don’t have an option for a USB Type C but that is understandable for this price point.
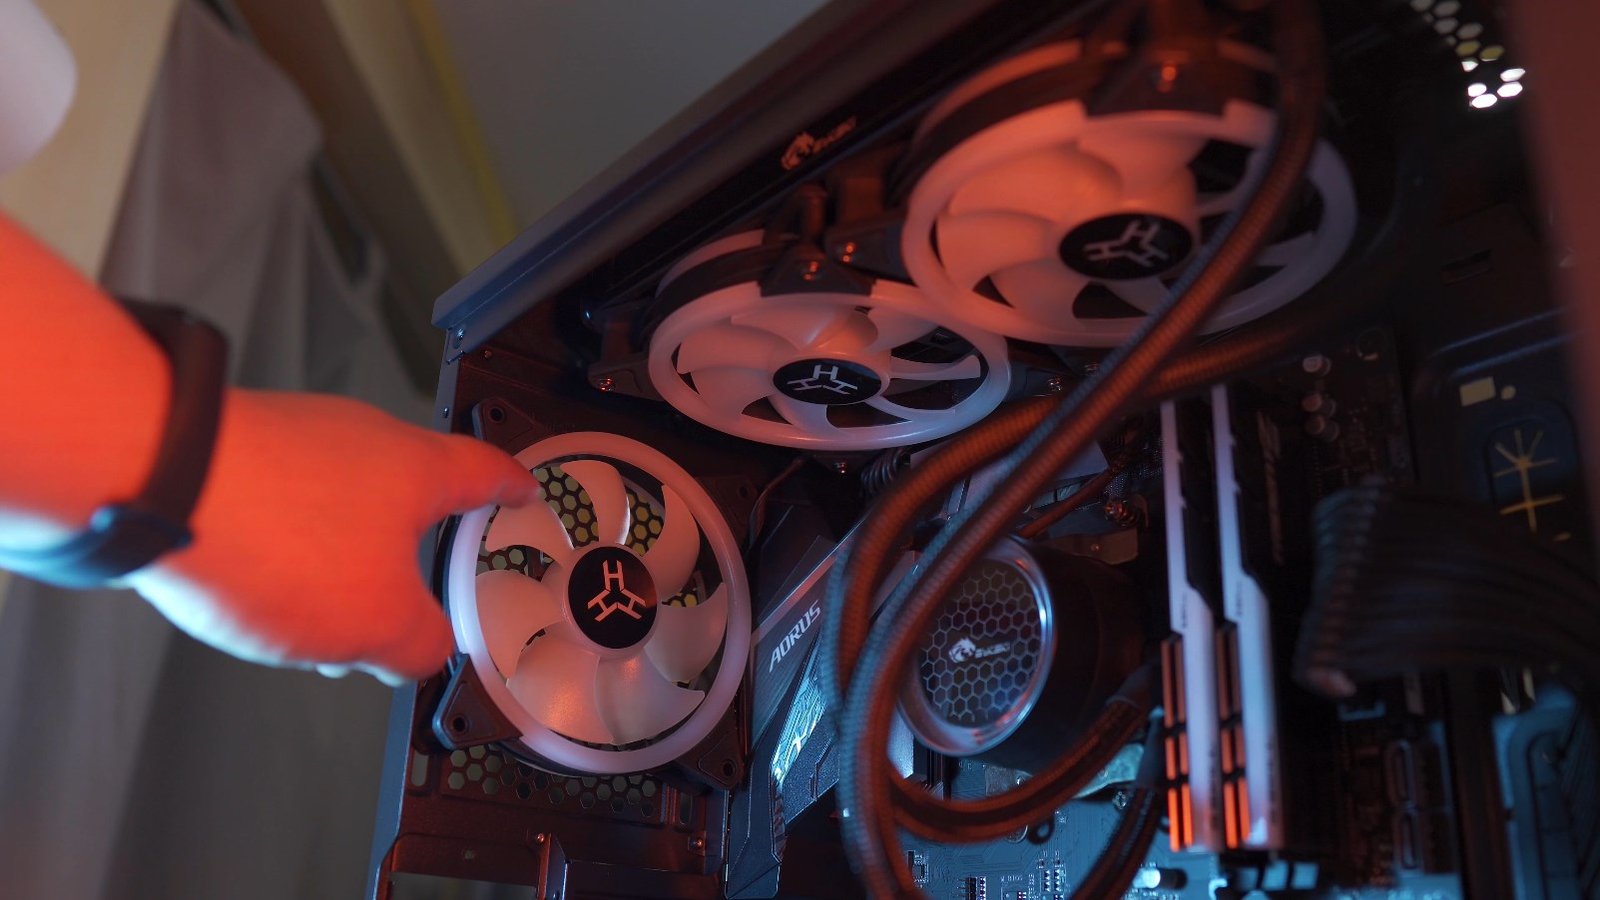
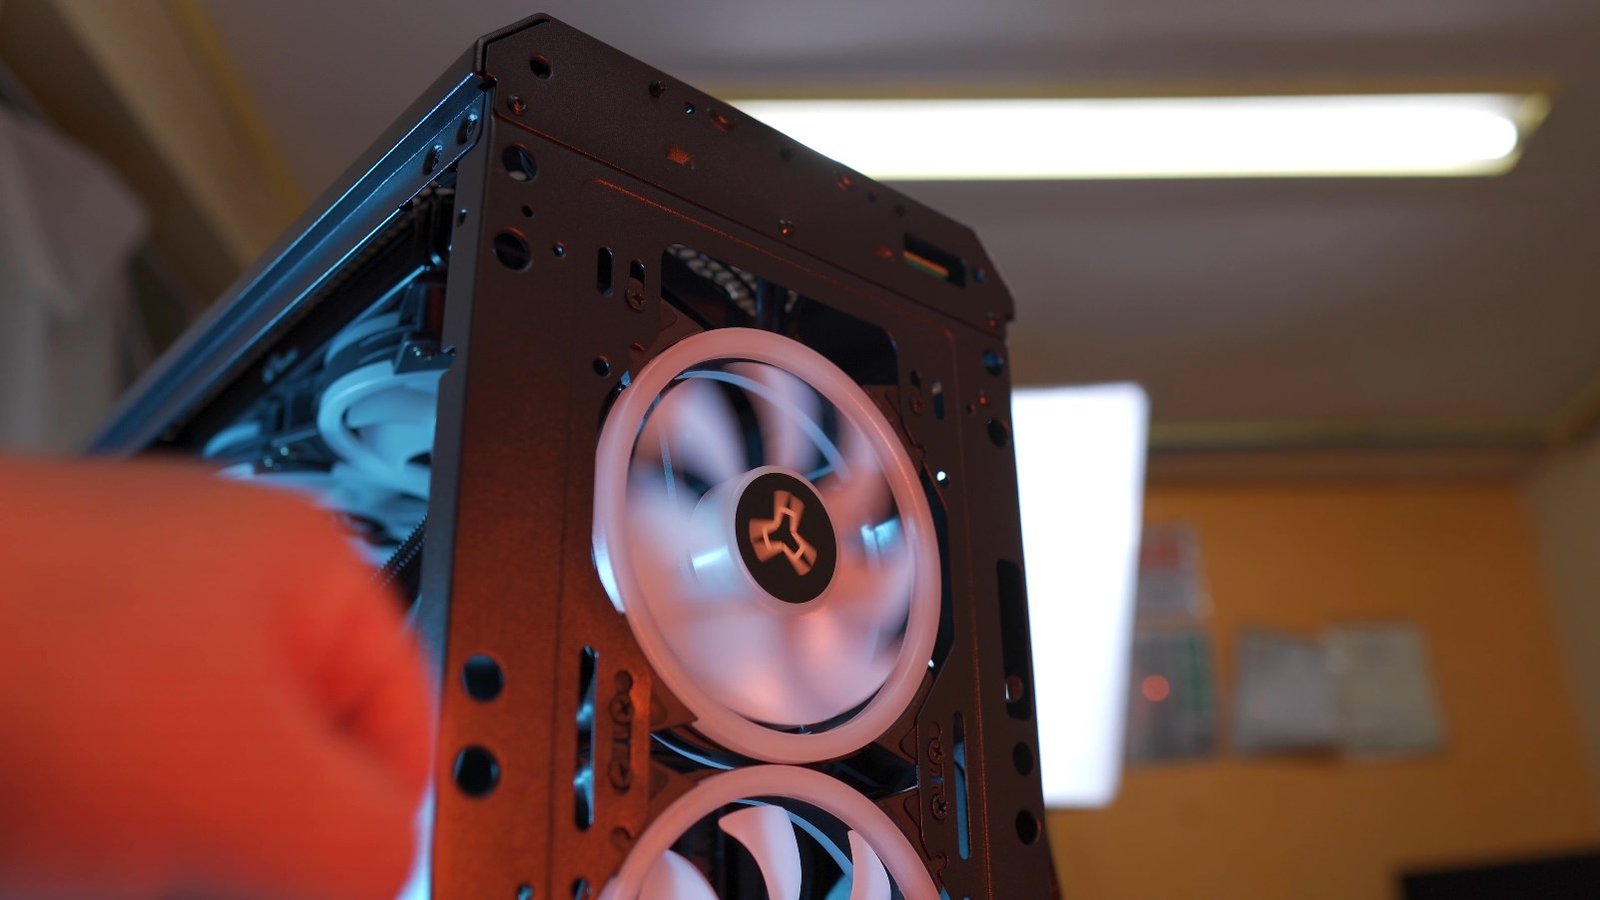
Now, at the top, you can install 2 140mm fans or 2 120mm fans, and it can also accommodate a 240mm AIO which is what we will test on this build.

In front, you can install 3 120mm fans or 2 140mm fans and of course, you can also install either a 240mm or a 360mm AIO.

At the back, you can install either a 120mm fan or a 120mm AIO,

And since this is a mid-tower case we have 7 PCI e slots with non-reusable metal covers, unfortunately.

We also have a quite large cutout for the motherboard’s backplate and it also has some preinstalled standoffs.

Build Experience
Alright guys, so building inside the Rakk Sinaya Gaming Case is certainly challenging but with proper skills and enough patience, you can easily build inside this one. But I’d say it is definitely easier to build inside this compared to the Rakk Hawani Flow but it’s not perfect.
For starters, my suggestion is to remove the drive cage first,

Then install the first hard drive on top before installing the 2nd one inside, you have to remove the drive cage or else it’s going to be a pain in the butt to screw the hard drives while the cage is installed on the case.

On the other side of things, the drive cage placement seems adjustable and it also has a rubber anti-vibration spacer which is nice.

Now, before you jump in and install the motherboard, make sure to check the standoffs if you already have enough installed.

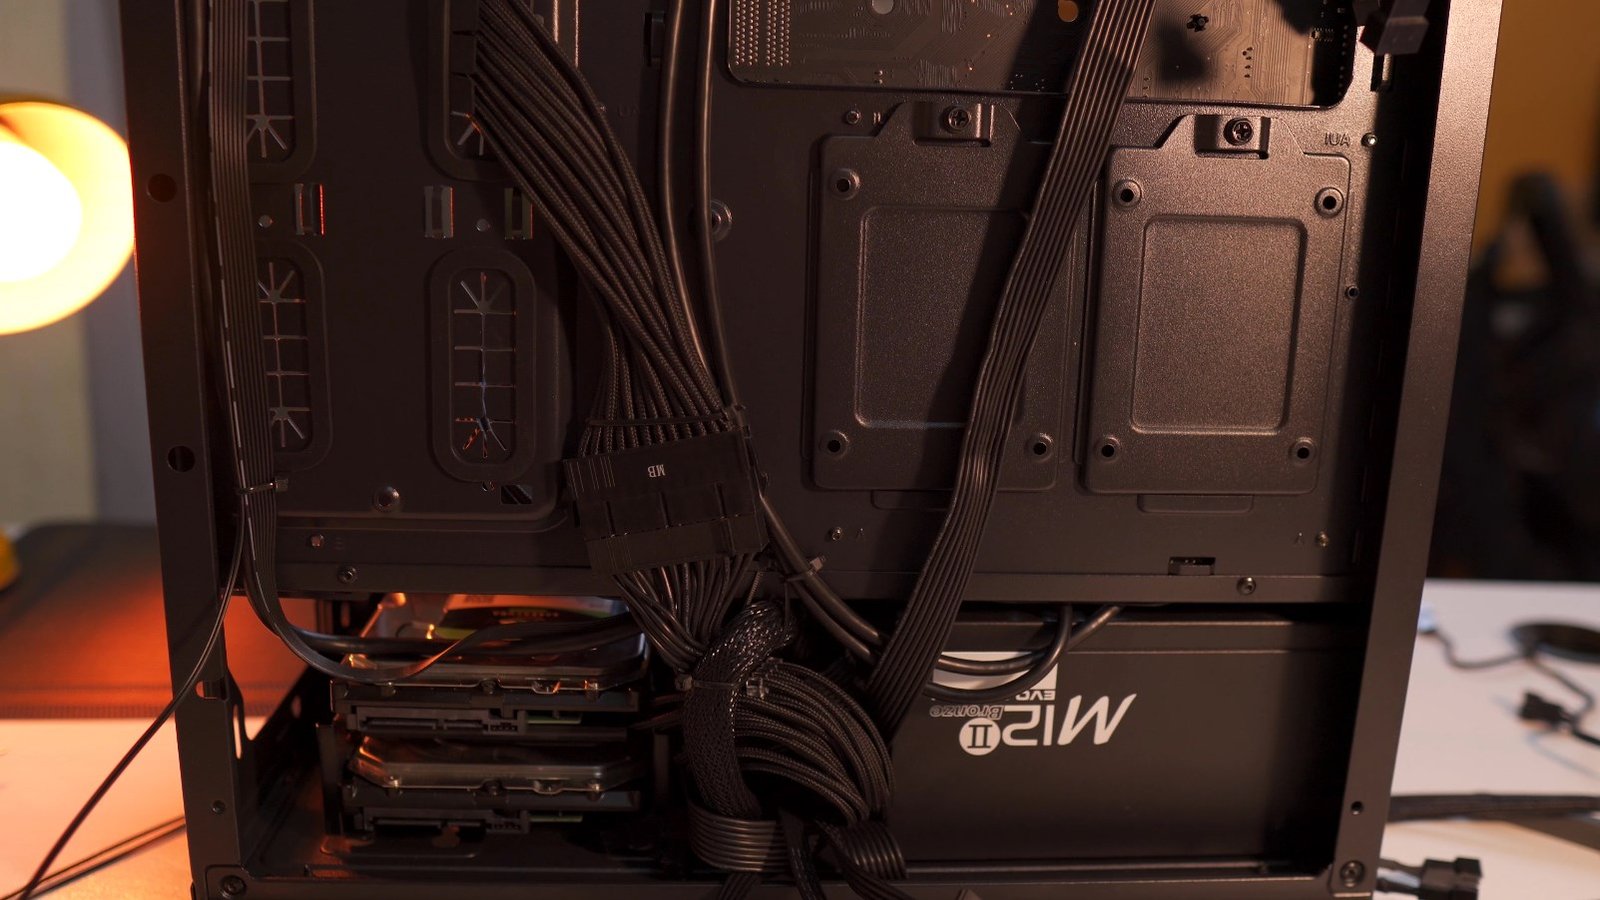
As for the initial cable management, as you can see it is quite tight down here,
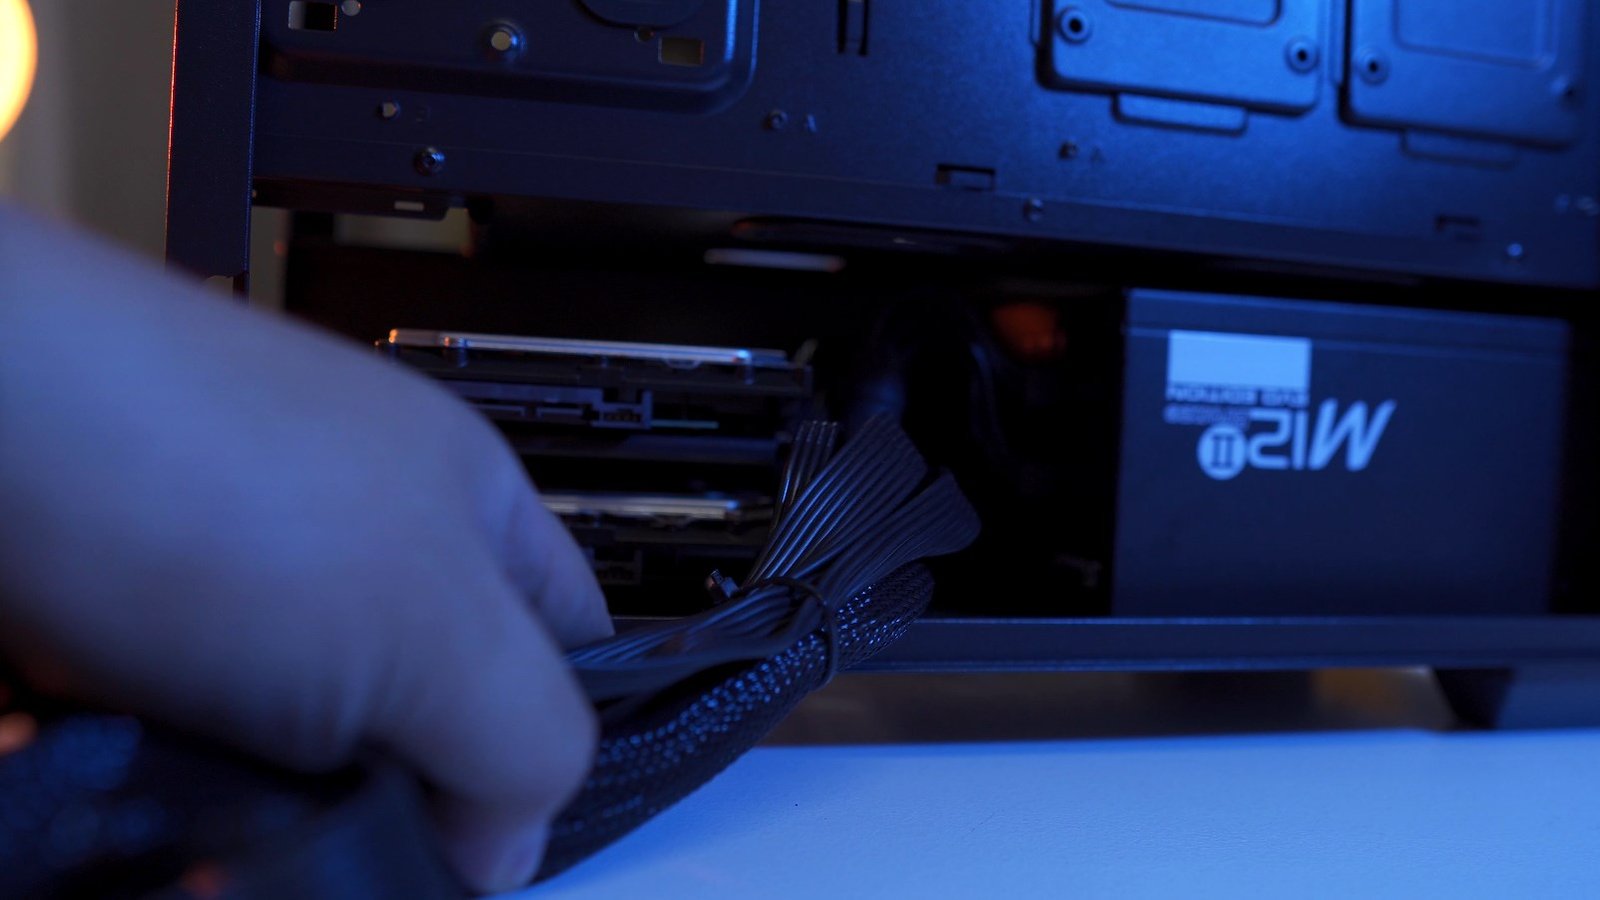
But as I said, you only need some patience to pass this challenge. Rubber grommets are still quite flimsy, but not as bad as what the Hawani Flow has.

You can still properly use it once you successfully pass the cable.

Another challenge is with the front panel connectors, the cutout here is rather small.
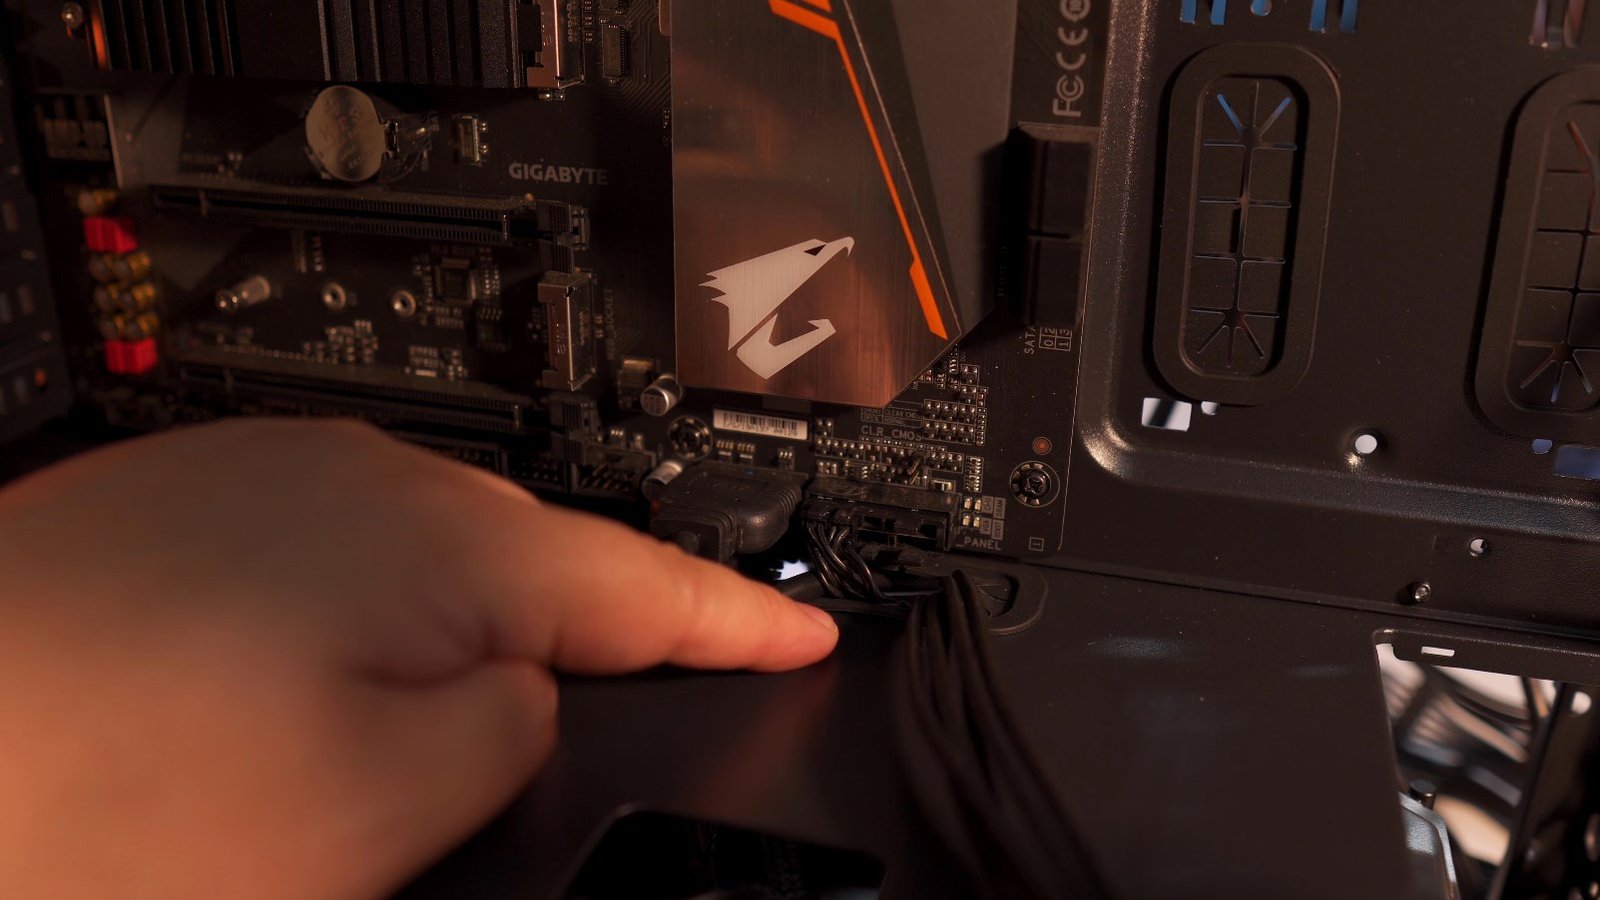
So my suggestion is to insert the USB 3.0 cable and the graphics card cable first before plugging in the connectors. And if you want rainbows on your build, then you won’t get disappointed with the USB 2.0 and HD Audio cables as you can see here. haha! why Rakk, why?

Cable management so far is good as you can see here.
SSD installation is super easy and you can also use these to hold some cables, just don’t over tighten them.

Now, like I said, the Rakk Sinaya unlike the Rakk Hawani and Hawani Flow now allows you to install a 240mm AIO at the top, and at least for my motherboard which is the Aorus B450 Pro WiFi, installing the Byski 240mm AIO was a breeze, and there are still a lot of headroom for the RAM.

By the way just a quick tip, you can use a couple of tiny double-sided tape on the backplate of the CPU cooler so that you can easily install and screw AIO or other CPU coolers in front without it falling.
So yeah, like I said, the top part has enough clearance for 240mm AIO and 2 140mm case fans.

There is also enough clearance to install a 120mm case fan at the back.
As for the fan installation in front, it is also super easy and there are a handful of adjustment slots for different sizes of case fans.
Now, for the Rakk Maris Pro fan hub, I decided to put it right beside the motherboard cutout because that’s probably the only place it can fit. I used the velcro strap included to mount it.
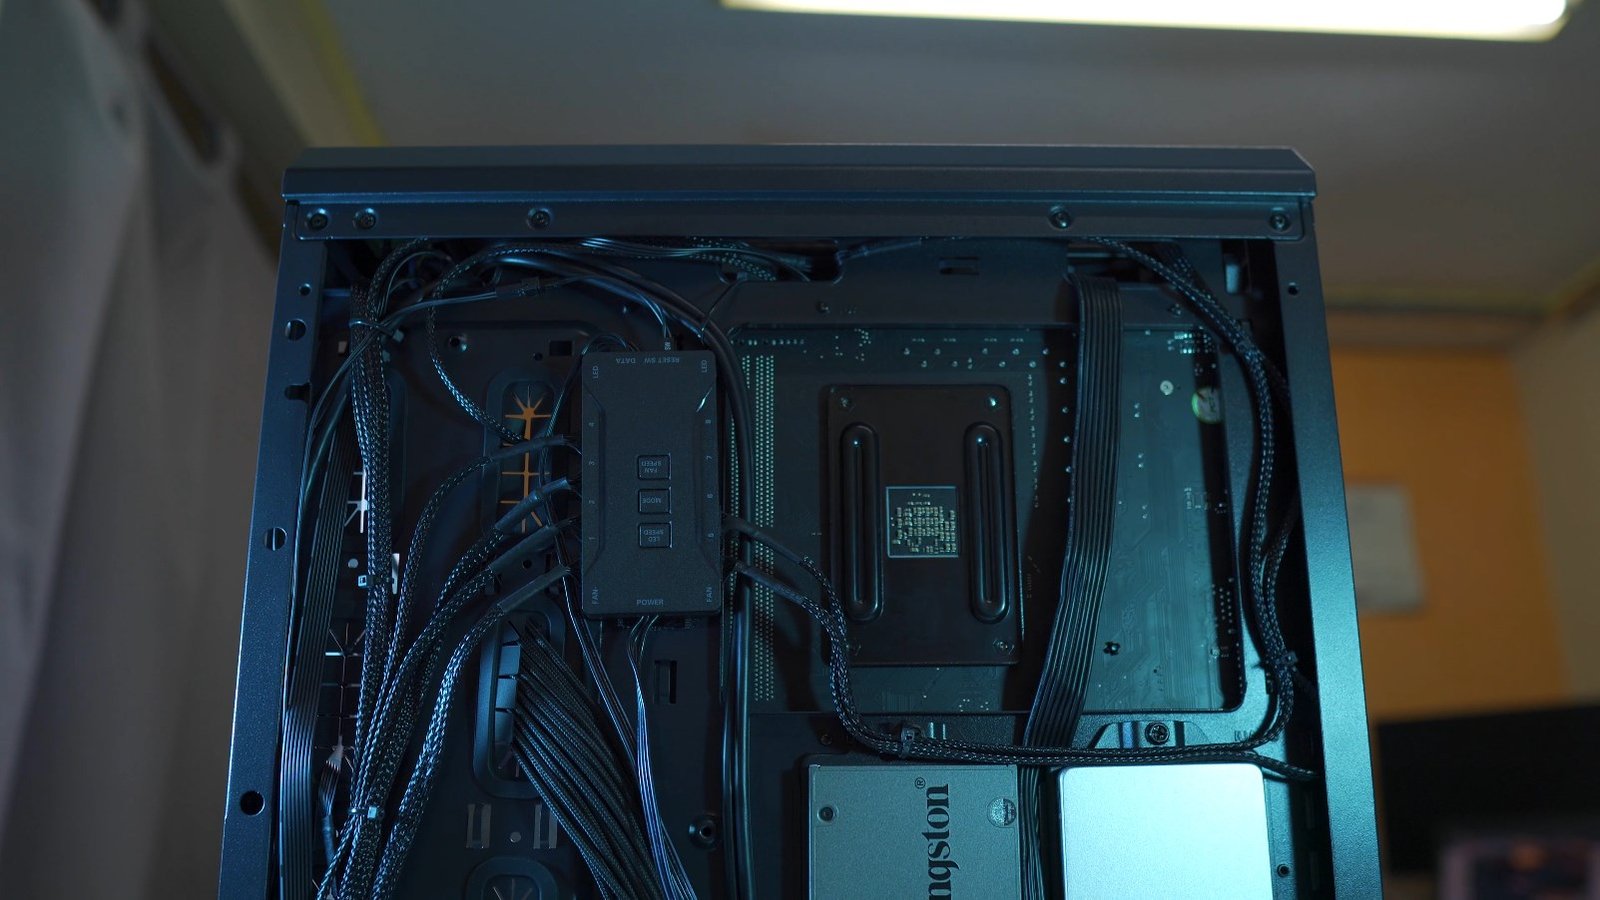
So here’s the final cable management,
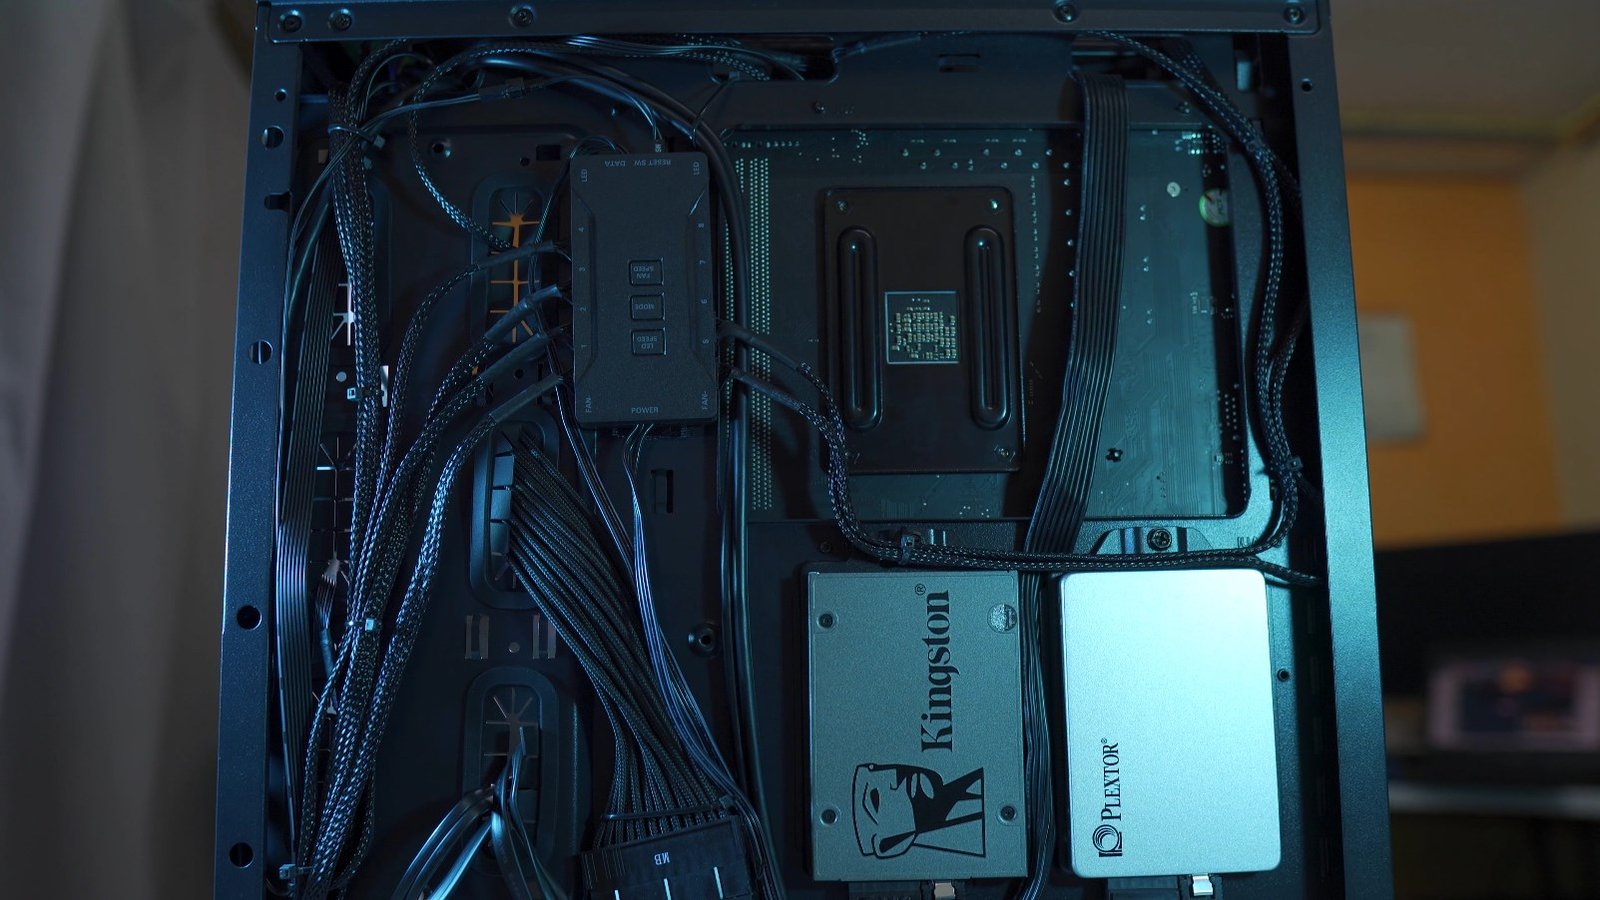
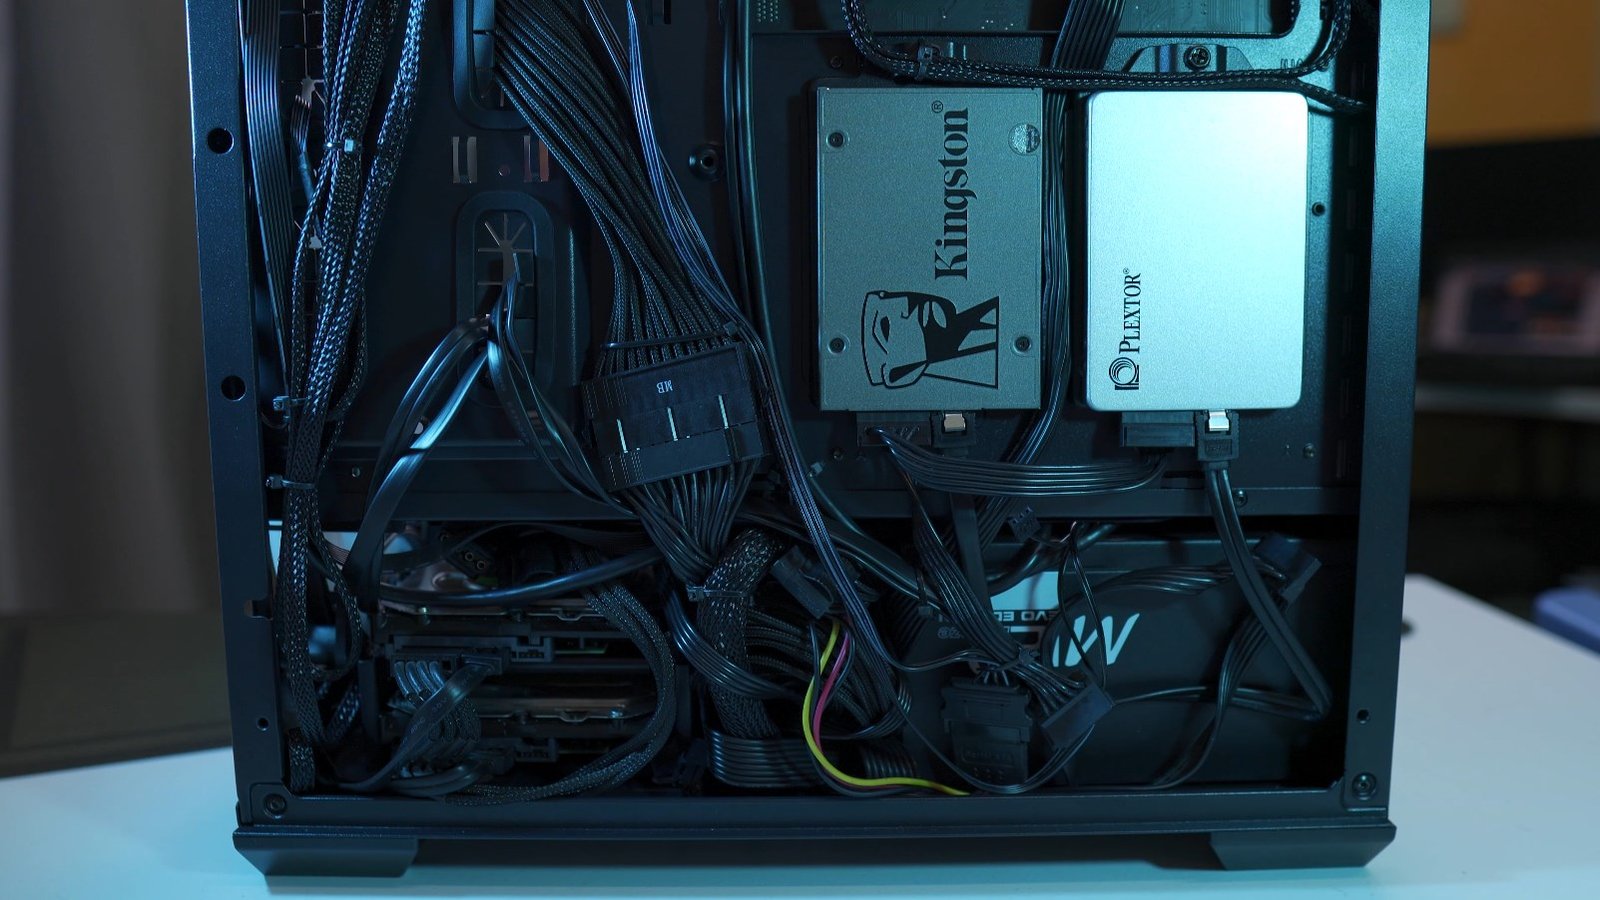
in my opinion, I think it is pretty decent, and thanks to the single cables of the Rakk Maris Pro and the Fan hub, it made cable management even easier with fewer cables to deal with.
By the way, make sure to watch my review of the Rakk Maris Pro case fans here.
Unfortunately, I don’t have a PCIe riser so I just installed my graphics card in the traditional way like so.

Overall, like I said, building inside the Rakk Sinaya is challenging but with enough preparation especially after reading this article, I’m pretty sure you will be able to build inside this in no time.
Thermal Benchmarks
Alright, guys, before we end this article, let’s take a look at some thermal benchmarks, shall we?
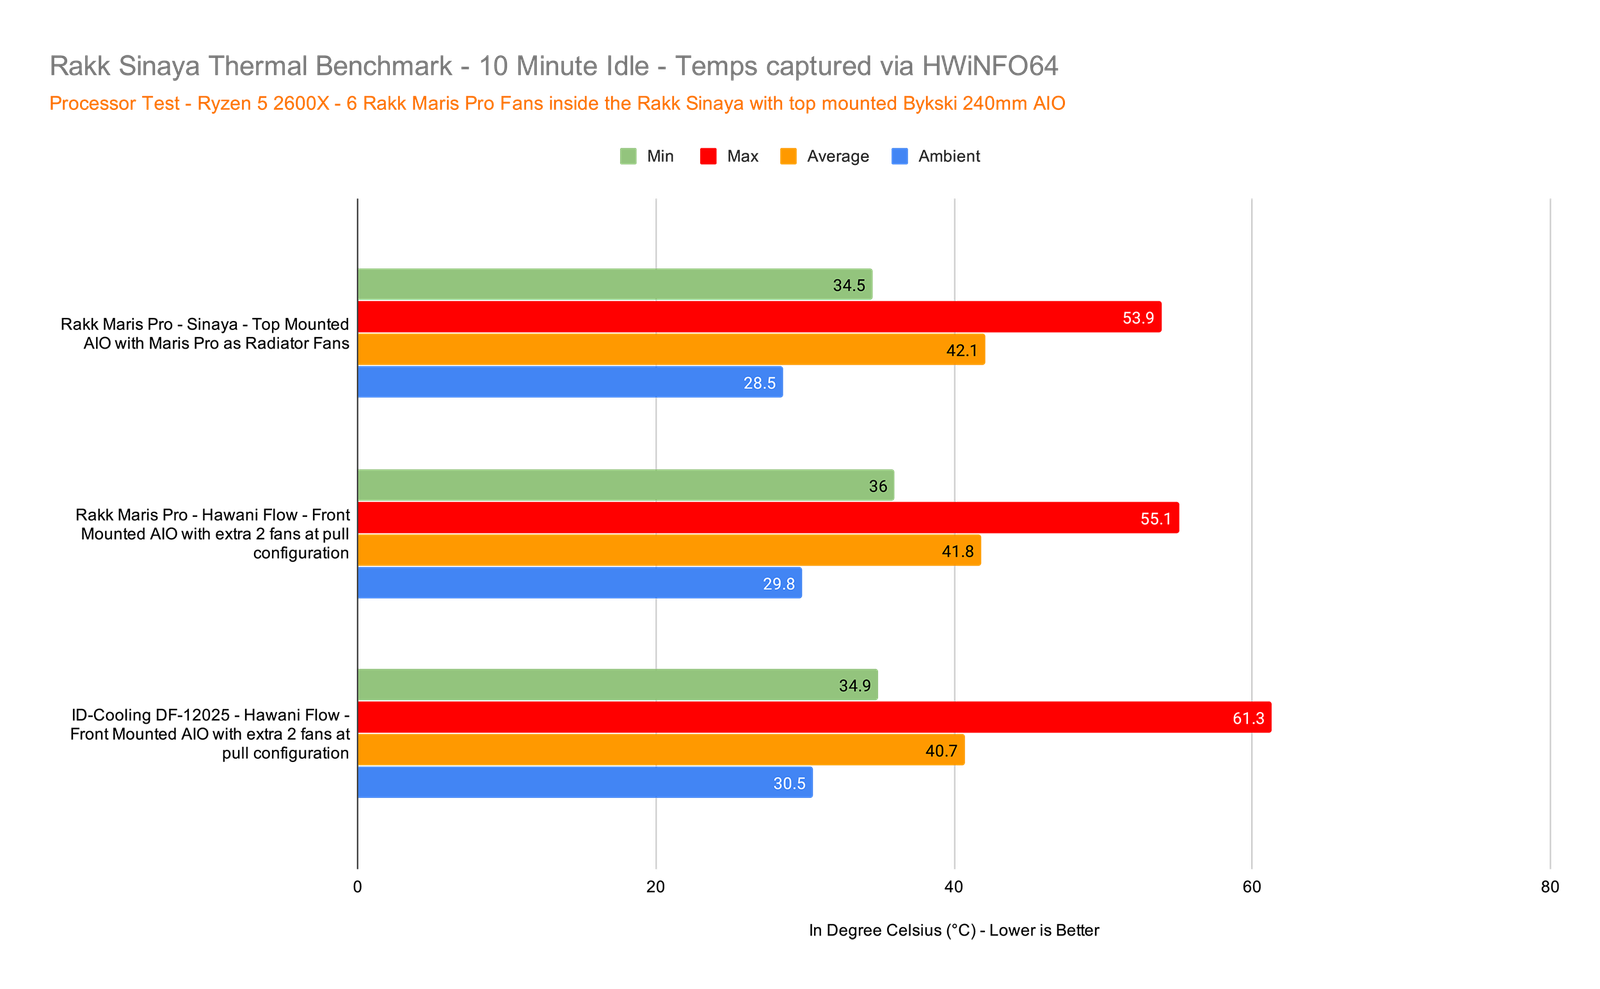
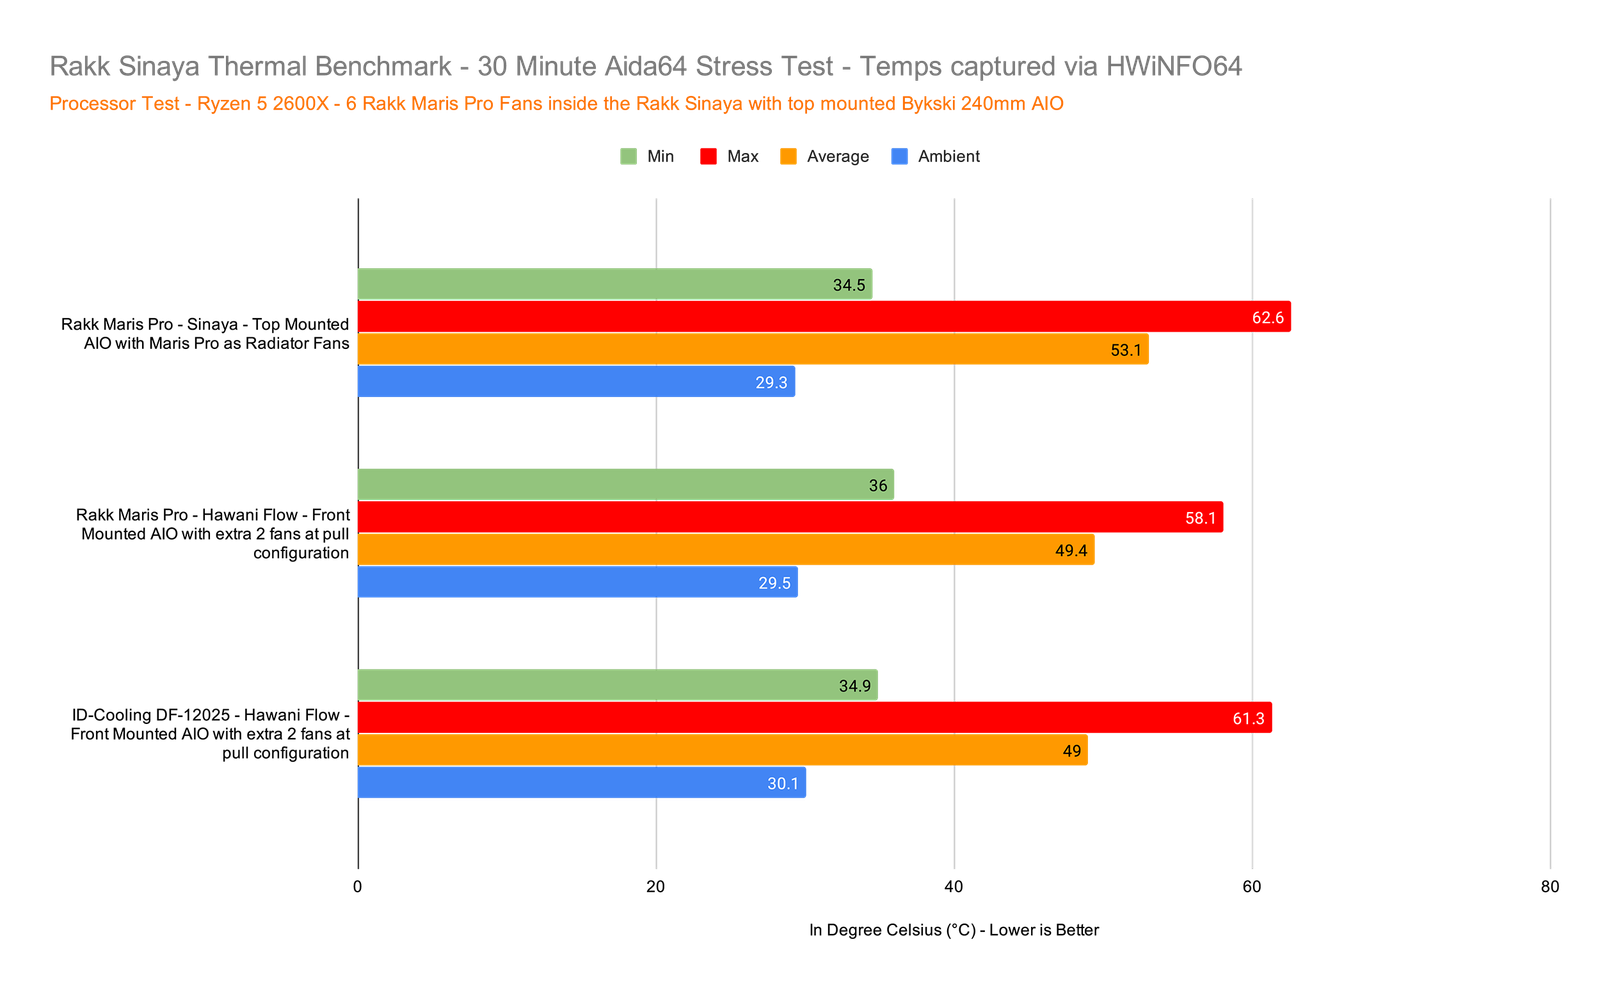
Now, since I can finally install an AIO at the top, I decided to go that route and see how the temps will differ from my previous configuration which is a front-mounted AIO with 2 fans at the back in a pull configuration. This time I only used 2 Rakk Maris Pro as the radiator fans, so basically we have 2 fewer fans in this build compared to when I used the Rakk Hawani Flow.
The first test is a 10-minute idle test using the Low RPM preset of the Rakk Maris Pro, and looking at these results for our processor which is an AMD Ryzen 5 2600x, the Rakk Sinaya is significantly cooler at max but a little hotter on the average, but I’d say these are so close and not that significant of a difference.
Next test is a 30min stress test using Aida64, and this is where we can see the difference in temps when it comes to mounting an AIO in front getting fresh air, compared to mounting it on top getting hot air from other components inside the case as the temperature is obviously hotter for our processor but still pretty decent in my opinion.
As for gaming which is kinda our real-world performance test here, the results are pretty close to each other but take note that we have 2 fewer case fans on our new configuration so this means, we’re not losing anything when it comes to performance which is actually quite nice.

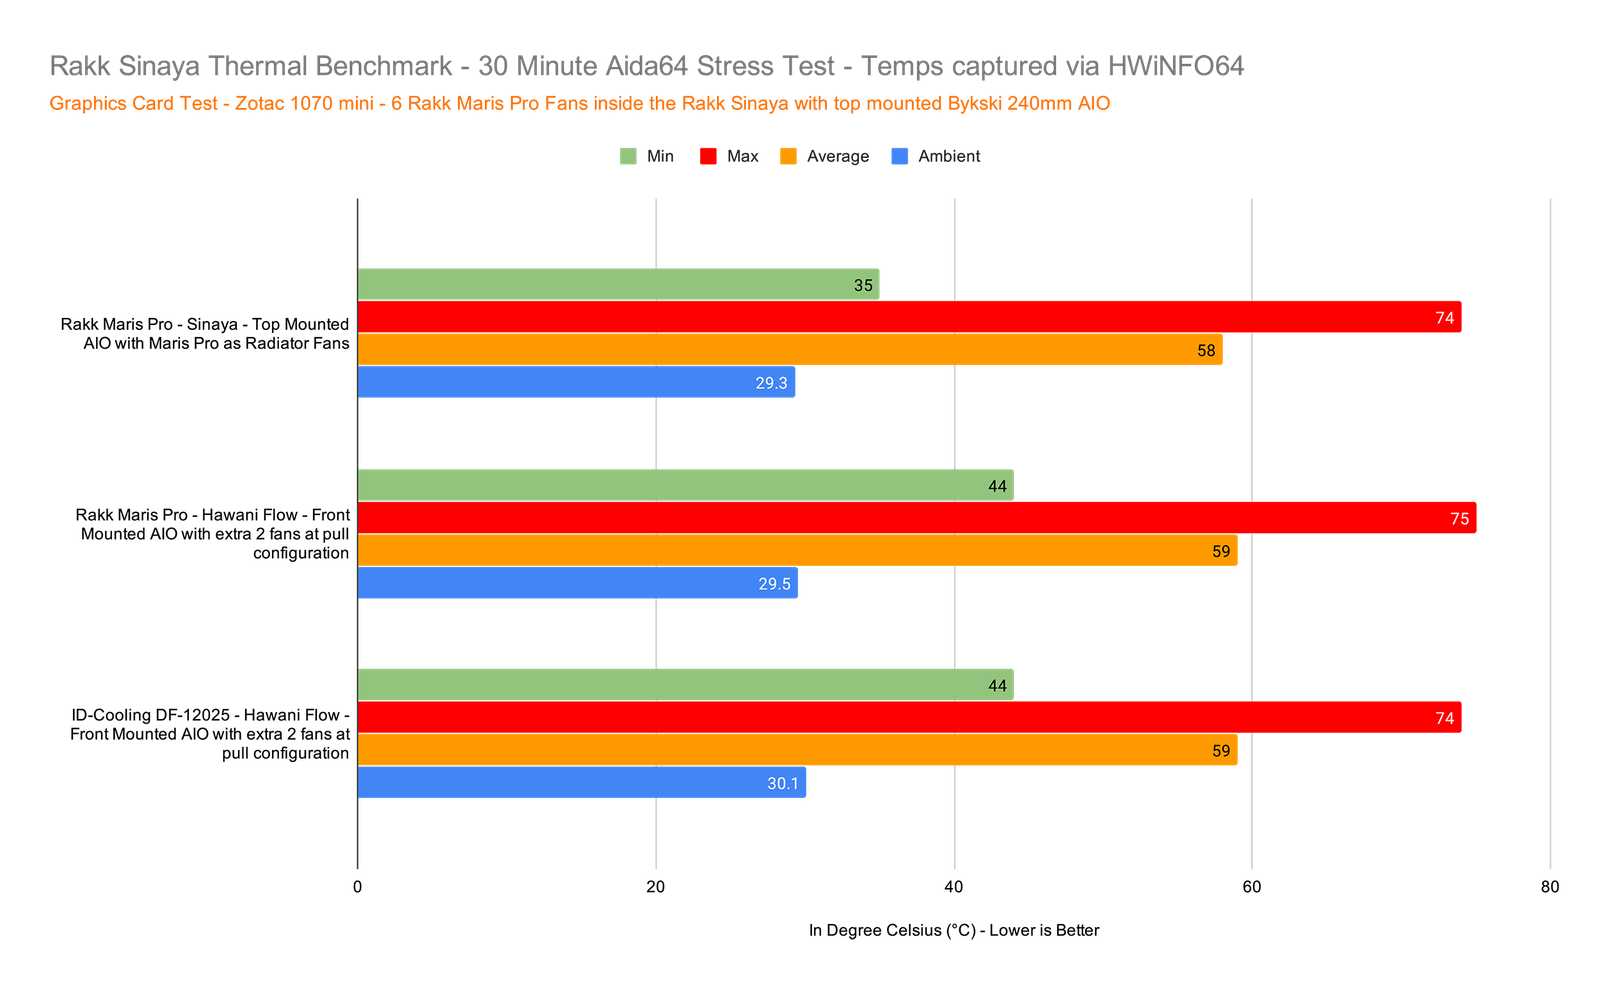
Next test is for our graphics card which is a Zotac 1070 mini and this one benefits the most with this new configuration as it is now the one getting fresh air from the front intake, and these results verified that as you can see our graphics card inside the Rakk Sinaya with top-mounted AIO is significantly colder at least when Idle.

But during load, everything balanced out as our test result here shows that all the configuration we had yielded the same result for our graphics during load.
However, for gaming, which again our real-world performance test, the Rakk Sinaya once again yields better results here with a significantly lower average temperature.
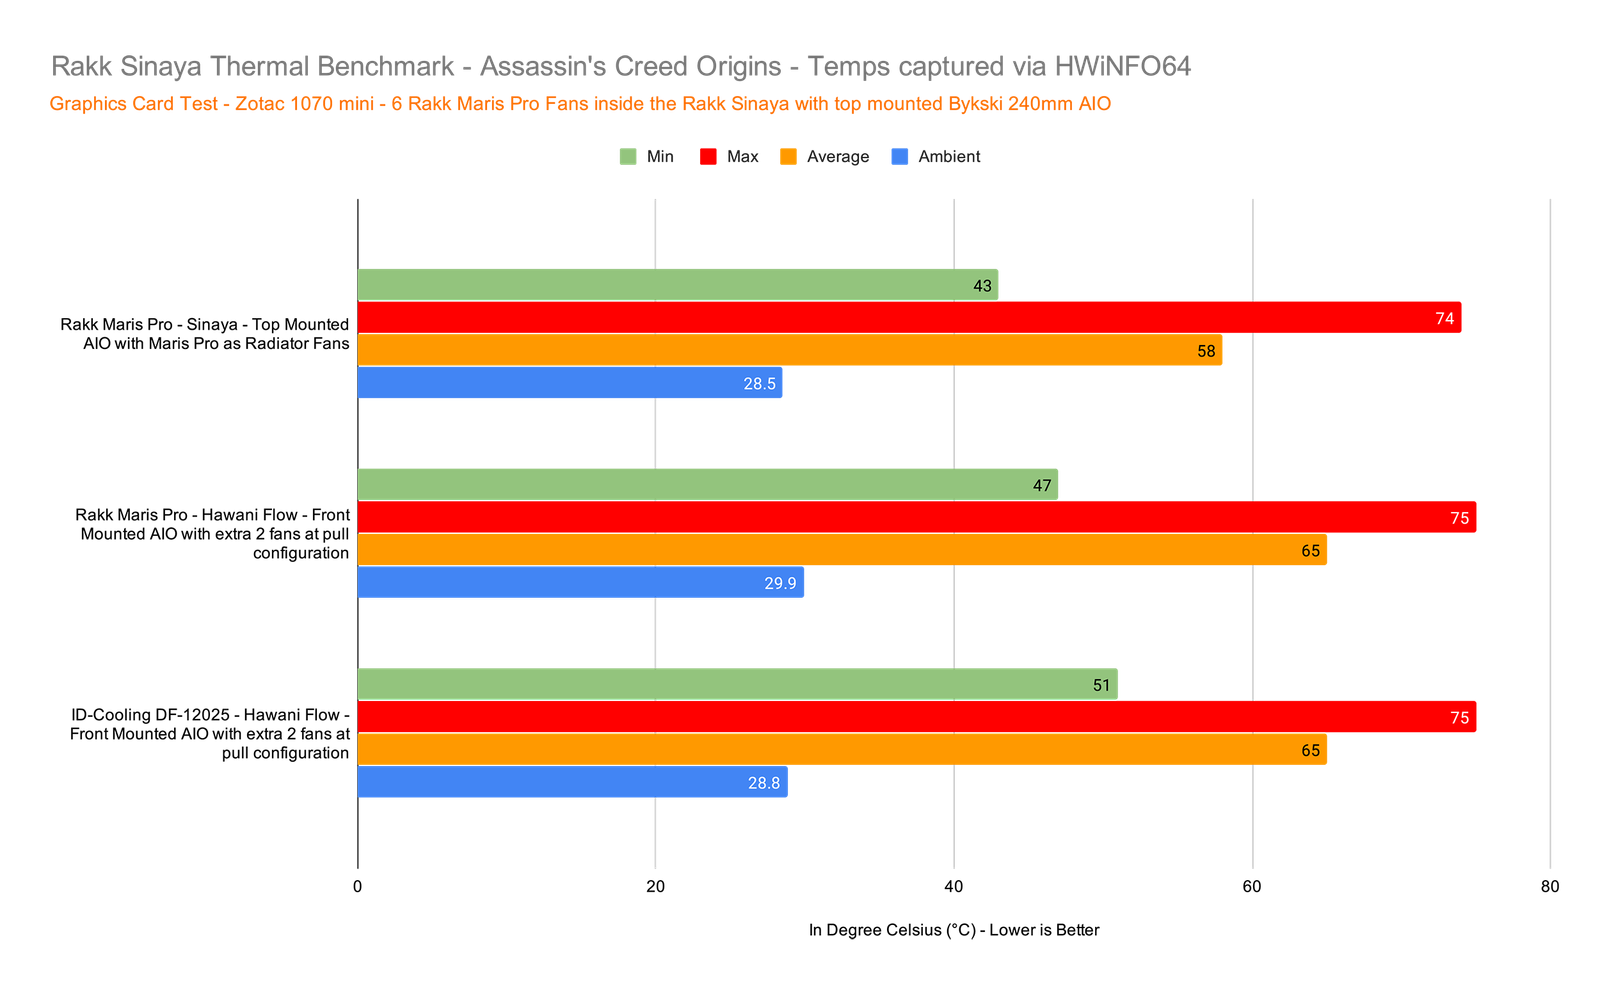
Overall, even with 2 fewer fans, the Rakk Sinaya with Rakk Maris Pro performed on par and even better on some cases against the Rakk Hawani Flow with either the Rakk Maris Pro or the ID-Cooling case fans.
VERDICT
To conclude, building inside the Rakk Sinaya is challenging but definitely easier than I thought it would be. Performance-wise it is pretty decent as you saw on our benchmarks and with an open front intake, it is certainly better than most restricted front intake cases out there. Not to mention, that it has this nice modern, stylish and polished look to it for just around 2000 pesos or 40usd. If there’s something that I want to improve on this in case Rakk is reading this, it would be a better implementation for the drive cage and a little more space at the back. A white version and a micro ATX version is also something that I’ve heard people are asking as well.
NEW Rakk Sinaya Unboxing and First Impressions!
ID-Cooling DF-12025-ARGB VS DF-12025-RGB Trio Case Fans
Bykski FouSeries AIO 240mm ARGB Review – How to test AIO!?
ID-Cooling FrostFlow X 240 AIO Review – Budget AIO!
Bykski FouSeries AIO 240mm ARGB Unboxing and Overview
Rakk Hawani Flow Budget Case Mod + Build Experience
Rakk Hawani Flow Mid Tower Case Review – New and Improved
Thanks to Rakk Gears for making this review possible, you can get this case from the link below.
If you like this one, please consider subscribing to my channel by hitting the button below. Have a great day!

WHERE TO BUY:
LAZADA:
Rakk Sinaya: http://bit.ly/36LmXNV
Rakk Maris Pro: http://bit.ly/3bXm88f
- Price may vary depending on existing promos
- The views and opinions on this review are solely based on my own personal experience, your results may vary

The Broll who always got your back online!