Search

TUTORIAL | How to Install HDD/SSD Caddy for Laptop | Step by Step Guide


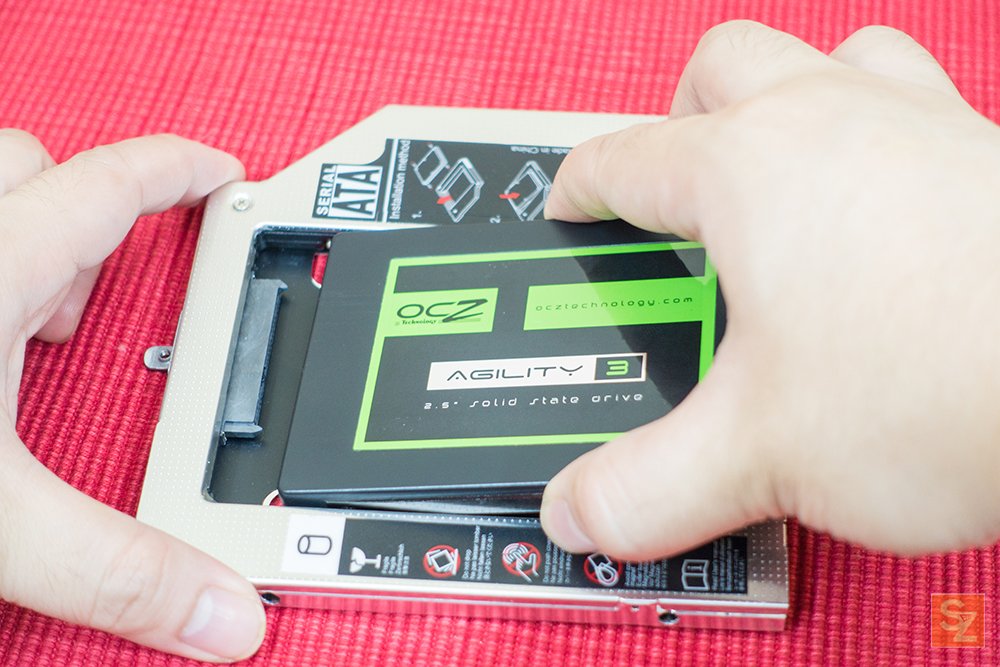
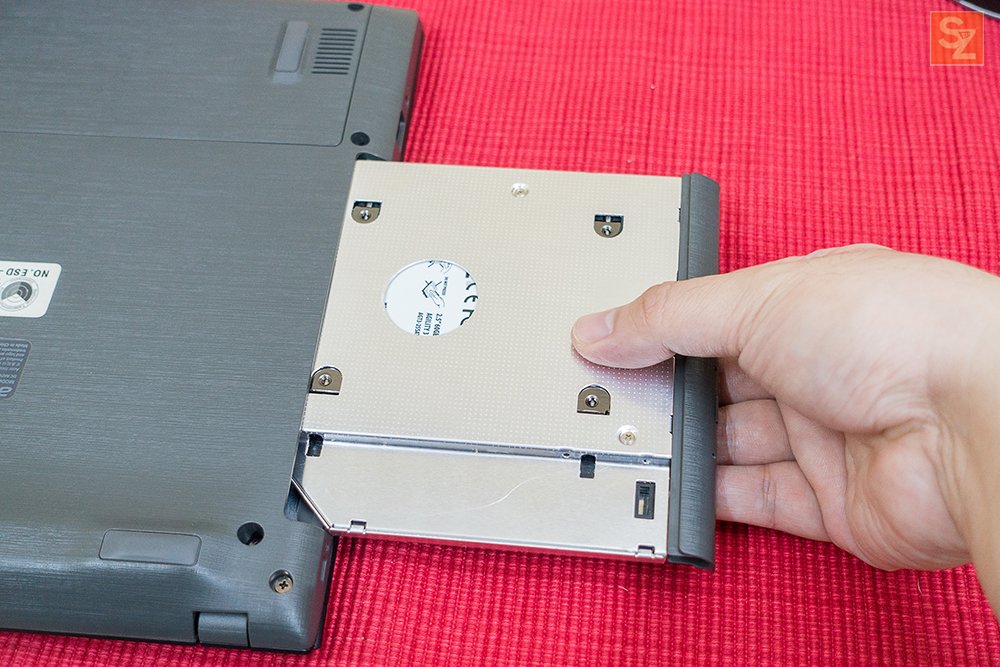
The HDD/SSD Caddy for Laptop let’s you install a 2nd Hard Disk or Solid State Drive in replacement of your laptop’s optical drive to let you have more storage space. 


Check out the Full HDD Caddy Review here: Review | HDD/SSD Caddy for Laptop | Increase your Storage

How to Install HDD Caddy for Laptop

What you need:

– 2.5in HDD or SSD
– HDD/SSD Caddy
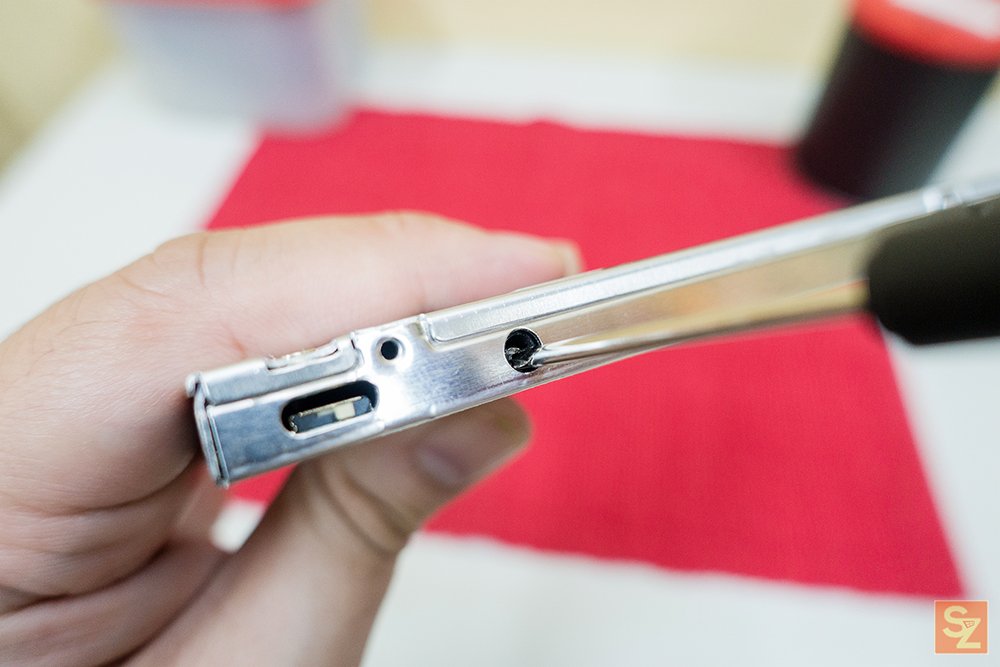
– Phillips screw driver
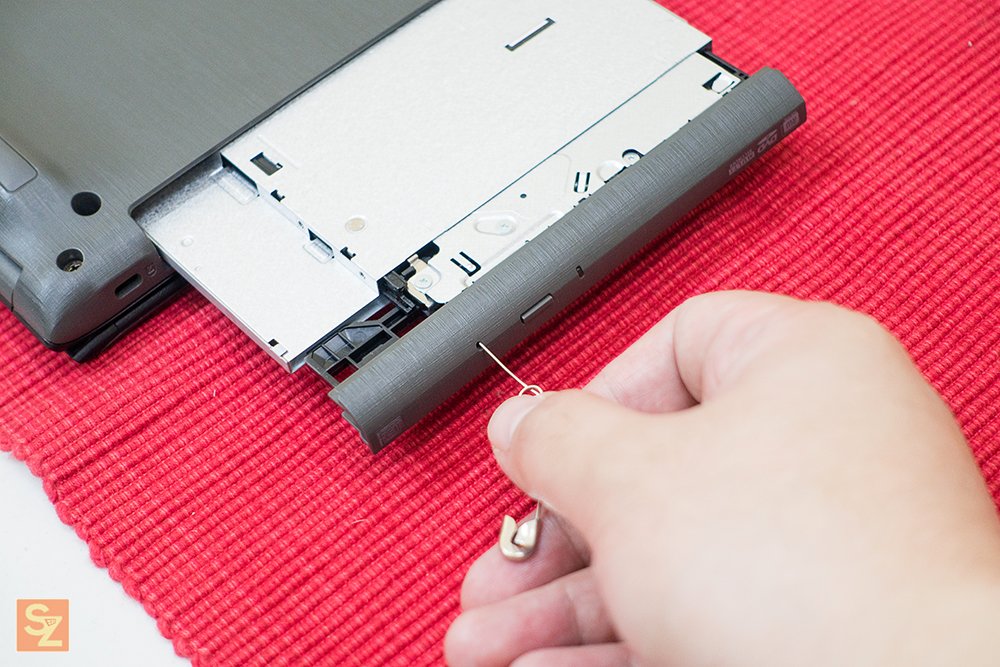
– Safety pin or paper clip


(adsbygoogle = window.adsbygoogle || []).push({});

Let’s Begin:

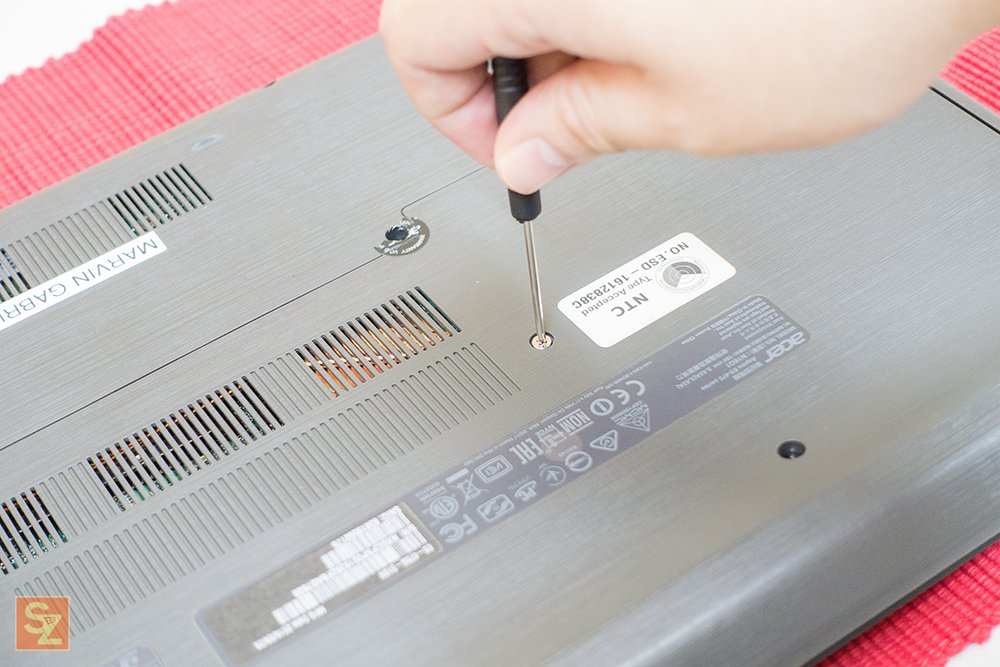
1. Make sure to turn off your laptop first
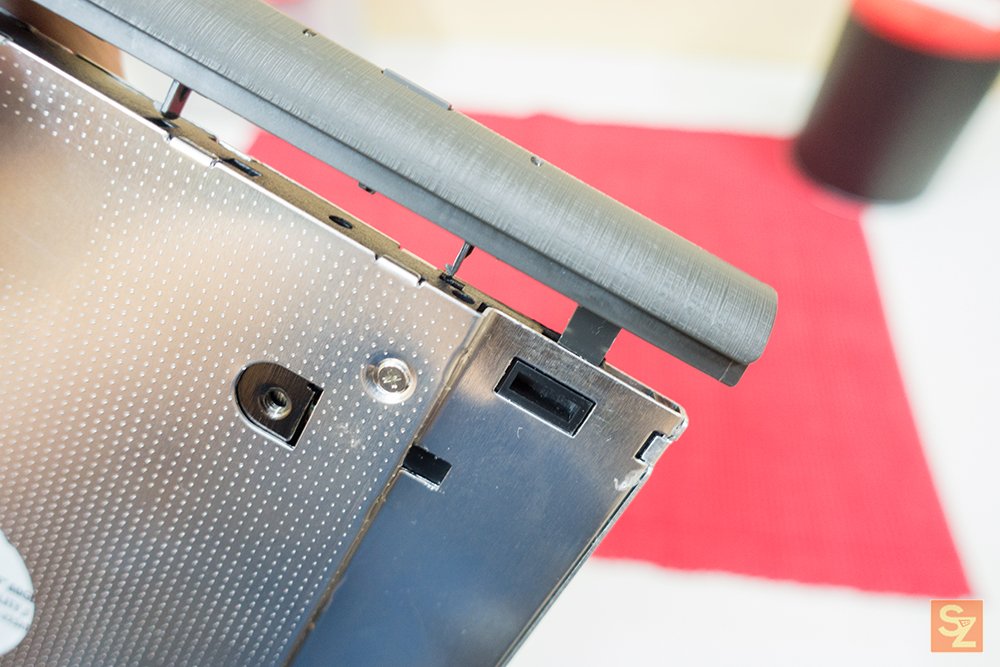
2. Remove the screw of the optical drive as seen below

how to install ssd caddy

3. There’s a manual eject button inside a small hole at the side of the optical bay. using a safety pin or a paperclip, carefully push the eject button to pop out the optical bay
replace your optical drive with a 2nd hdd/ssd

4.  Once the optical drive is already removed from your laptop, remove the optical drive’s side cover by pushing the clip as seen below. We will use the side cover on the HDD/SSD Caddy later.
removing optical drive side cover

5. Prepare your HDD/SSD Caddy. On this tutorial, I used my old OCZ SSD.

.article_ads { width: 300px; height: 200px; }
@media (min-width:300px) { .article_ads { width: 100%; height: 100%; } }
@media (min-width:500px) { .article_ads { width: 100%; height: 100%; } }
@media (min-width:800px) { .article_ads { width: 580px; height: 100%; } }
@media (min-width:1200px) { .article_ads { width: 640px; height: 100%; margin-left: 1em; margin-right: 1em; } }


(adsbygoogle = window.adsbygoogle || []).push({});

6. Insert your HDD/SSD on the Caddy carefully
ssd optical drive caddy

7. Secure the HDD/SSD inside the Caddy by tightening all the screws (2 at each side).
tighten the screws on the caddy

8. Remove the screw holder from your optical drive and transfer it into your HDD/SSD Caddy
optical bay hard drive caddy

9. Attach the optical drive side cover that we removed earlier into your HDD/SSD Caddy.
transfer side cover from optical drive to hdd caddy

10. Carefully insert the HDD/SSD Caddy back into your laptop. Make sure you insert it in the proper orientation.
insert back hdd caddy into laptop

11. Secure the HDD/SSD Caddy by tightening the phillips screw that we removed earlier at the start of this tutorial.
tighten the screws on laptop

12. Power up your laptop and if all goes well, you now have your extra storage space.
hdd caddy working on my computer


(adsbygoogle = window.adsbygoogle || []).push({});

Disclaimer: Do this at your own risk, I am not responsible for any damage to your device.

Check out the Full Review here: Review | HDD/SSD Caddy for Laptop | Increase your Storage


WHERE TO BUY:

Check out more products from Lazada

  • I searched for the highest amount of ratings and good feedback from buyers
  • Price may vary depending on existing promos
  • The views and opinions on this review are solely based from my own personal experience, your results may vary
——
Thank you for dropping by, don’t forget to check out my other Reviews and Subscribe if you like. Cheers!  

SHARE THIS

Related posts

Leave a Comment