MY EARLY BREAKDOWN
Pros: Affordable, Decent build quality, Hotswappable, Gateron Switch, Has dedicated arrow keys
SPECIFICATIONS
Brand: Geek Customized
FEATURES
1. GK64 supports CIY switch, you could remove the original switches and replace them with your favorite switches.
WHAT’S INSIDE THE PACKAGE
Geek GK64 Mechanical Keyboard, Instruction manual in both English and Chinese, braided USB Type C cable with gold plated connectors and a plastic keycap puller

FULL REVIEW
Design and Construction
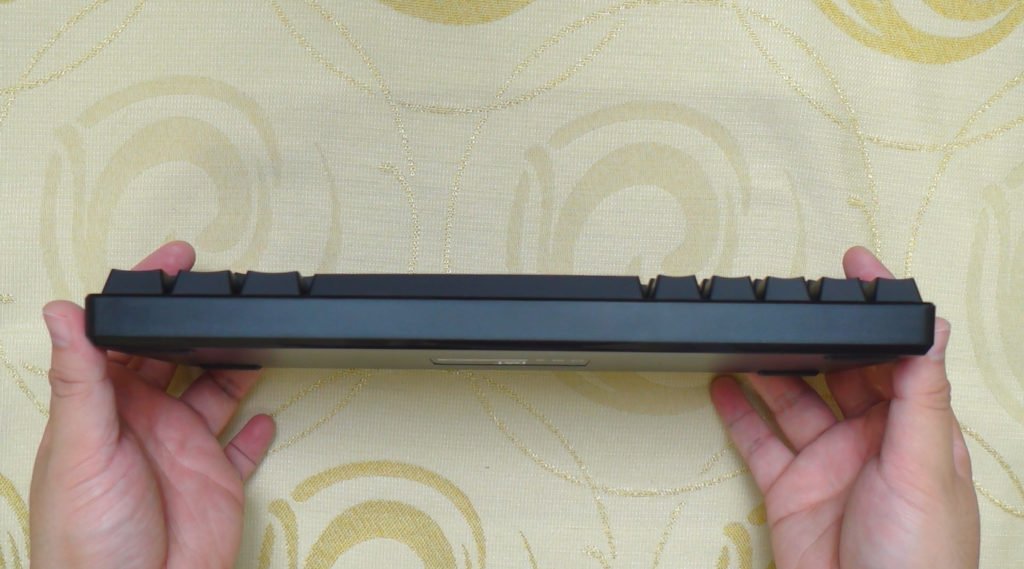
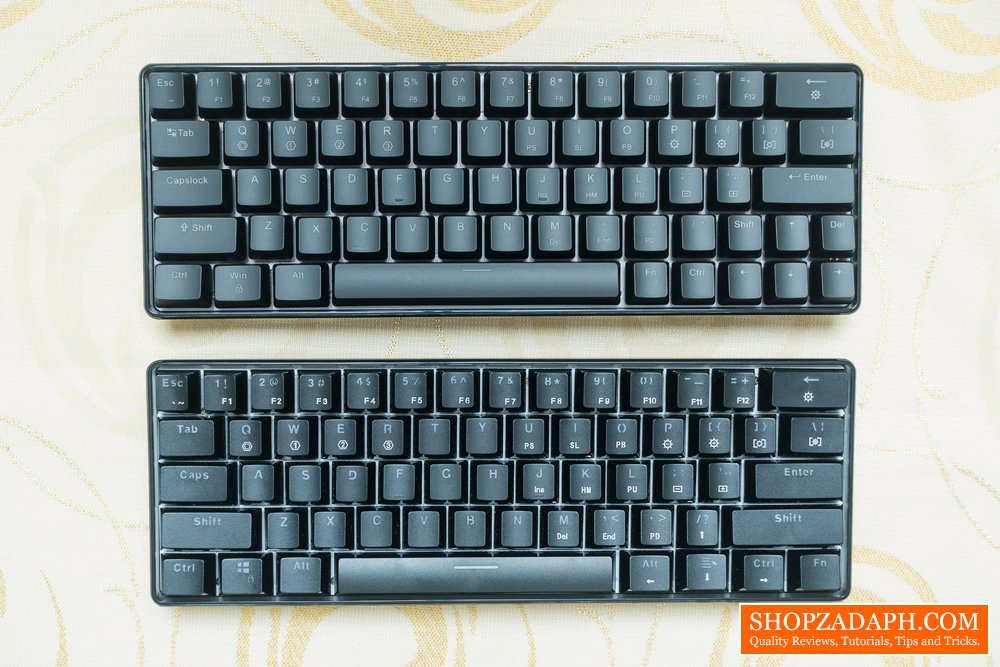
Now let’s take a look at the Geek GK64 mechanical keyboard, at first touch this keyboard feels really nice for its price, the design is good and it is pretty lightweight but it doesn’t flex that much. It weighs around 442 grams which is currently the lightest keyboard that I’ve tried. The layout is non-standard but that’s because it squeezed in the dedicated arrow keys which I really appreciate.
We have a smaller right shift and a dedicated delete key, the right control and function keys are also smaller, and the left shift key is also smaller than usual. All these adjustments were made to accommodate the dedicated arrow keys.

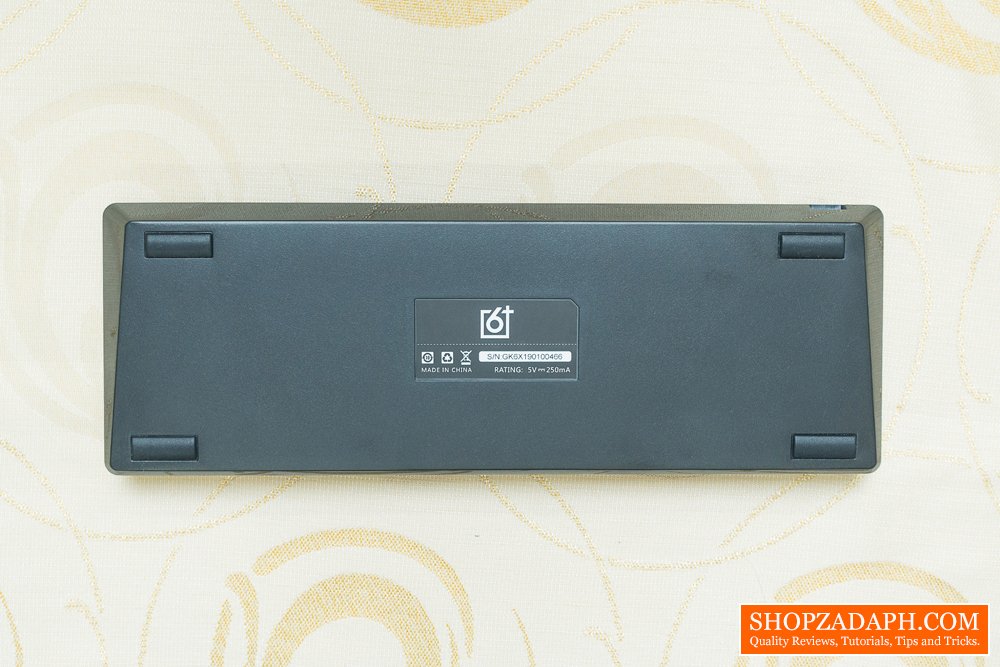
At the back, we have four rubber feet and the technical information at the center


And lastly, here’s a look at the front side. Overall, the design of this keyboard is quite decent and I also like the fact that the keycaps are matte black finish instead of the glossy finish of the Geek GK61.
The only downside of this layout is it’s not standard so it is more difficult to get compatible custom keycaps, although I’ve seen some that are specifically made for this layout.
Geek GK64 VS GK61
Now, moving on, let’s check out some key differences between the Geek GK61 and the Geek GK64. As you can see they both have the same 60% form factor and probably the same bottom housing. But the Geek GK64 has dedicated arrow keys, and as I said earlier, for that to be accommodated, the right control and function key are smaller than the regular keys on the geek gk61. We also lose the menu and alt key on the Geek GK64, but we get a dedicated delete key. As you can see, the geek gk61 has the standard shift while the geek gk64 has a smaller one on both sides. Other than that, all the other keys are the same. Personally, I would prefer the layout of the Geek GK64, just for the sake of having dedicated arrow keys.
Layout and Layers
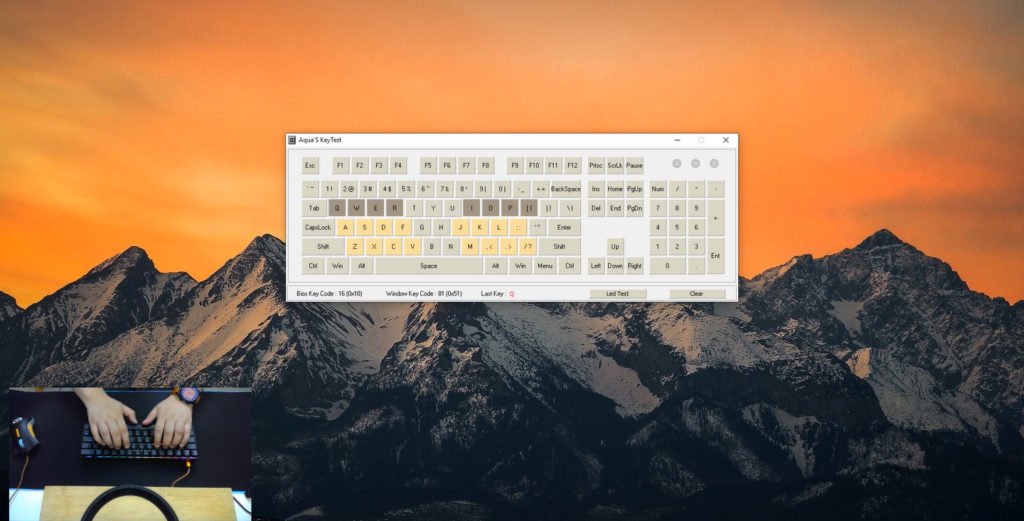
In terms of the legends and layers, since this is a 60% keyboard, you lose some valuable keys like the function rows up top, as well as dedicated nav cluster which are all located on a different layer. These layers can be toggled by simply pressing FN + the corresponding key.
In terms of the other legends, we have the keys for adjusting lighting effects on the upper right, and then we have the tab that doubles as a mode switch key, we also have the windows lock key, and the legends on W, E and R for the different profiles that you can use which we’re going to discuss later.

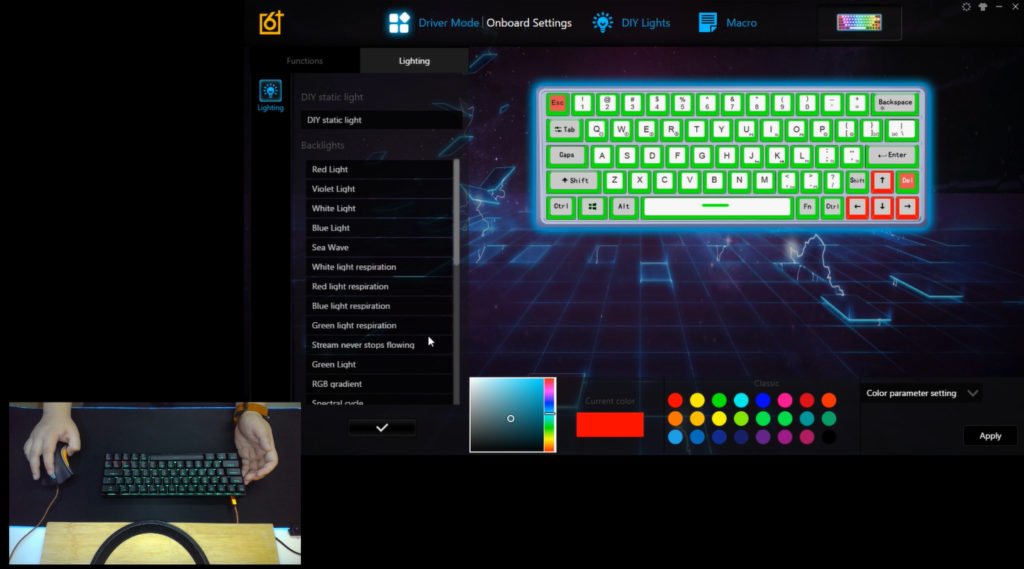
Lighting Effects
With regards to the lighting modes, you can press FN + Backspace to turn the illumination on an off, and to adjust the brightness, you simply press FN + P and FN + open bracket, up until the led blinks indicating that it is the maximum setting. You can also press FN + semicolon and FN + apostrophe to adjust the animation speed.
Now for the lighting modes, we have two separate groups, one is the logic lights with basic animations and then the other group is called code lights with reactive animations that trigger when you press the keys. This includes the audio visualizer that takes advantage of the built-in microphone under the spacebar like what the Geek GK61 has. Aside from that you also have the basic functions like FN + windows key to prevent start menu from popping, and that’s pretty much it with the lighting effects.


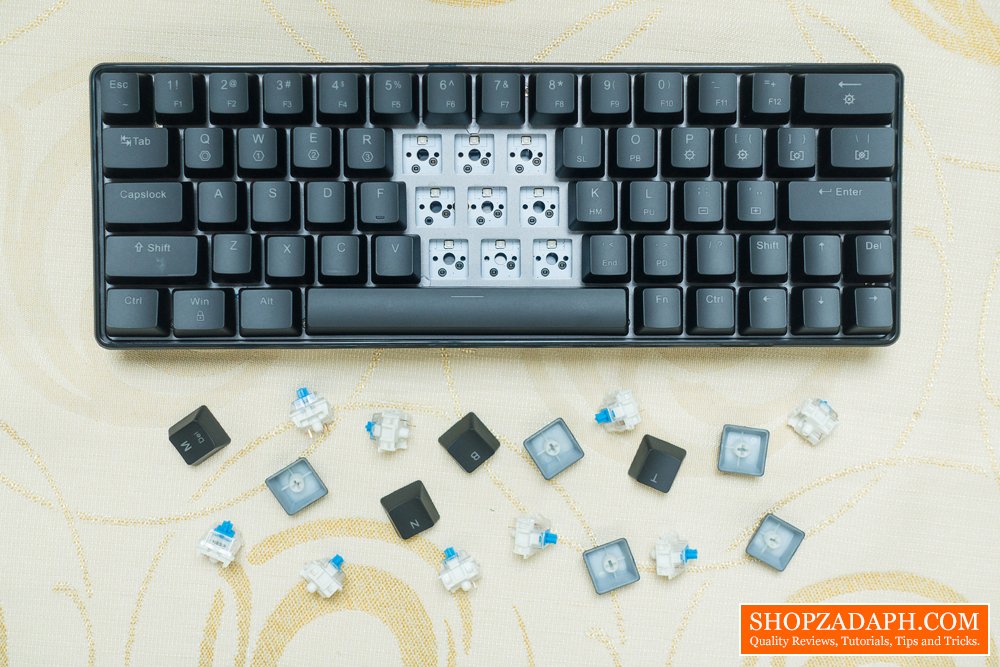
Hot-swappable Feature
What I like about this keyboard is that it is a hot-swappable board, which means you can easily swap out switches whenever you like. For example, if you want to try different switch or if ever some switch becomes faulty at some point. This means, as long as the board itself is intact, you will be able to use this keyboard for a very long time.


If you want to learn more about the optical switch, click here for my review of the Geek GK61.


Keycaps
Now in terms of the keycaps, although the fonts used is pretty good, the keycap itself is not so much. It is UV coated ABS plastic with laser etched fonts but unfortunately, it is not double-shot and super thin at around 1mm. In comparison, the keycap on the Geek GK61 is double-shot with a thickness of around 1.4mm which is way better than the ones on the GK64.

Stabilizers
With regards to the stabilizers, it is quite decent without much annoying rattling sound, It also comes with some factory lube which is always a good sign. The board itself is from Jikedingzhi.com, I checked them out and there are actually a lot of interesting info there including different brands that they are supporting.

Performance
Now, finally, let’s discuss the overall performance of the Geek Gk64,
Typing experience
Now in terms of the typing experience, this being a keyboard with blue switch, it is one of its strong points especially for typist that likes clicky and tactile feedback. I personally don’t like loud and clicky switches but the Gateron blues are undeniably satisfying to type with, especially with its smooth travel. The 55g of actuation force is also at just the right amount for me for typing comfortably for a prolonged period of time.

Gaming Performance
When it comes to gaming, as I’ve mentioned on my previous reviews, most gamers prefer linear switches rather than clicky ones, as they are going to bottom out the keys anyways and the click and tactile feedback are really not necessary. But then again, it will still boil down to personal preference and there’s really no definite answer for what switch is good for gaming.

Software
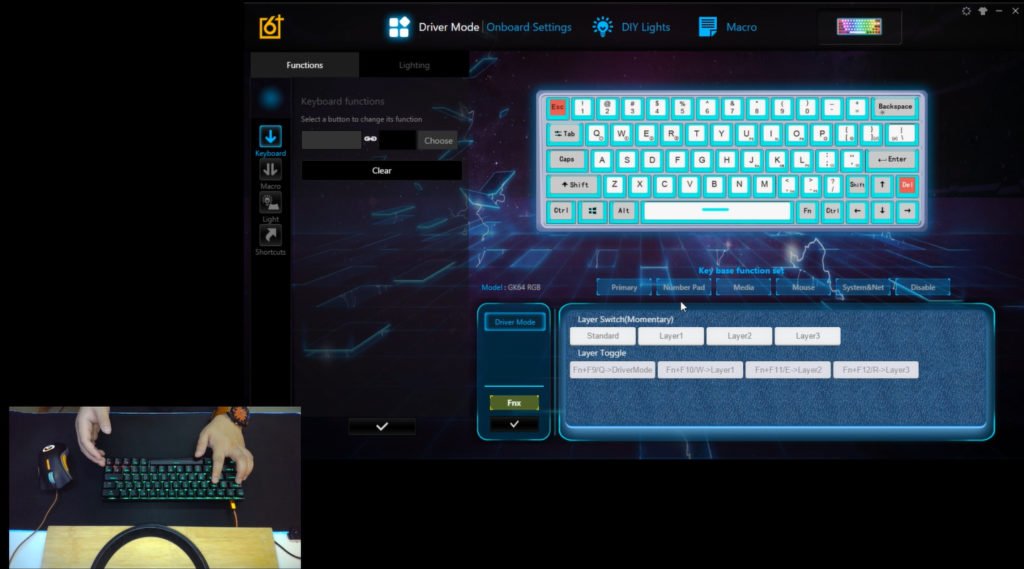
Now, when it comes to the software, this uses pretty much the same software as the Geek GK61, but now I have a better understanding of how to fully take advantage of this to enhance your workflow especially with the 60% form factor. It’s still not very intuitive but it’s actually quite powerful once you’re able to figure it out.
So basically we have two main settings, the driver mode and the onboard settings that you can toggle using FN + Q. The onboard settings are the one you should customize if you want to use this keyboard without the software, like for example if you frequently move between workstations or if you bring this keyboard along with you elsewhere. All the settings will be saved on the onboard memory of the keyboard.
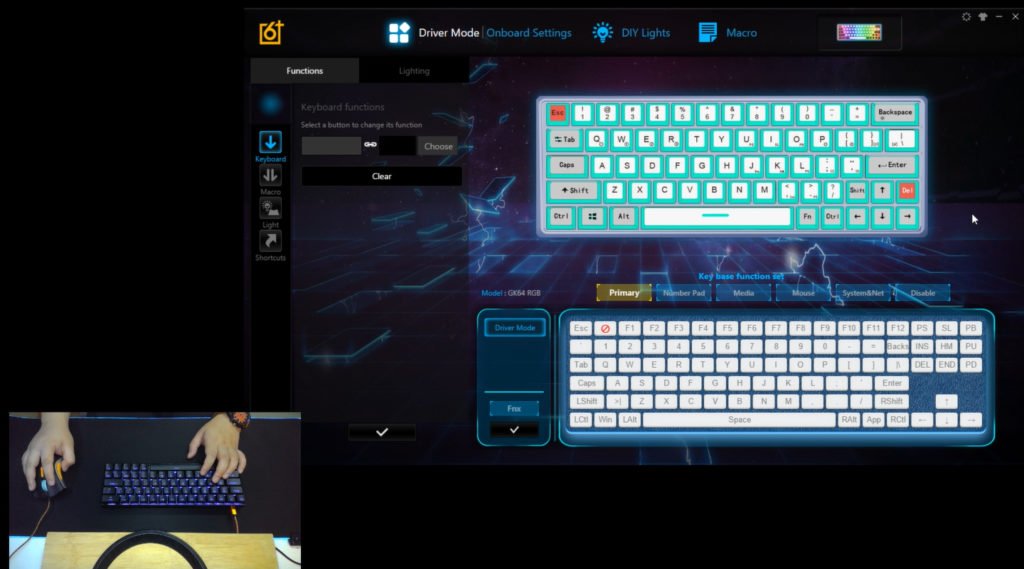
Now when it comes to the onboard settings, you still have a lot of customization options but you will lose some of the cool ones, such as some lighting modes and the music sync mode as well as the shortcut feature. What you have here instead are the 3 available layers that you can take advantage for your workflow. You can toggle these layers by pressing FN + W, E, and R.
And lastly, we also have the layer switch feature which I think is the most important tool that you need for this keyboard.
Here’s how it works, so the first layer is for the arrow keys, and then the layer 2 is for the function keys using the numbers row, and then the layer 3 is the nav cluster. For the nav cluster, you can easily toggle them since the function button is right below them, but the problem is with the function rows up top, you’re going to need two hands just to activate the function rows. What I did is I used the caps lock button as the trigger for the layer 2, so instead of using the function key, I can easily toggle the function rows by pressing capslock momentarily to activate the functions keys.
And that’s pretty much it with regards to the software, I suggest you take your time to learn this if ever you decide to get this keyboard as it is quite useful.
VERDICT

Royal Kludge RK71 Mechanical Keyboard Review – RK Blue Switch
Motospeed CK62 Mechanical Keyboard Review – Outemu Red
Geek GK61 Optical Mechanical Keyboard Review – Optical Gateron Brown
Anne Pro 2 60% Mechanical Keyboard Review – Gateron Brown!
Royal Kludge G87 Mechanical Keyboard Review – RK Brown Switch
Ajazz AK33 RGB Mechanical Keyboard Review – Zorro Black Switch
Gigaware K28 Mechanical Gaming Keyboard Review – Content Blue Switch
Motospeed Inflictor CK104 Mechanical Keyboard Review
Geek GK64 Mechanical Keyboard Review + GK64 VS GK61

WHERE TO BUY:
BANGGOOD:
Geek GK64 Mechanical Keyboard
GET 10% OFF USING MY CODE: MARVIN5
- You can also buy through Philippines COD
- Price may vary depending on existing promos
- The views and opinions on this review are solely based on my own personal experience, your results may vary

The Broll who always got your back online!