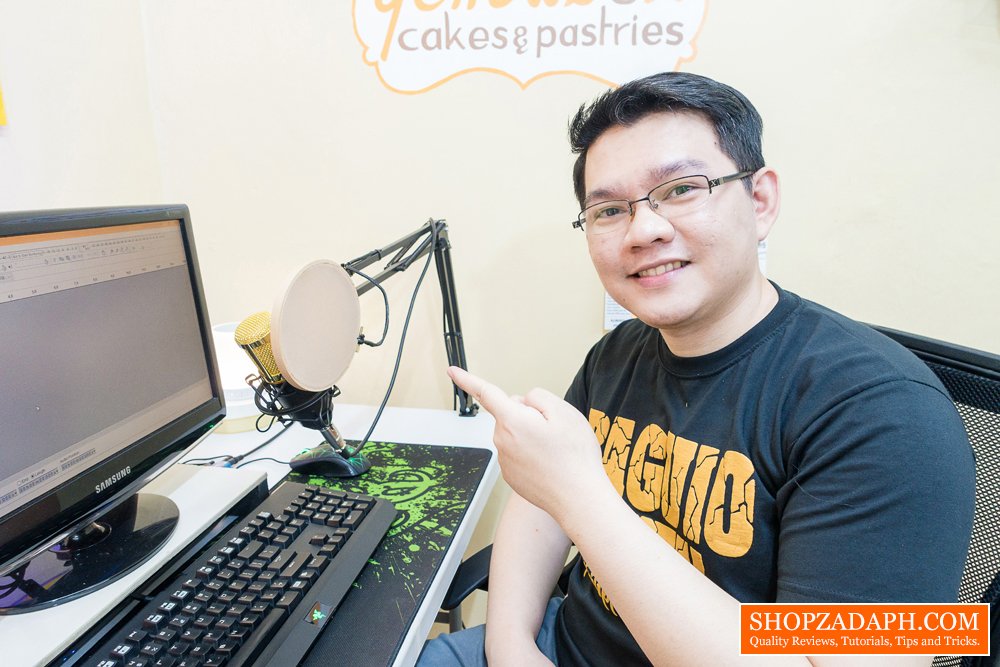
As you may have noticed if you’re already a follower of my blog and my youtube channel, that I’ve been hustling on making more unboxing and review videos lately. And I thought it’s a good idea to share a little bit of information with you guys about my budget home recording studio setup. And possibly help you get an idea if you’re just starting out like me.
If you know me or at least you’ve checked my “About” page, then you know that I don’t have a lot of money to spend on buying expensive studio equipment. But that doesn’t stop me from doing my passion for blogging and making youtube videos.
(adsbygoogle = window.adsbygoogle || []).push({});
So with a budget of just less than 1000 pesos, I was able to come up with my…
Budget Home Recording Studio Setup
Most people won’t even try to start building their own home recording studio thinking that it would be super expensive. But the thing is, you really just need a few things to be able to start recording your audio for your video projects, voice-overs, song covers, etc..
So here’s a list of things that I have for my budget home recording studio setup
Let’s start with the things that I already have beforehand that’s also needed for audio recording:
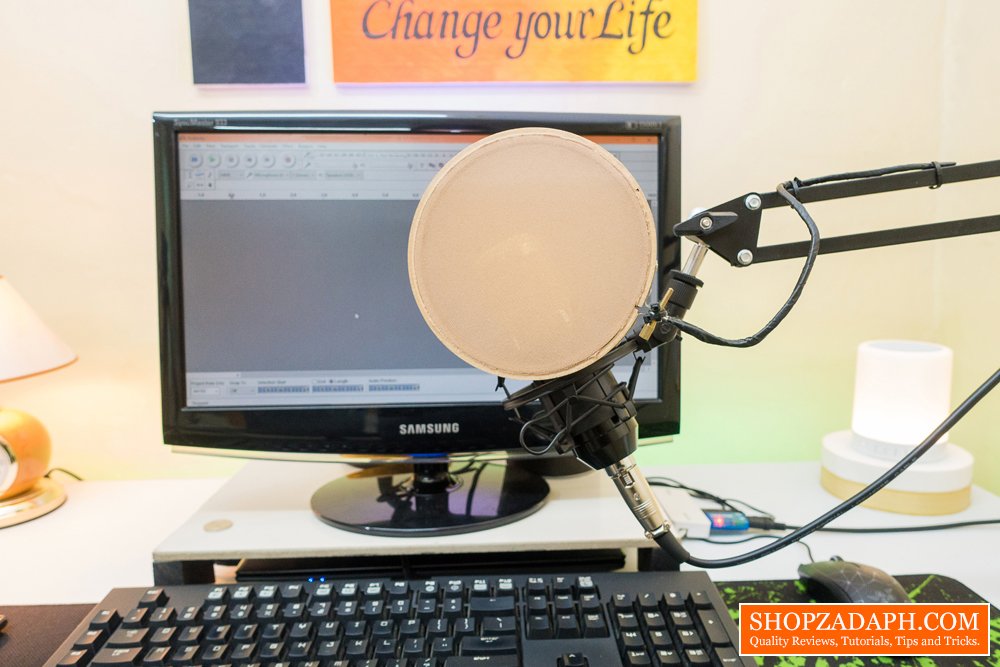
- Computer/Laptop – I use this for capturing the audio being recorded from my microphone as well as editing those recordings after.
- Headset/Speaker – I use this to listen to my recordings. It’s best to use a headset for monitoring your audio to make sure that you can hear every single detail of the sounds from your recordings. I recommend the Awei A980BL that I’ve reviewed here.
(adsbygoogle = window.adsbygoogle || []).push({});
Now, let’s discuss the things that I got for only less than 1000 pesos to complete my budget home recording studio setup:
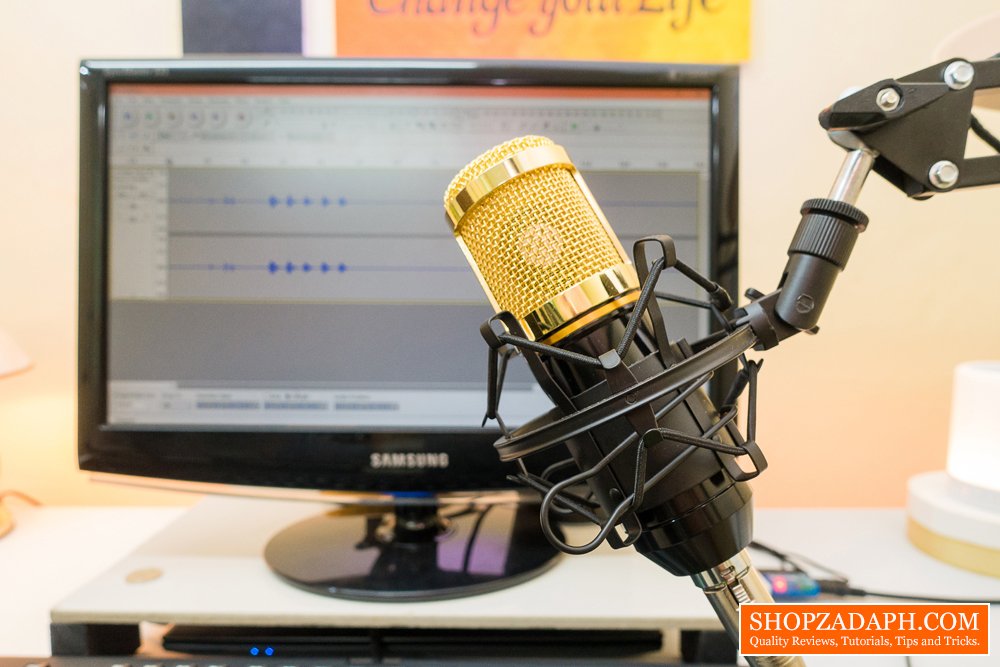
Microphone – The microphone of my choice is the super affordable yet good quality BM 800 Condenser Microphone. For only about 500 pesos, you’ll get a durable microphone that can capture clear sounds by itself. Use this with a 48V phantom power supply or with an audio interface and you’ll get an even more amazing sound quality.
Check my review of this microphone here.
Watch my actual testing here.
Microphone Stand/Holder – I got this Microphone Suspension Scissor Arm for only 249 pesos, this gives me the flexibility when it comes to moving my microphone around my desk. And since it’s on top of my desk, the chances of tripping on the wires or accidentally bumping the mic has been reduced significantly.
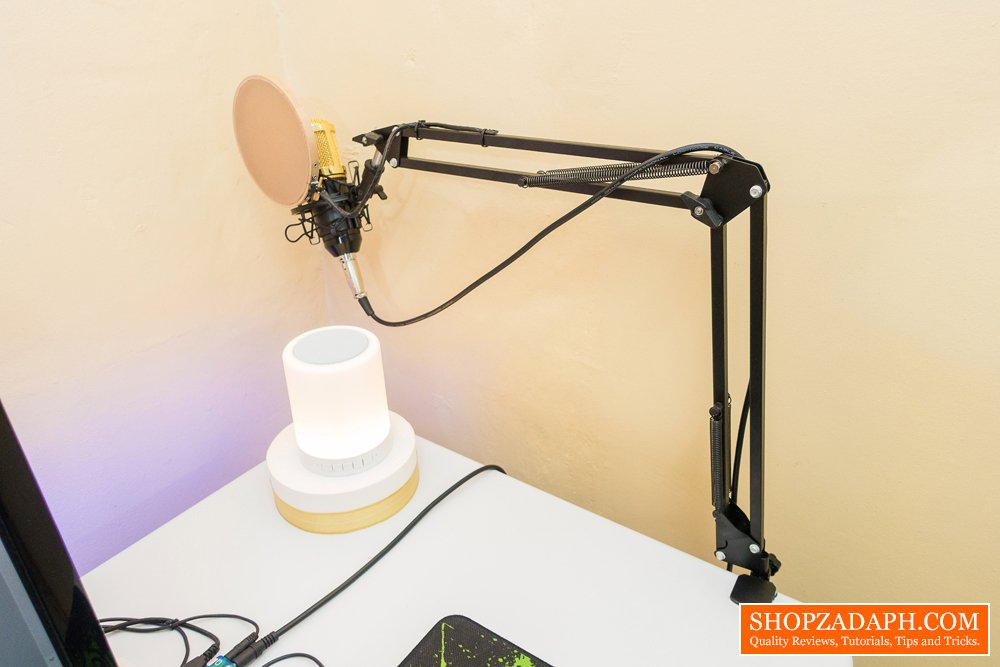
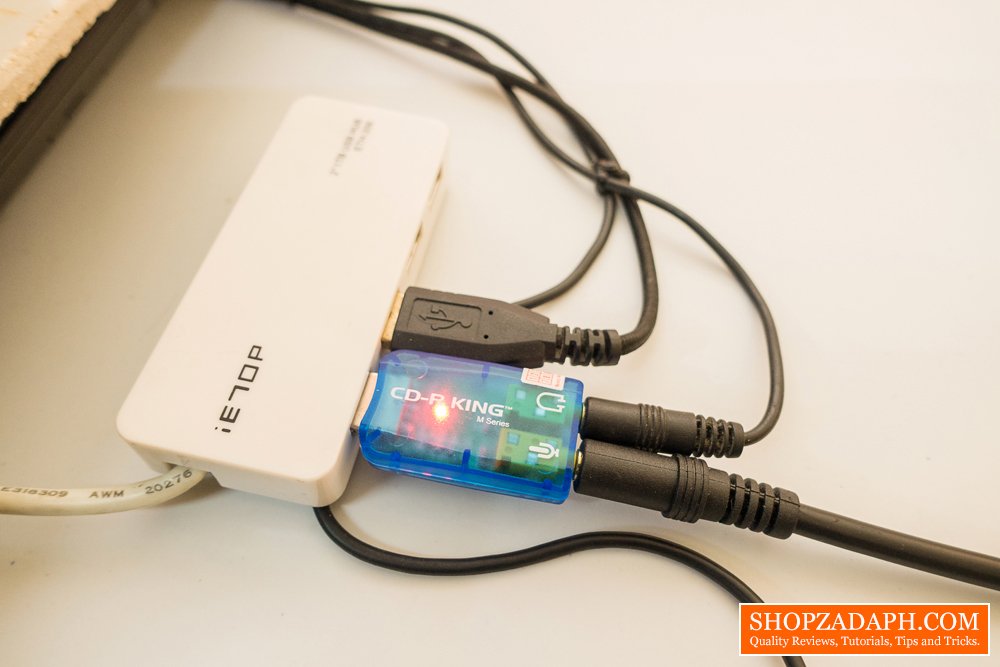
USB Sound Card – I use this to split the audio input and output on my laptop as it has only one 3.5mm jack. This also powers my BM 800 Condenser Microphone. I got this USB Sound Card from CD-R King but it’s also available here with Cash on Delivery option for just 198 pesos.
Pop Filter – I created my own DIY Pop Filter using an embroidery loop and a pantyhose. I use this to reduce the air pressure coming from my mouth to the microphone for a much clearer audio recordings. It also serves as a protection for accidental spitting.
Watch my video tutorial on how to create your own DIY Pop Filter here.
If you sum all those up guys it’s only a total of 947 pesos. So as you can see, you can really start your audio projects without breaking the bank.
(adsbygoogle = window.adsbygoogle || []).push({});
Now, let me show you guys in a form of a video my home recording studio setup with bonus tutorial on how to edit your audio recordings in audacity.
In this video, you will see all the items that I’ve mentioned above and you will learn how to remove background noise on your audio recordings as well as a quick tutorial on how to enhance your audio recordings using audacity.
And there you have it guys, as I’ve mentioned in the video I hope you can take away something from this and apply it to your setup. Let me know in the comments below if you have clarifications or suggestions with regards to this.
And don’t forget to subscribe to our blog here and of course, subscribe to my youtube channel here. Thank you!
More contents to check out!
SHARE THIS
The Broll who always got your back online!


Hi! Great tips! My wife is planning to become a vlogger and this post helps like me whose budget conscious. Just one question though. How about the recommended affordable camera for vlogging?
Hello Virgo Guy! Thanks for dropping by, my suggestion would be to use your smartphone's camera. especially if you're on a tight budget and just starting out. But if you're looking for the best vlogging camera my suggestion would be either Canon G7x or the SonyRX100 series. I personally use the Sony RX100M3 on my videos. try to look for camera with flip screen so you can see yourself while vlogging. hope this helps bro. 🙂
What do you suggestion for beginners with affordable camera? And also equipment? Looking to make one channel. Thanks.
If you're just starting out I would suggest you use any camera you have, even your smartphone while you're still gaining experience with what you do. But if you have the budget, any camera with autofocus like Canon 70D or 80D will be a nice choice. If you want smaller camera you can choose Canon G7XmII and the like.